Page 1 of 5
Hip Roof Model 2, mailing 2: keta intersection
Posted: Tue May 02, 2017 10:32 am
by Chris Hall
Looking forward to seeing this keta connection joint Derek! It's the most ideal method for this framing situation, IMO.
Re: Hip Roof Model 2, mailing 2: keta intersection
Posted: Wed May 03, 2017 6:34 am
by Yxoc
Thanks Chris,
I received the images via email and have perused them. It looks like there is easily enough information supplied within to complete the joint cut out.
It's interesting that one side of the Keta connection is not supported directly by the Tsuka underneath the intersection, but is only by the relatively thin tenons, does that limit the total load that this construction can bear?
I was also wondering if this roof structure pertains to the structural roof that sits above the decorative roof, or is this merely another example of a decorative roof, similar in function to the last model?
Cut out to follow, some challenges in keeping dimensions accurate over long tenons and mortices I suspect.
Derek
Re: Hip Roof Model 2, mailing 2: keta intersection
Posted: Wed May 03, 2017 9:12 am
by Chris Hall
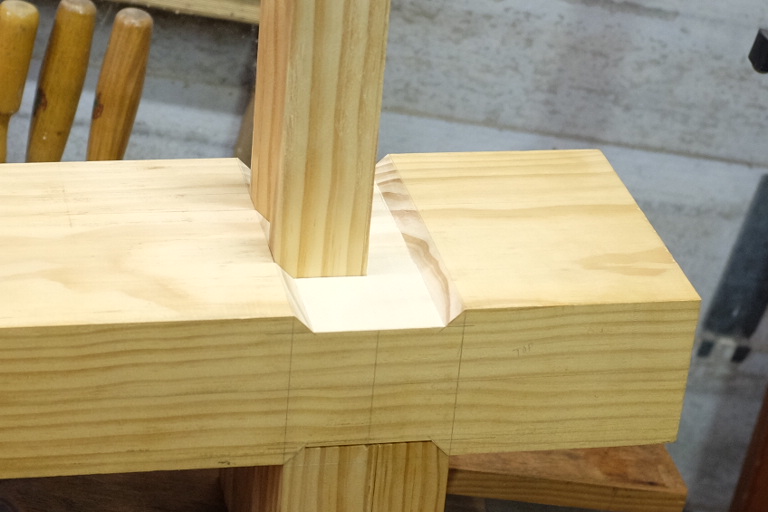
The full-sized version of this joint can incorporate a stub tenon for additional support on the 2-piece keta side, however bear in mind (pun intended) that the hip rafter travels right through there, and is primarily supported by the 1-piece keta, so that member is carrying most of the load. If the roof load is expected to be heavy (i.e., snow load, heavy tile roof), then a corbel can be fitted under the connection, in line with the 2-piece keta. I'll send you an image of the full size one so you can see the detail differences.
This model is being done as a single-layer roof, and will have taller rafter sections than you would see with the decorative roof/hidden roof system.
Re: Hip Roof Model 2, mailing 2: keta intersection
Posted: Sun May 14, 2017 3:14 am
by Yxoc
I promise things are actually happening...
I started with the morticed piece. I drilled and pared the mortices first:
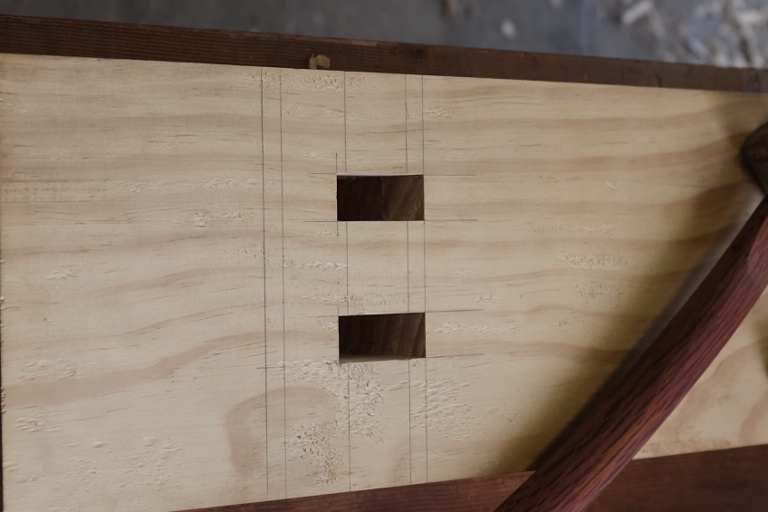
- DSCF4385.JPG (182.01 KiB) Viewed 6829 times
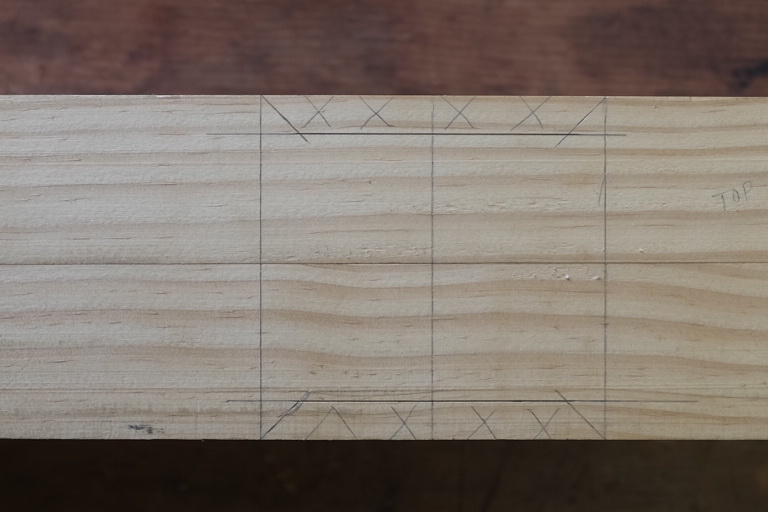
After I was happy the mortices went squarely through the main Keta member along their whole length, I started the cheek recesses that take the cross Keta, first marking out the depth of the mitred abutments:
- DSCF4386.JPG (186.13 KiB) Viewed 6829 times
Then cut out ensued:
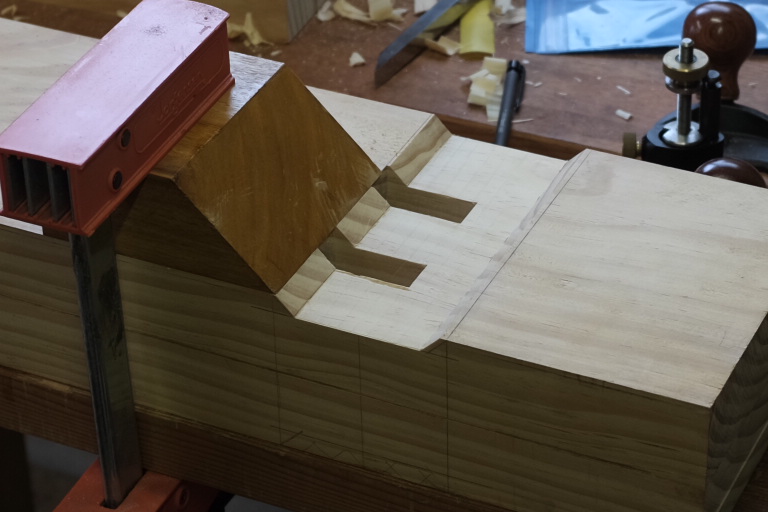
- DSCF4387.JPG (192.32 KiB) Viewed 6829 times

- DSCF4388.JPG (185.41 KiB) Viewed 6829 times
The mitres are cut well shy of the line at this stage. Some carelessness with the chisel blowing out some wood near one of the mortices mars an otherwise nice surface.
More to come over the next week.
Re: Hip Roof Model 2, mailing 2: keta intersection
Posted: Mon May 15, 2017 8:46 am
by Yxoc
Both cheeks of the main Keta piece cut now, both still with bucket loads of room to manoeuvre on the mitred abutments:
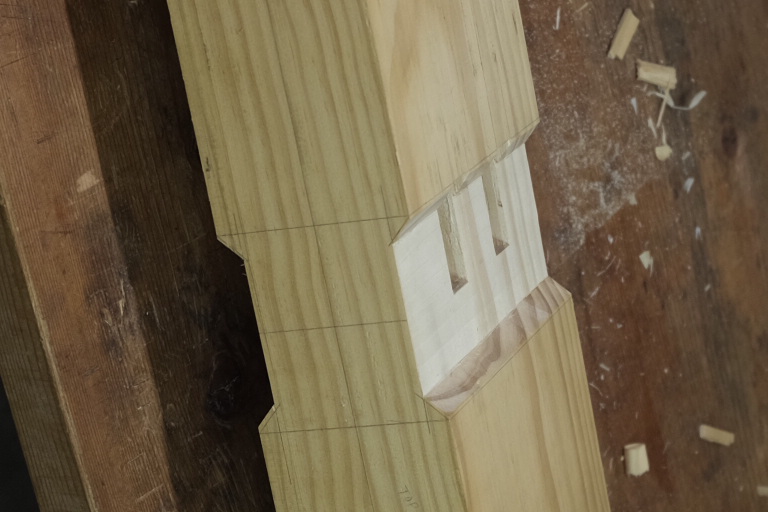
- DSCF4390.JPG (202 KiB) Viewed 6811 times
Re: Hip Roof Model 2, mailing 2: keta intersection
Posted: Sun May 21, 2017 5:32 pm
by Yxoc
The trenches to receive the cross piece tenons have been mostly cut - still a couple of mm shy of final depth. It's a stopped groove at the moment because I haven't cut this piece to length yet:
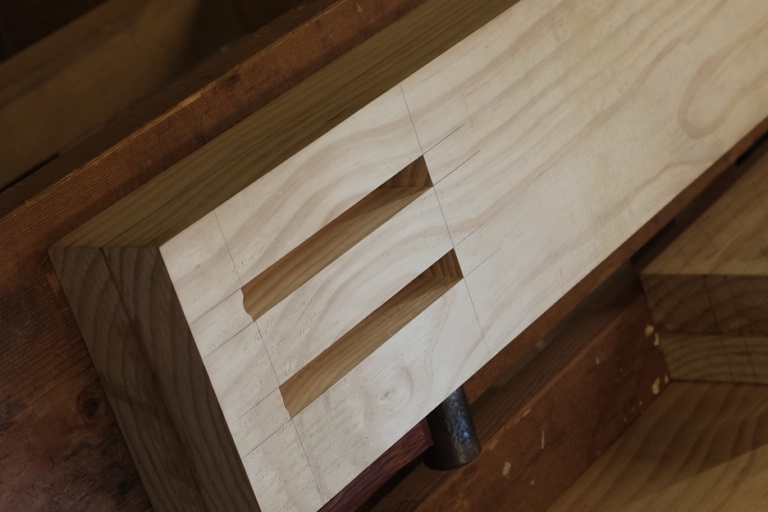
- DSCF4392.JPG (186.77 KiB) Viewed 6795 times
Re: Hip Roof Model 2, mailing 2: keta intersection
Posted: Tue May 30, 2017 9:16 pm
by Chris Hall
Coming along cleanly
Re: Hip Roof Model 2, mailing 2: keta intersection
Posted: Wed May 31, 2017 3:37 am
by Yxoc
Activity has stalled for a couple of days awaiting a new tool - I will share photos with you all when it arrives.
Re: Hip Roof Model 2, mailing 2: keta intersection
Posted: Sun Jun 18, 2017 7:46 am
by Yxoc
A hair more needs to come off the thickness of the tenons before this joint is ready for trial fitting. Then the wedging pins and this should be complete.
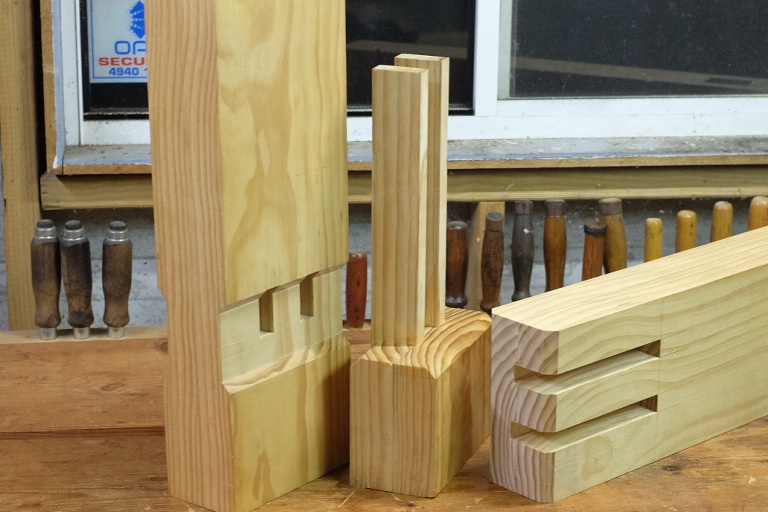
- DSCF4419.JPG (223.52 KiB) Viewed 6763 times
Re: Hip Roof Model 2, mailing 2: keta intersection
Posted: Wed Jun 21, 2017 7:02 am
by Yxoc
First trial fitting and despite measured dimensions being satisfactory, there is still enormous friction inserting the tenoned piece. Here shown pretty close to fully inserted:
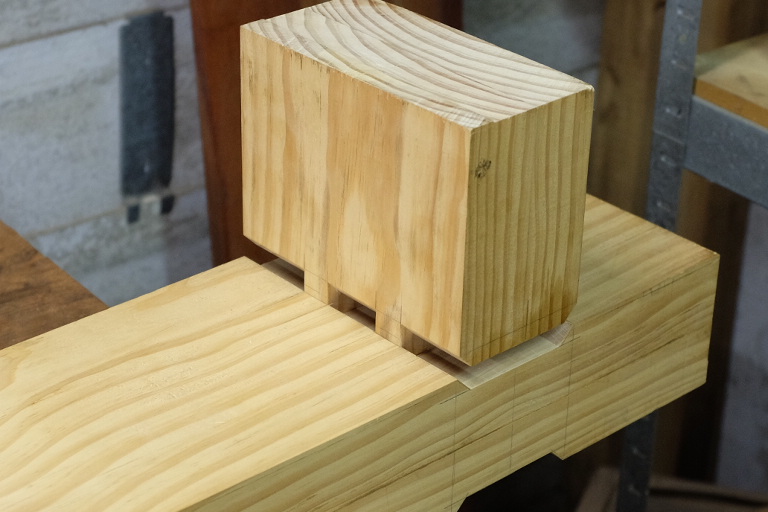
- DSCF4424.JPG (205.42 KiB) Viewed 6746 times
And here as closed as it can be without fine tuning of the mitred abutments:
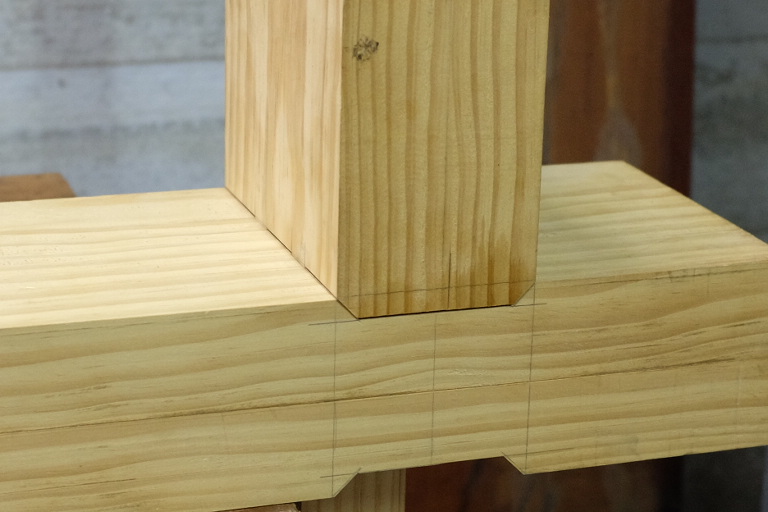
- DSCF4425.JPG (193.2 KiB) Viewed 6746 times
Tenons passing through the other side:
- DSCF4426.JPG (189.93 KiB) Viewed 6746 times
And here with the morticed piece. This was as close as I dared close up the joint for fear of needing excessive force to get it apart:
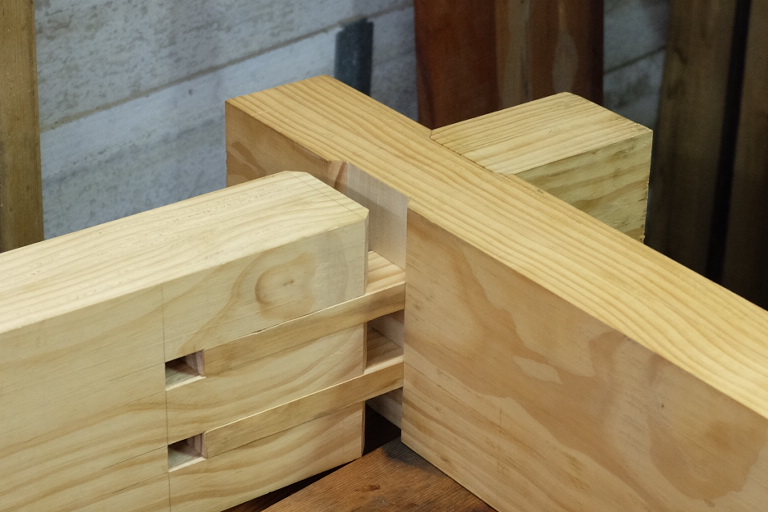
- DSCF4427.JPG (202.46 KiB) Viewed 6746 times
Still a little more needs to come off the tenons such that the pieces will assemble with only reasonable pressure.