Bench build

Here's a place for forum members to share pictures of their recent work outside of the study group projects.
User avatar
Brian
Deshi
Posts: 1090
Joined: Sat Nov 29, 2014 11:46 am

Bench build

Sat Nov 29, 2014 12:41 pm

Hello Gents!

I'm a long time reader of Chris' blog. I'm blown away by the quality of the work I see here and would like to humbly submit my projects in contribution. I mostly use western tools but have been slowly accumulating Japanese tools and searching for information on how to prepare and use them.

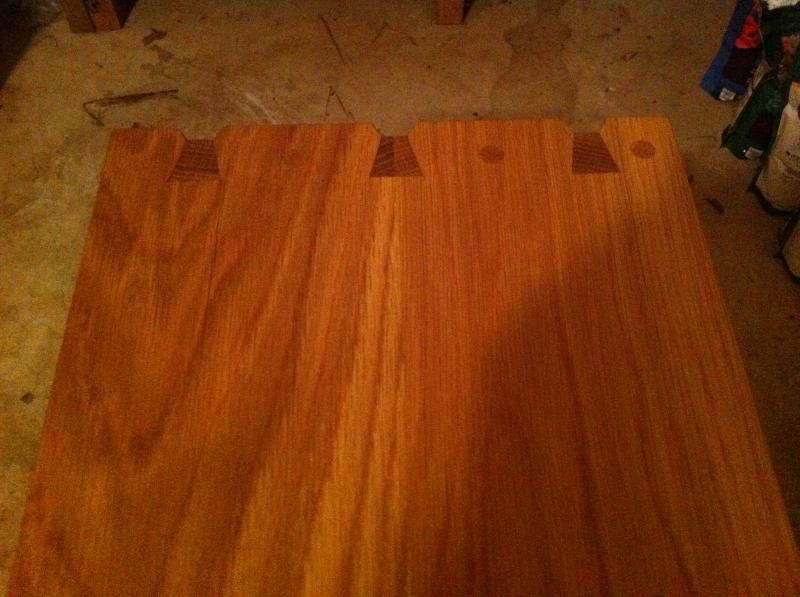
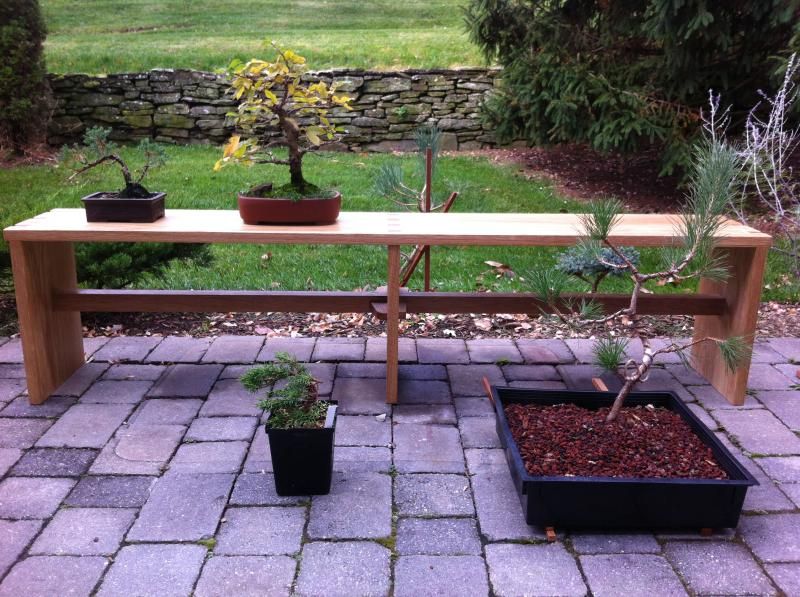
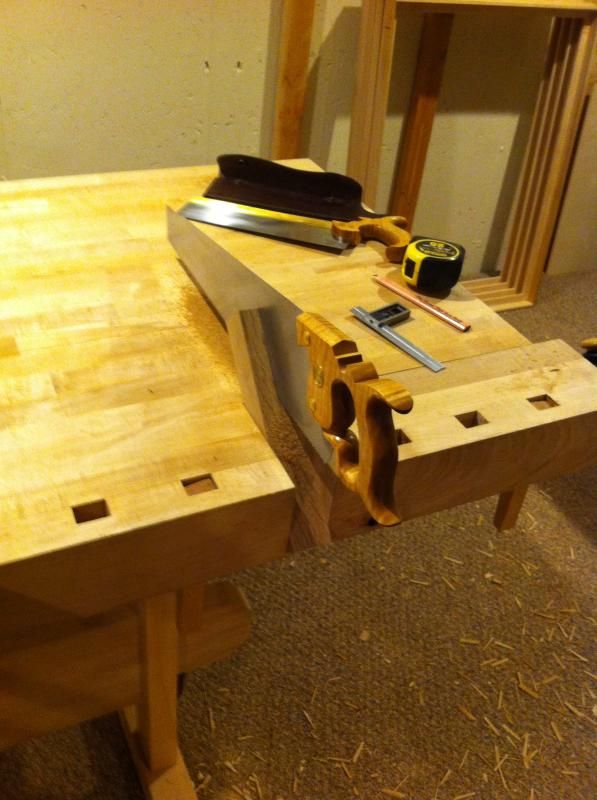
This is a bench I built in white oak;

Image

Image

Image

Image

Image

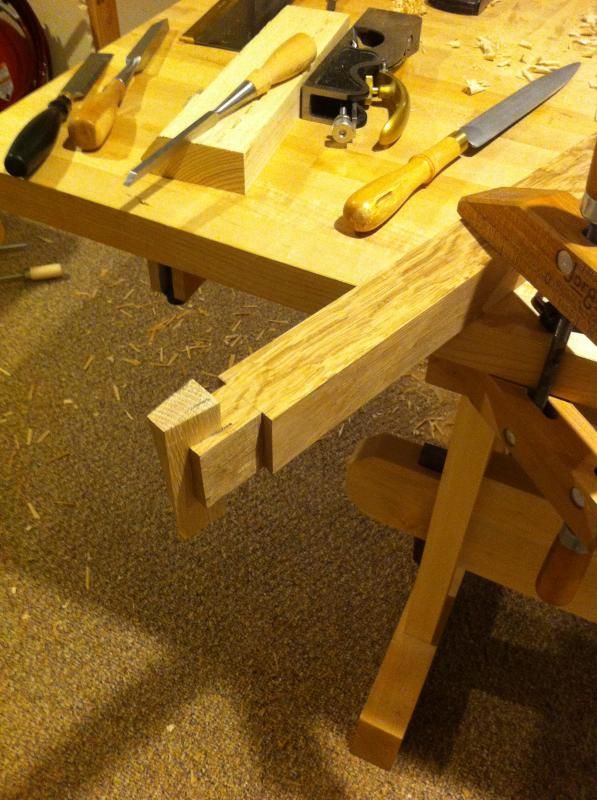
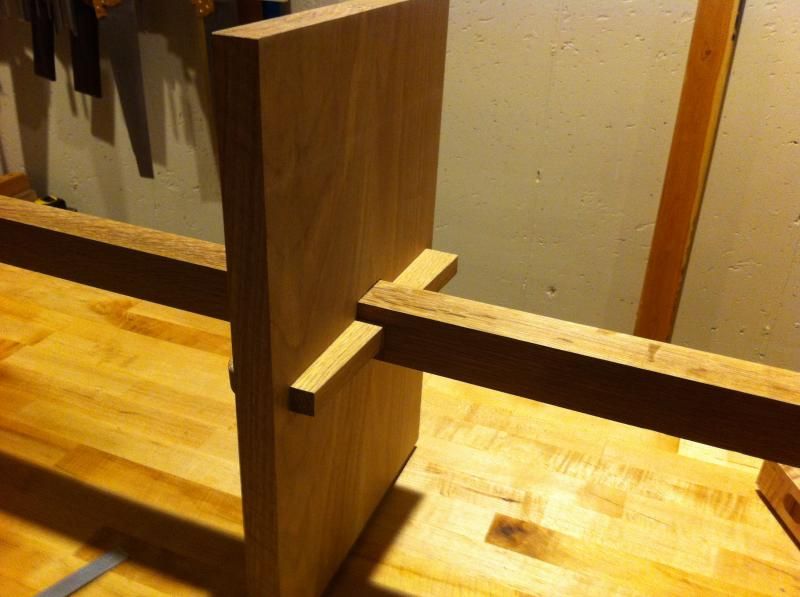
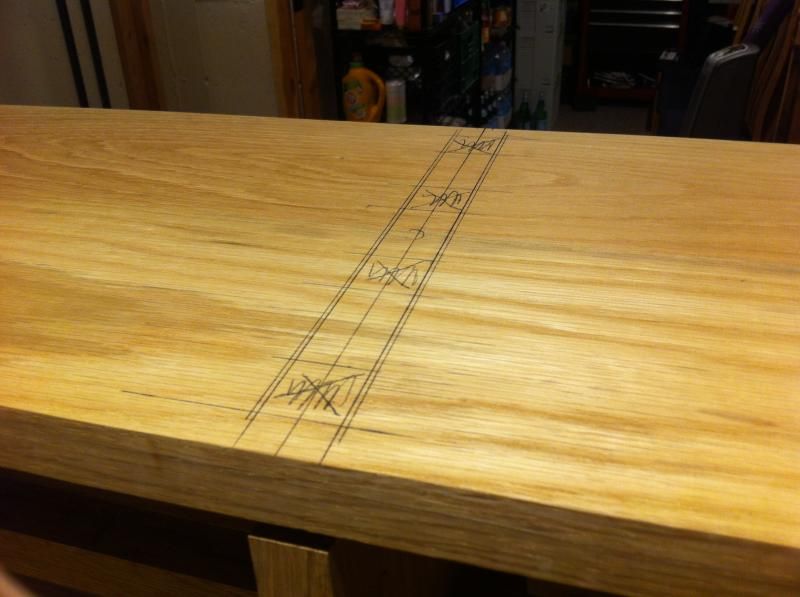
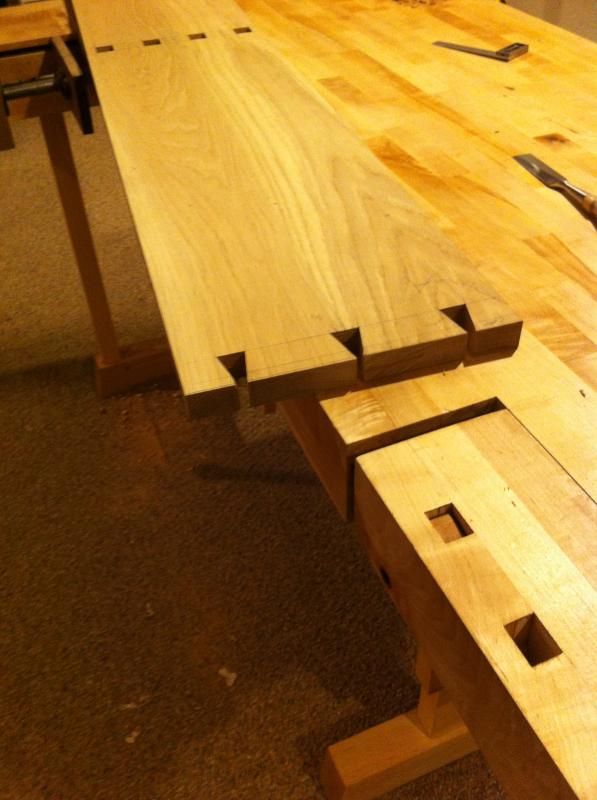
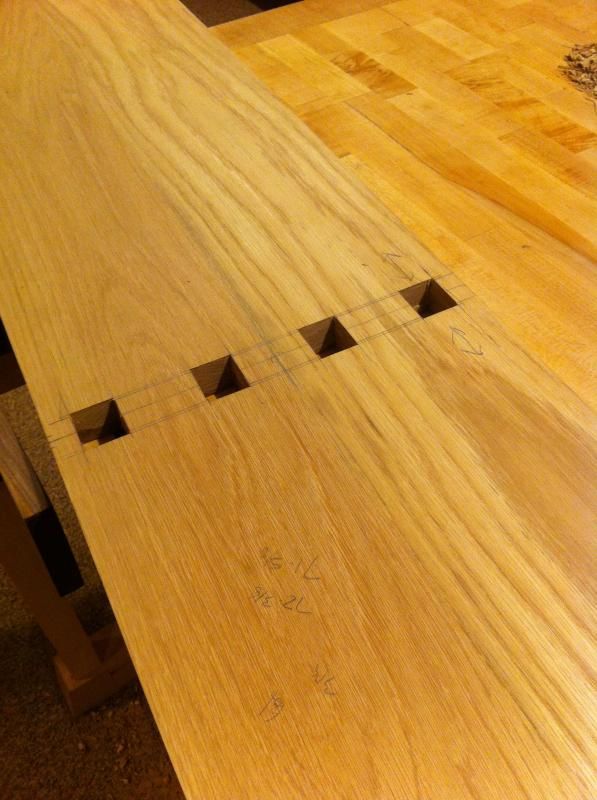
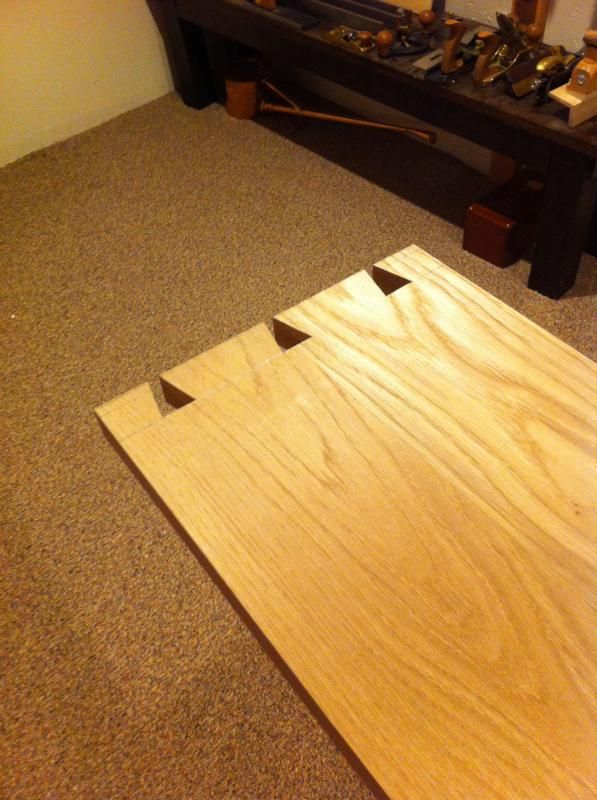
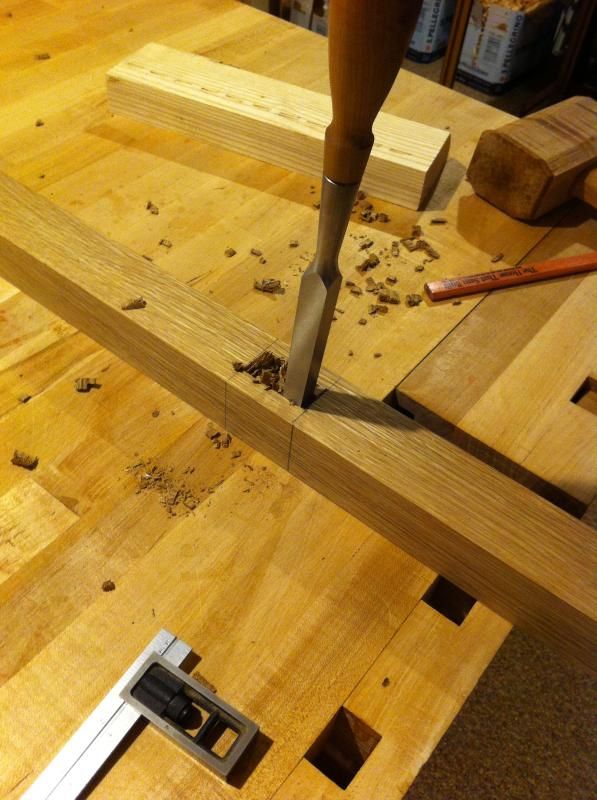
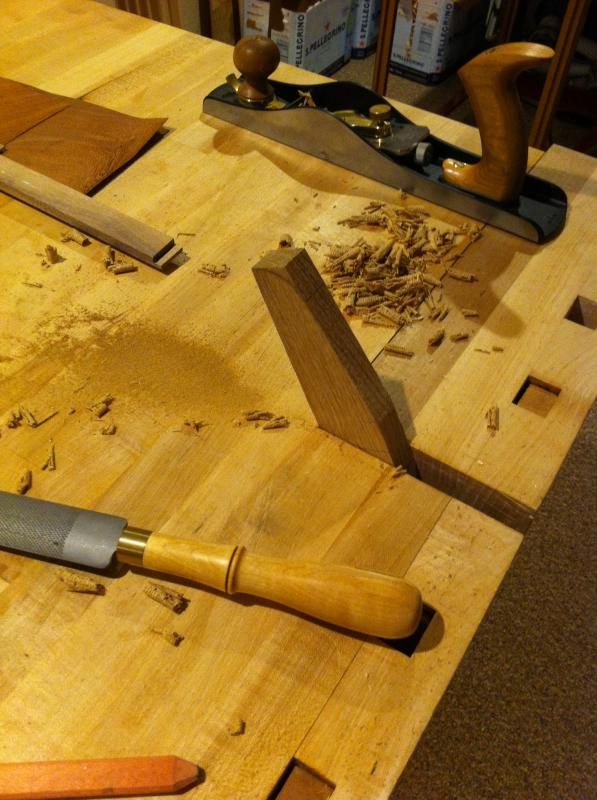
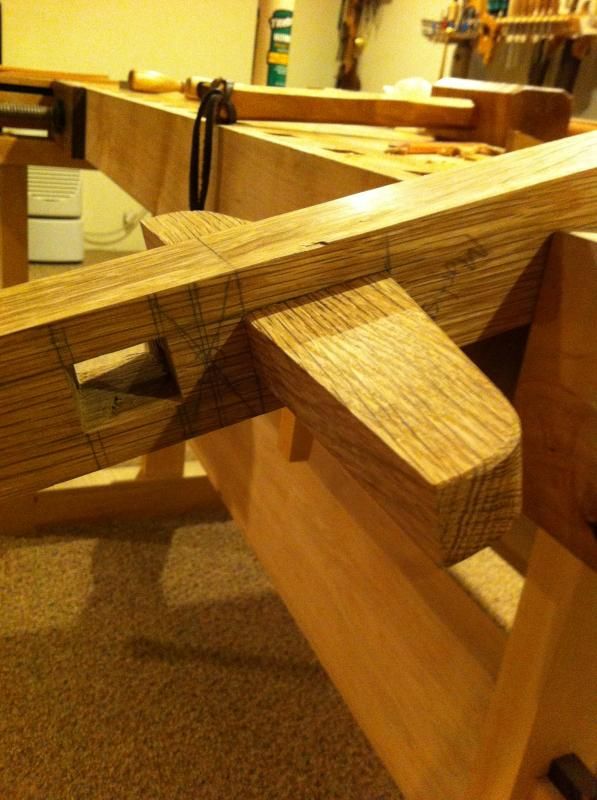
Mortising for the center support:

Image

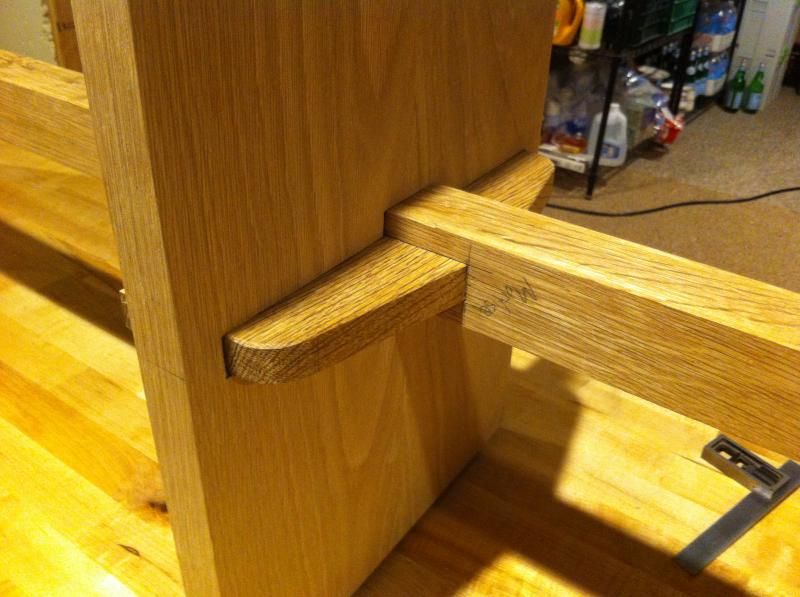
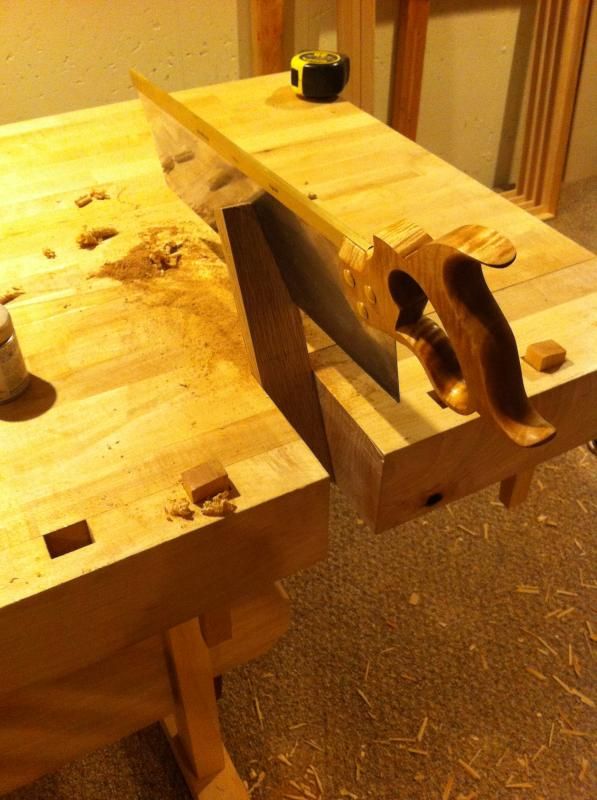
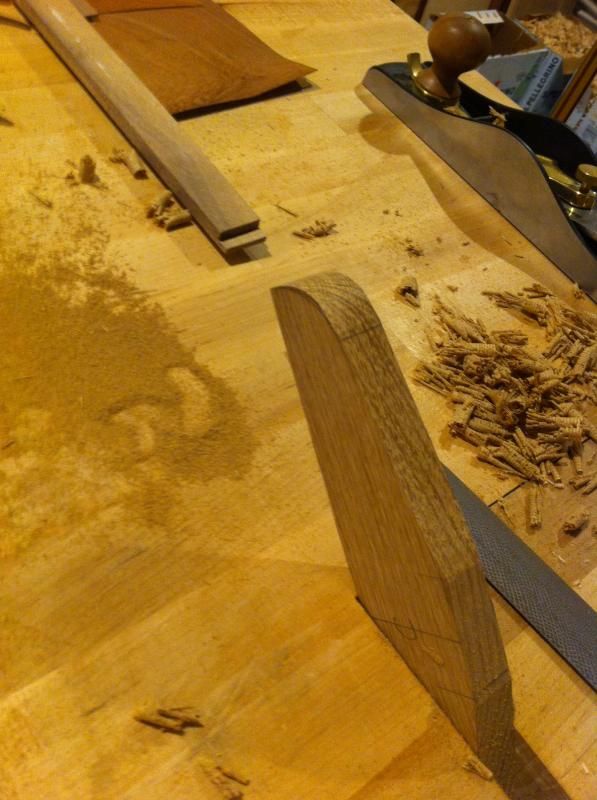
Cutting back detail with rasp then chamfering with spokeshave
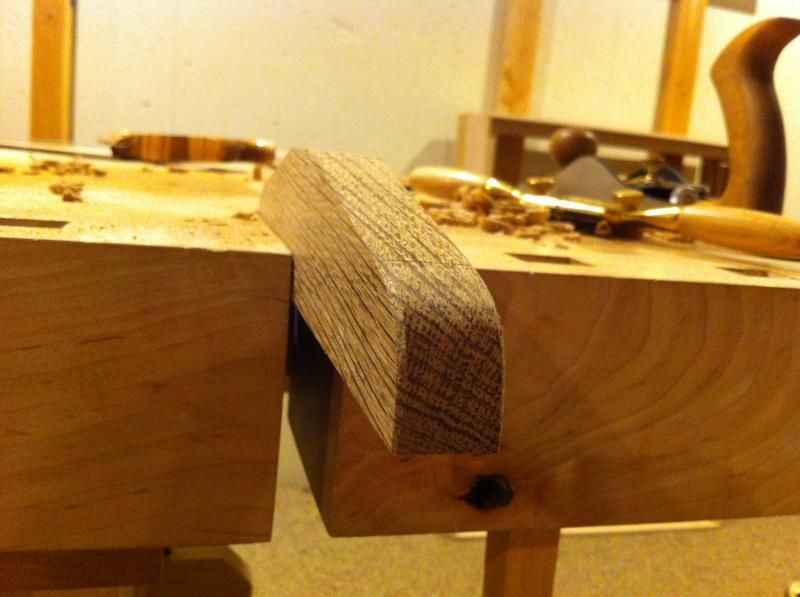
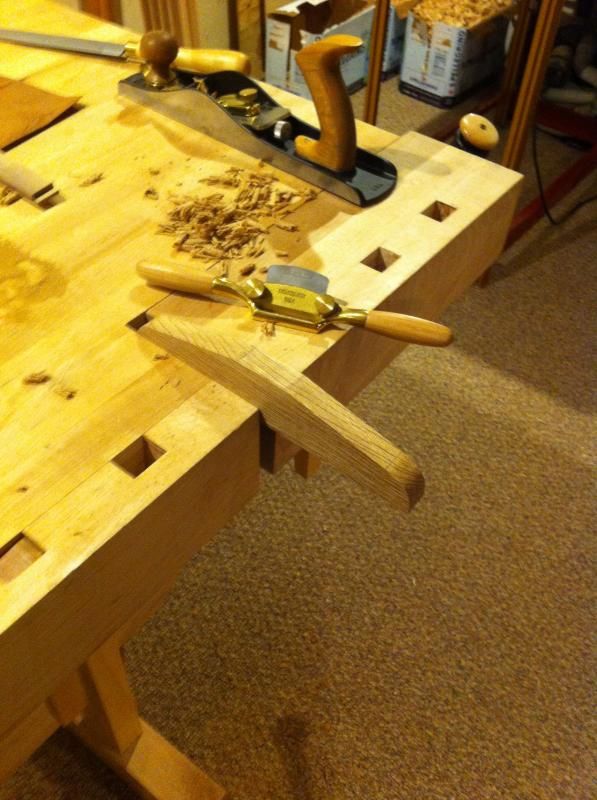
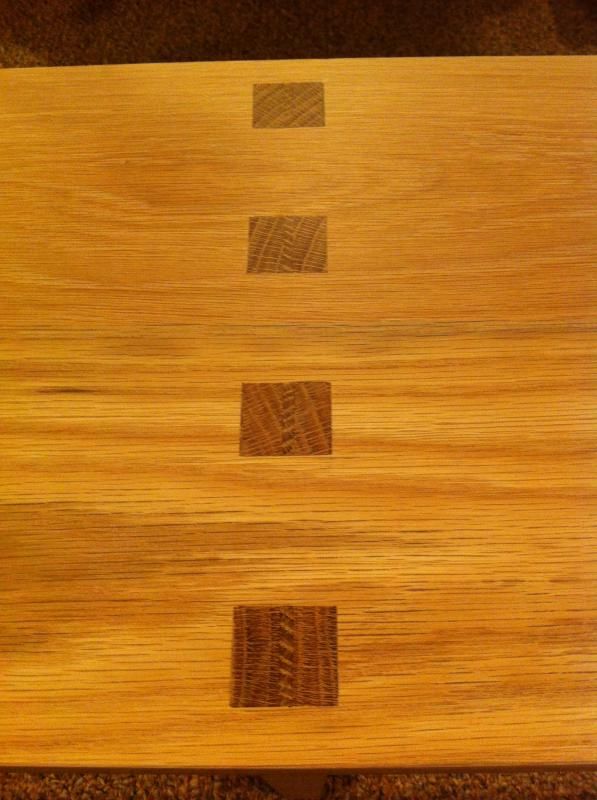
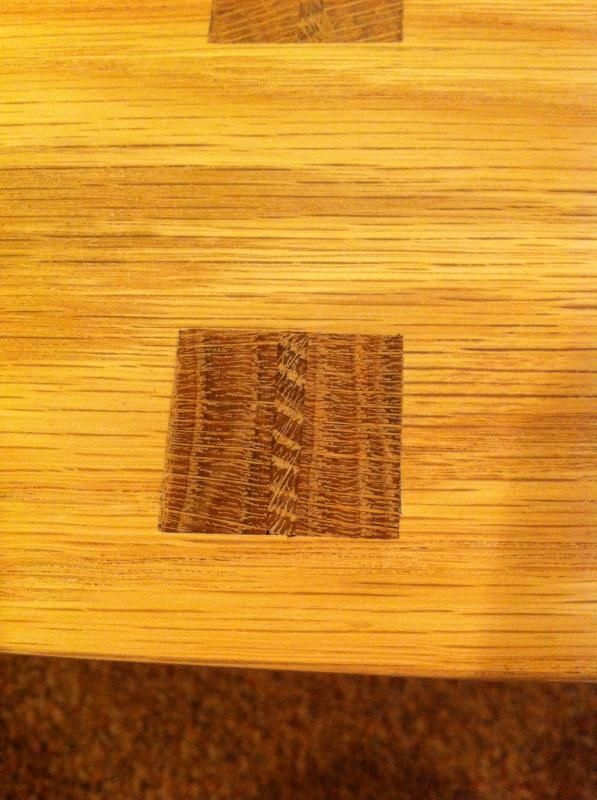
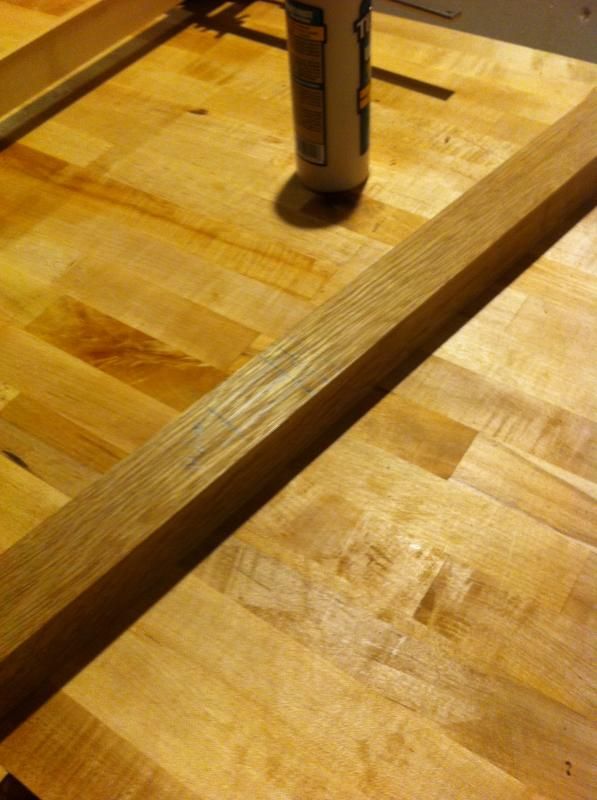
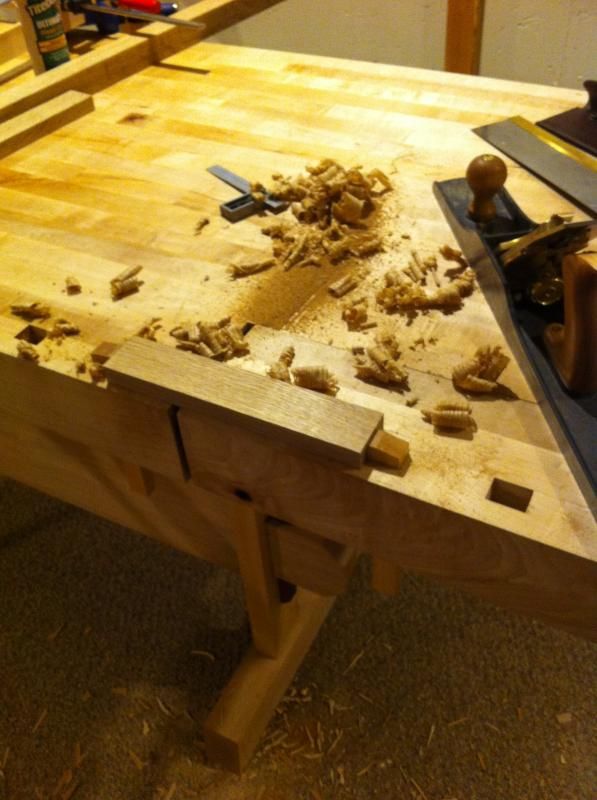
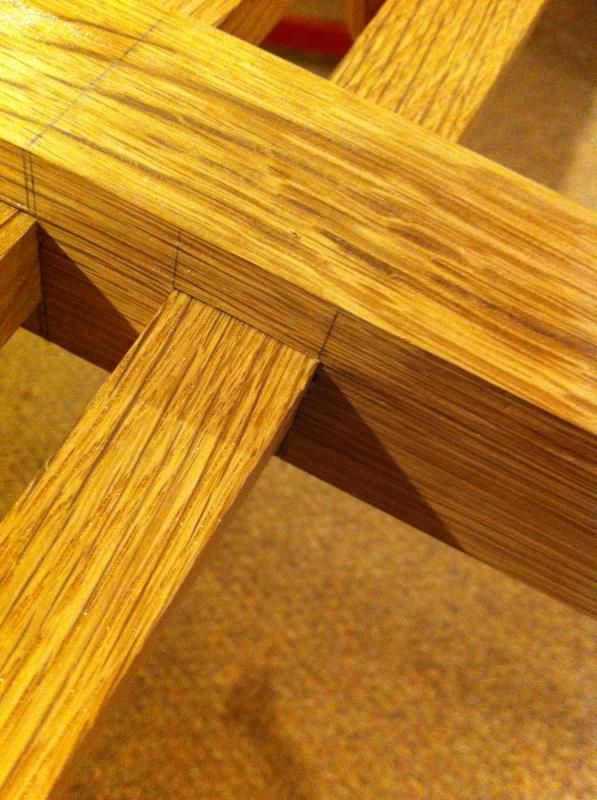

Image

Image

Image

Image


Installed.

Image

I didn't take detailed pics of the wedged side of this, but it's very similar except that I cut it past the thickness of the center leg so it can do it's job unhindered.

This will also allow me to tighten up the center leg without disturbing the outside legs.

Image

I will probably also pin the fixed support.
User avatar
Brian
Deshi
Posts: 1090
Joined: Sat Nov 29, 2014 11:46 am

Re: Bench build

Sat Nov 29, 2014 12:45 pm

It should start becoming clear what my design looks like in this post. The dovetailed key through tenon is completed in both sides;

Image

Please note that the top is just resting on the base at this point, I'll be cutting joinery for that as well.

The center upright support is complete;

This is the side with a wedged support which is removable.

Image

And here is the fixed side, and you can see I cut a groove to clock the support at 90 degrees.

Image

The top is next and I'll be starting with the wedged through tenons very soon;

Image

Image

Image

These are fun...

Image

Image

Test fitting the tenons.

Image

Image

Image

Image
User avatar
Paul Atzenweiler
Deshi
Contact:
Location: Kansas City, MO
Posts: 204
Joined: Fri Dec 23, 2011 11:37 pm

Re: Bench build

Sat Nov 29, 2014 4:27 pm

Well done, sir! The rasp that is on your bench in the first picture - is that one of the "hand stitched" French rasps?
User avatar
Chris Hall
Site Admin
Contact:
Location: Greenfield, Massachusetts
Posts: 2385
Joined: Mon Nov 22, 2010 12:46 pm

Re: Bench build

Sat Nov 29, 2014 4:34 pm

Your work is clean and attractive, however this connection is a bit problematic:
hmm.jpg
hmm.jpg (44.91 KiB) Viewed 4838 times
User avatar
Brian
Deshi
Posts: 1090
Joined: Sat Nov 29, 2014 11:46 am

Re: Bench build

Sat Nov 29, 2014 5:31 pm

Thanks fellas!

Paul, that is a Auriou hand stitched rasp. I've tried a few rasps in the past, but wow these make a clean cut.

Chris,

It's hard to tell from the photo but that is a double taper, it locks in nicely. What gives you pause about that connection?
User avatar
Chris Hall
Site Admin
Contact:
Location: Greenfield, Massachusetts
Posts: 2385
Joined: Mon Nov 22, 2010 12:46 pm

Re: Bench build

Sat Nov 29, 2014 6:22 pm

Oh I get what the joint mechanism is -no worries. And you executed it cleanly.

There are a couple of issues. One of them is in common with this piece which was covered in FWW several months back:
011231062_hand-tool-shaker-stool_md.jpg
011231062_hand-tool-shaker-stool_md.jpg (27.19 KiB) Viewed 4833 times
The through tenons on this bench are not done correctly - here's one of those Shaker stools built by someone presumably from the FWW article:
img_0325.jpg
img_0325.jpg (143.12 KiB) Viewed 4833 times
User avatar
Brian
Deshi
Posts: 1090
Joined: Sat Nov 29, 2014 11:46 am

Re: Bench build

Sat Nov 29, 2014 6:34 pm

Thanks.

I'm again confused however, the mechanism of my through tenons is done in a manner that the wedging force is applied against the end grain. When I apply my wedges it's quite a violent act, if they were going to fail they would do so at that point.

The shaker bench's failure in design is that the tenons work to split the top since the wedge is directed with the grain of the rather than perpendicular to it. I suspect it's saving grace is that they were put in delicately (I presume).
User avatar
Chris Hall
Site Admin
Contact:
Location: Greenfield, Massachusetts
Posts: 2385
Joined: Mon Nov 22, 2010 12:46 pm

Re: Bench build

Sat Nov 29, 2014 7:09 pm

Okay, maybe I'm seeing it wrong. Could be.

To clarify then, the grain in the receiving piece runs like this, yes?:
hmm.jpg
hmm.jpg (45.23 KiB) Viewed 4827 times
The portion which rests upon the floor would be the end grain.

When the wedge is driven down, the stretcher portion of the connection, which has a tapered trench for the wedge, will spread like this, yes?:
tenon.jpg
tenon.jpg (59.28 KiB) Viewed 4827 times
Therefore, as the wedge is fitted at final assembly, the outward force on the stretcher portion will push outward, like this:
c.jpg
c.jpg (57.48 KiB) Viewed 4827 times
The portion of the stretcher being pushed outward is not bearing on end grain in the receiving leg. This situation is analogous to the wedged through tenons on Becksvoort's stool.
User avatar
Brian
Deshi
Posts: 1090
Joined: Sat Nov 29, 2014 11:46 am

Re: Bench build

Sat Nov 29, 2014 7:38 pm

Sorry Chris, I thought you were comparing to the wedge tenons in the top of my bench.

Yes the grain is running in that way, however it doesn't put much pressure (if any) outwardly on the long grain in practical use. It's main function is to capture the upright and help it to maintain it's position.

The wedge in this case is seated when the upright meets the shoulder of the through tenon and not forced beyond that. If one were to drive it home they would likely split the tenon prior to splitting the upright.

It's function is the same as that of a tusk tenon more so than that of a wedged through tenon.
User avatar
Chris Hall
Site Admin
Contact:
Location: Greenfield, Massachusetts
Posts: 2385
Joined: Mon Nov 22, 2010 12:46 pm

Re: Bench build

Sat Nov 29, 2014 8:14 pm

The shaker bench's failure in design is that the tenons work to split the top since the wedge is directed with the grain of the rather than perpendicular to it. I suspect it's saving grace is that they were put in delicately (I presume).
The wedge in this case is seated when the upright meets the shoulder of the through tenon and not forced beyond that. If one were to drive it home they would likely split the tenon prior to splitting the upright.
My point exactly. In order to make the connection work, you cannot drive it home very tightly. That will be fine until the leg and stretcher and wedge all shrink a bit when humidity is low for an extended period, at which point the connection will be loose and the joint function will decrease somewhat. If the bench were loaded laterally at that point in time, then only the corner dovetail joints between top and legs would resist the load to any significant degree.

There's more to it though. Let's say you rotated the wedge and stretcher 90˚, so that when the wedge is driven in the load is taken up onto the mortises end grain portions. This seems like a better solution, however the joint's design mechanically is such that as it is loaded it becomes weaker. Allow me to explain if I may....

This is the form of the joint - please correct me if I have missed something:
wedgie a-small.jpg
wedgie a-small.jpg (21.85 KiB) Viewed 4821 times
Then with the wedge inserted until contact:
wedgie b-small.jpg
wedgie b-small.jpg (15.69 KiB) Viewed 4821 times
At this point, the sides of the wedge fit against the cheeks of the half dovetail mechanically (i.e, there is some degree of friction).

What happens though when you try to drive the wedge further however is that the wedge shape of the wedge, in the horizontal cross section) will push the stretcher's half dovetails apart, and immediately there will be gaps at the ends and the mechanical friction between the parts will be lost:
wedgie c-small.jpg
wedgie c-small.jpg (24.78 KiB) Viewed 4821 times
What happens next is the wedge will want to squirm outward, away from the stretcher towards the opening in the half dovetails. The joint doesn't tighten well. It looks like it would, but in reality it won't. I know this from having cut one of these a few years back, thinking to myself it was a cool kind of form. In the end it had no mechanical strength.

I invite you to cut one to test this out for yourself- don't take my word for it.

Return to “Your Recent work”

Who is online

Users browsing this forum: No registered users and 56 guests