
Crannygoat, the table looks great! Nice execution. I love the joinery. Looks like you could park a truck on it.
I hardly feel qualified to offer advice for finish planing, but maybe a higher bed angle would help?
a little table talk
- crannygoat
- Raw Log Import
- Contact:
- Location: Oakland, CA
Post 
Re: a little table talk
I am using a chip breaker. Which setting are you wondering about? Bevel angle of the chip breaker? If so, I do a mini bevel, and it looks to be about 85 degrees relative to the, um, plane of the wood. Punsters Unite! Ok that's not really a pun, but I'm not at my sharpest after sanding all day.Brian wrote:Anytime!
Do you have a chip breaker? If so, what is your current setting?
- crannygoat
- Raw Log Import
- Contact:
- Location: Oakland, CA
Post
I feel entirely confident that one could park a Tonka tuck on it.
Re: a little table talk
Thanks Matt, you may well be right about the bed angle. Completion of this table and the next one should afford the opportunity to get a new blade, and I think I will chop a 60 degree dai for it.Matt J wrote:Crannygoat, the table looks great! Nice execution. I love the joinery. Looks like you could park a truck on it.
I hardly feel qualified to offer advice for finish planing, but maybe a higher bed angle would help?
I feel entirely confident that one could park a Tonka tuck on it.
- djwong
- Deshi
- Location: Cupertino, CA
Post
Really inspiring joinery. I love the housed mortises. As I recall, there was a bit of discussion on wedged tenons during the toolbox project (in the Joinery section). Specifically Getting rolling - dadoes, mortises, and tenons starting at page 4, and Hell Tenons - Jigoku hozo
Re: a little table talk
Crannygoat,crannygoat wrote:Moving along. I seem to recall a detailed discussion of wedging tenons here or on CW but I can't seem to find it. Anyone have a clue where that is? Wedge against end grain, size wedges to mortise tapers. One thing that's never made much sense to me is angling the saw kerfs in towards the middle of the tenon. What is gained by this? Seems to me a straight kerf means less short grain, therefore stronger. If there's an error in my thought, enlighten me please.
I haven't settled on an approach to wedging the long and short apron tenons. They both have a meaty haunch, and then they lap each other. I could do short wedges, (they cross at 3/4" form the outside face of the leg). Or a longer wedge and trench the tenons. Anyone care to weigh in?
Really inspiring joinery. I love the housed mortises. As I recall, there was a bit of discussion on wedged tenons during the toolbox project (in the Joinery section). Specifically Getting rolling - dadoes, mortises, and tenons starting at page 4, and Hell Tenons - Jigoku hozo
-
Brian

- Deshi
Post
I have also taken to setting the chipbreaker as close as .005" from the edge, but typically it is .010".
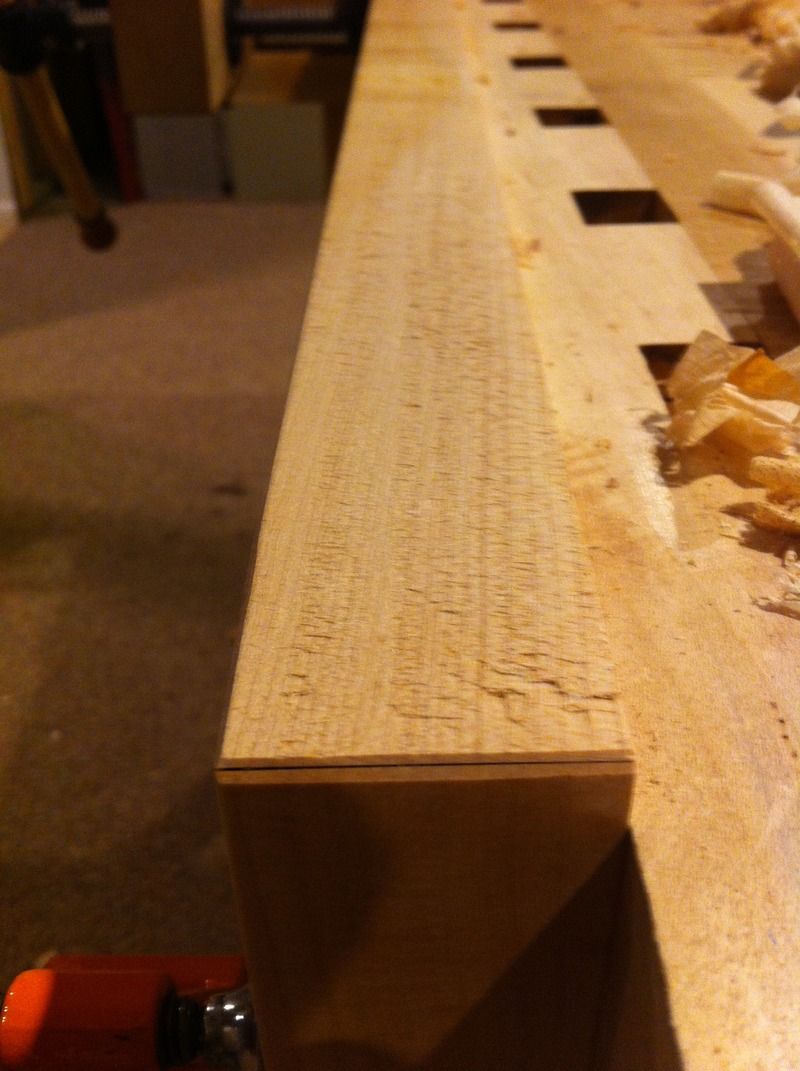
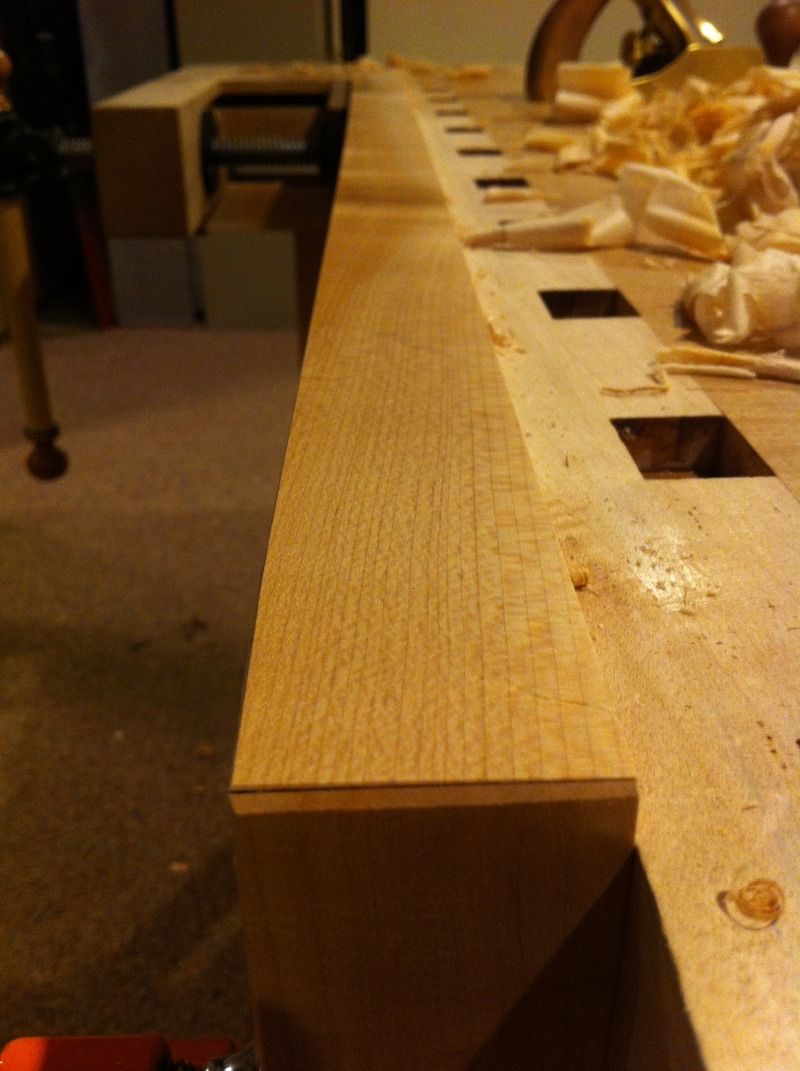
Here is some hellish maple I've planed with the breaker set .005" from the edge....45 degree pitch.
I've had a 55 degree pitch and hated it, I prefer not to take .001" shavings, i like .003" for finishing.
Re: a little table talk
In my experience going to 95-100 Degrees from the plane of the wood (lols) worked better for me than 90 or 80. I like a heavy bevel (1/16" ).crannygoat wrote:I am using a chip breaker. Which setting are you wondering about? Bevel angle of the chip breaker? If so, I do a mini bevel, and it looks to be about 85 degrees relative to the, um, plane of the wood. Punsters Unite! Ok that's not really a pun, but I'm not at my sharpest after sanding all day.Brian wrote:Anytime!
Do you have a chip breaker? If so, what is your current setting?
I have also taken to setting the chipbreaker as close as .005" from the edge, but typically it is .010".
Here is some hellish maple I've planed with the breaker set .005" from the edge....45 degree pitch.
I've had a 55 degree pitch and hated it, I prefer not to take .001" shavings, i like .003" for finishing.


-
Chris Pyle

- Deshi
- Location: St. Louis, MO
Post
Re: a little table talk
This is QS maple? Does it give that ray flecking like QS oak? Looks like you planed it without issue.
-
Brian
- Deshi
Post
Re: a little table talk
QS Maple, from board to board it can be incredibly well behaved to needing the finest settings that I can muster to get a good pass, but everything will clean up. Those shavings that basically shoot straight up out of the plane are what I'm always looking for. They are great and they are indicative of good plane settings, they also allow you to take full length passes and maintain a good flat board.
- crannygoat
- Raw Log Import
- Contact:
- Location: Oakland, CA
Post
Re: a little table talk
Here's the backpacking table in situ.
Tiny problem. I made the aprons deeper than normal for structure, with careful attention paid to ergonomic standard for knee clearance. I did know I would be excluding some of the outliers on the bell curve, not just the absolute extremes of nature from table. Trouble is, I guess those standards were developed in the forties. I guess our diet has given our bell curve a new shape. When the clients held a test dinner at the table, they reported to me that fully 50% could not fit their legs under the apron. OOPS. 
Surprisingly, they were very gracious and offered to pay me to fix it. I think I'll meet them somewhere halfway or just do it.
The chairs they selected already feel rather low, so I don't think trimming the legs there is going to help.
Which means that giving the table shoes might make it feel too high.
Now that it's on its feet with joinery wedged and glued and it feels totally stout, I think I could cut a relief arch from the apron without sacrificing structural integrity.
It seems there is plenty to learn when building furniture at this scale. I humbly share my embarrassment, that none of you may suffer it.
- DSC01520.JPG (212.48 KiB) Viewed 3660 times
Surprisingly, they were very gracious and offered to pay me to fix it. I think I'll meet them somewhere halfway or just do it.
The chairs they selected already feel rather low, so I don't think trimming the legs there is going to help.
Which means that giving the table shoes might make it feel too high.
Now that it's on its feet with joinery wedged and glued and it feels totally stout, I think I could cut a relief arch from the apron without sacrificing structural integrity.
It seems there is plenty to learn when building furniture at this scale. I humbly share my embarrassment, that none of you may suffer it.
- crannygoat
- Raw Log Import
- Contact:
- Location: Oakland, CA
Post
Re: a little table talk
Same gracious clients, same taste for size. This one is 9 feet in diameter. Solid Elm. Yikes. I did suggest a torsion box top, but they wanted solid. Elm.
I guess the forces that be really want me to understand wood movement. It certainly is a force to be reckoned with. The joinery design is entirely unglued and I think will accommodate for movement. The top and breadboard ring is all tongue and grooved, left a little gappy between breadboard miters. which should tighten up. I'm pretty sure this wood is going to do nothing on the whole but shrink. Air dried for about twelve years, the wood was at 14% mc at the mill, and went down to 12% in the months at my shop. It's new home has much dryer summers than my shop, and while the winters are actually wetter there, I think it's reasonable to anticipate that the doors will be closed and the heat will be on. Betting on this and the 100 year drought that is California now, I left the shoulders of the main top tongue and groove joints tight. Even so, I anticipate a rather monstrous gap of 5/16 between boards at it's driest. I explained this to the client, and they didn't seem concerned. I guess they have staff with long vacuums.
Each top board is fastened to the understructure via machine screws and threaded inserts on the centre line only, to allow each board it's own shrinkage. (BTW if you try something like this, I don't recommend brass in elm. Even after pre tapping the holes the inserts were a bear to get in without stripping).
If the drought miraculously ends, and somehow the room goes mostly humid, I might be remaking a rather expensive table. As things are, I think the weakest link is the breadboard ring pinned through the tongue and groove at the centre line of each board. Not a whole lot of relish beyond the pins.
As the main boards shrink, they may apply outward force on the breadboard ring, and I honestly I am a little nervous about the relish blowing out. Hindsight has me making a wider tongue and elongated pin holes in the tongue.
Not much concerned for the base and understructure, I think it will be ok.
I'll post this build backwards. ish.
Any comments are welcome. Wood movement is a topic worthy of discussion, and I think this table will provide some real facts about the phenomenon in the coming years. You can bet I'm going to check up on it, and report here.
I guess the forces that be really want me to understand wood movement. It certainly is a force to be reckoned with. The joinery design is entirely unglued and I think will accommodate for movement. The top and breadboard ring is all tongue and grooved, left a little gappy between breadboard miters. which should tighten up. I'm pretty sure this wood is going to do nothing on the whole but shrink. Air dried for about twelve years, the wood was at 14% mc at the mill, and went down to 12% in the months at my shop. It's new home has much dryer summers than my shop, and while the winters are actually wetter there, I think it's reasonable to anticipate that the doors will be closed and the heat will be on. Betting on this and the 100 year drought that is California now, I left the shoulders of the main top tongue and groove joints tight. Even so, I anticipate a rather monstrous gap of 5/16 between boards at it's driest. I explained this to the client, and they didn't seem concerned. I guess they have staff with long vacuums.
Each top board is fastened to the understructure via machine screws and threaded inserts on the centre line only, to allow each board it's own shrinkage. (BTW if you try something like this, I don't recommend brass in elm. Even after pre tapping the holes the inserts were a bear to get in without stripping).
If the drought miraculously ends, and somehow the room goes mostly humid, I might be remaking a rather expensive table.
As the main boards shrink, they may apply outward force on the breadboard ring, and I honestly I am a little nervous about the relish blowing out. Hindsight has me making a wider tongue and elongated pin holes in the tongue.
Not much concerned for the base and understructure, I think it will be ok.
I'll post this build backwards. ish.
Any comments are welcome. Wood movement is a topic worthy of discussion, and I think this table will provide some real facts about the phenomenon in the coming years. You can bet I'm going to check up on it, and report here.
- Attachments
-
- IMG_4293.jpg (166.67 KiB) Viewed 3659 times
-
- IMG_4296.jpg (195.98 KiB) Viewed 3659 times
-
- IMG_4302.jpg (210.17 KiB) Viewed 3659 times
-
- DSC01523.JPG (214.49 KiB) Viewed 3659 times
- crannygoat
- Raw Log Import
- Contact:
- Location: Oakland, CA
Post
Re: a little table talk
A note about the breadboard ring, I went with an asymmetrical miter thinking that this would promote a close fit as the breadboards shrink, or at worst, even gappage. It occurs to me now that I could have calculated the shrinkage and cut the miters open on the outside so they would close up as they shrank. The current scheme, which does keep the eye moving around the table, had the unpleasant side effect of keeping placement moving around the table. Another possibility would have been to cut symmetrical miters on two opposite apexes of the octagon, and reversed asymmetrical miters on the other ends of those boards. this would have had a capturing effect in placement of them. Another step closer to foresight.
- Attachments
-
- IMG_4280.jpg (174.27 KiB) Viewed 3658 times
-
- IMG_4281.jpg (178.66 KiB) Viewed 3658 times
-
- IMG_4287.jpg (179.22 KiB) Viewed 3658 times
-
- IMG_4291.jpg (145.69 KiB) Viewed 3658 times
Who is online
Users browsing this forum: No registered users and 40 guests