Hehe, doesn't hurt to ask :p
My Japanese saws are fillers for the western saw that I do have, I have a few situations where I dont have a great saw and those are being filled with Japanese. I had an initial bad experience, but have decided it was a fluke and have moved forward with success. The saws I've landed on are Mitsukawa with replaceable blades.
Western backsaws on the whole are very good and do not leave a lot to be desired, but they do have some gaps in their offerings which are better filled by Japanese saws.
Transitioning into Kanna is a bit more involved, because my lineup of planes does everything asked of it with exception that I have to maintain the blades more then I prefer, and then I have my HNT gordon planes which are wonderful in every dimension, including blades that do not disappoint. So I went ahead and bought a replacement blade for my jointer in blue steel and so far so good.
Other thing I have is that there is a transition period where I find what I like, and that is sometimes quite involved. I am lucky that so far it has been minimally painful for Japanese chisels....for instance I found the Koyamaichi mortise chisels to leave a bit to be desired, but their ultra thin paring chisels and heavy chopping chisels are great.
So I will again tip-toe, finding a smoothing plane that I like by a maker that I like and so forth.
Bed Build
-
Brian

- Deshi
Post
Re: Bed Build
Do you think it's possible to improve this to a true mirror right off the plane with a Kanna?
I'm 99% tear out free right off the finish plane and some work on really hellish grain reversals or slightly tightening the chip breaker should get me there. Over 90" of work I have maybe 2" showing very mild haziness from tear out.
Part of me thinks that the waxy sole of a wooden plane and near full hardness blade can help the final finish...obviously combined with a chip breaker that is well set. Other part of me thinks this is pretty solid.
Down a ways;
-
Chris Hall

- Site Admin
- Contact:
- Location: Greenfield, Massachusetts
Post
Re: Bed Build
I think the result looks fine. One can similarly sharpen a western chisel to take a thin end grain shaving, but....
Your comment earlier, "My only complaint of western planes is that the blades suck", still applies though. I know how often you will need to resharpen that blade.
Also the aspect of kanna where you become aware of the dai moving and changing shape and needing adjustment, puts you in more touch with the material you work. And I think ultimately that wooden bodied planes, if adjusted to a highly refined level, are capable of taking thinner shavings than a metal-bodied plane. If I'm wrong about that, then I wonder why I am still waiting for someone to take a sub 10-micron shaving with a metal pig.
That said, I feel no need to defend kanna, and acknowledge the difficulties that come with those tools. They're not for everyone I guess - they push you to develop your skills in blade fitting and sharpening, force you to become more keenly aware of the interaction between cutting edge and material, and walking that path can sure be frustrating at times.
-
Brian
- Deshi
Post
Re: Bed Build
It's an idea I've been dabbling with for a while, reason being that ultimately many craftsman go the way of wooden bodied planes and my suspicion for a while has been that they are more friendly when they're on (wax impregnated sole), but a bit more temperamental.
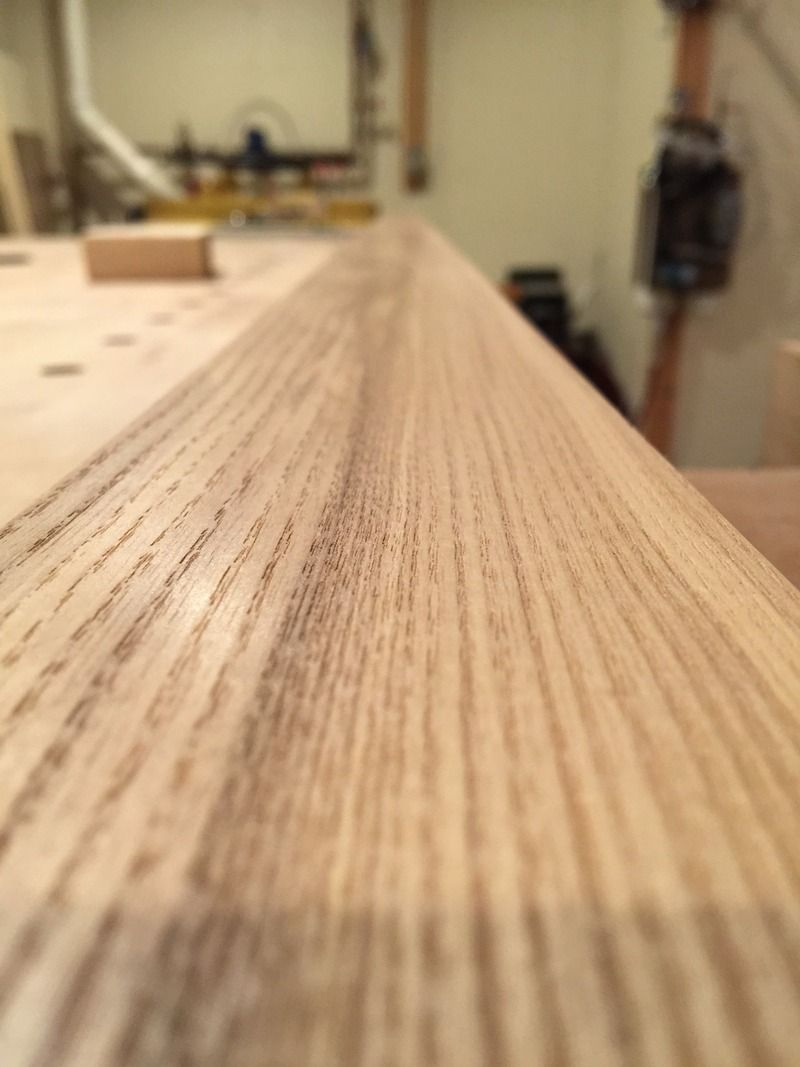
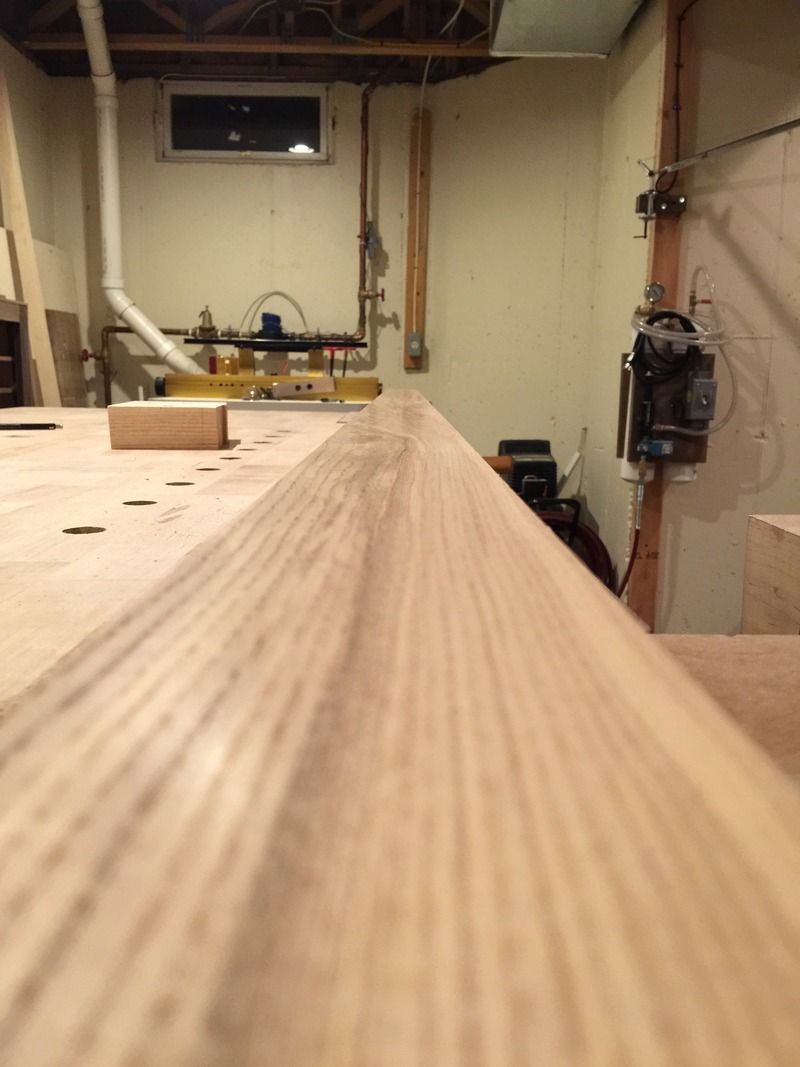
The reason I posted my finishes are that I actually do achieve a true mirror off of the plane, but it's an elusive beast. Wanting to find it more often has been a source of frustration and I'm wondering if it is even realistic to think I can do so with consistency.
That white ash is a perfect example of good but not truly a mirror, and so possible to improve upon.
I greatly appreciate your tutelage, so, certainly it is not my intention to have you in defense of them, I'm just trying to get my head around the idea of change and see where the change can improve my results.
-
Paul Atzenweiler

- Deshi
- Contact:
- Location: Kansas City, MO
Post
Re: Bed Build
It certainly appears that your current plane is doing what it supposed to. I like my metal planes in addition to my Japanese planes. I end up using my no. 7 on almost every project. You do great work and am always excited when i see that you've posted something.
-
Brian
- Deshi
Post
Re: Bed Build
Thanks Paul!
So far I have used my number 7 on every project also, I dont plan to jettison my western planes, especially after tuning them to the point that I currently have them at.
That being said, I think it may be a great thing to add a kanna to the lineup. I went and re-read Chris' blog posts on setup and have been doing a bit of investigating into what items are needed for basic setup and which I approach I should take in getting them. All of which will be multi-purpose in my shop.
-
Paul Atzenweiler
- Deshi
- Contact:
- Location: Kansas City, MO
Post
Re: Bed Build
I started using Japanese planes in 1985 (sheesh I'm old) and the only reference i had was Toshio Odate's book which i love but now i see has its short comings compared to the resources available now. When tuned, they are a joy - tuned improperly they are extremely frustrating! I have stuggled to the point of abandoning them but have felt very fortunate to have persevered.
-
Brian
- Deshi
Post
Re: Bed Build
Sometimes I'm originally hesitant to make a move into another facet of woodworking, but that has actually been what maintains my interest. I've been in the hobby for the better part of my life and very serious about it for the past 7 years and still it's always interesting to me. So, over the next few months I will further progress with this.
After some contemplation I've thought about the fact that getting into these does open me up to a range of planes not found commonly in western woodworking like a plane with skates for thicknessing thin material to uniform and consistent thickness and a wooden body chamfer plane with a chipbreaker.
After some contemplation I've thought about the fact that getting into these does open me up to a range of planes not found commonly in western woodworking like a plane with skates for thicknessing thin material to uniform and consistent thickness and a wooden body chamfer plane with a chipbreaker.
-
Brian
- Deshi
Post
Re: Bed Build
And back to the woodwork
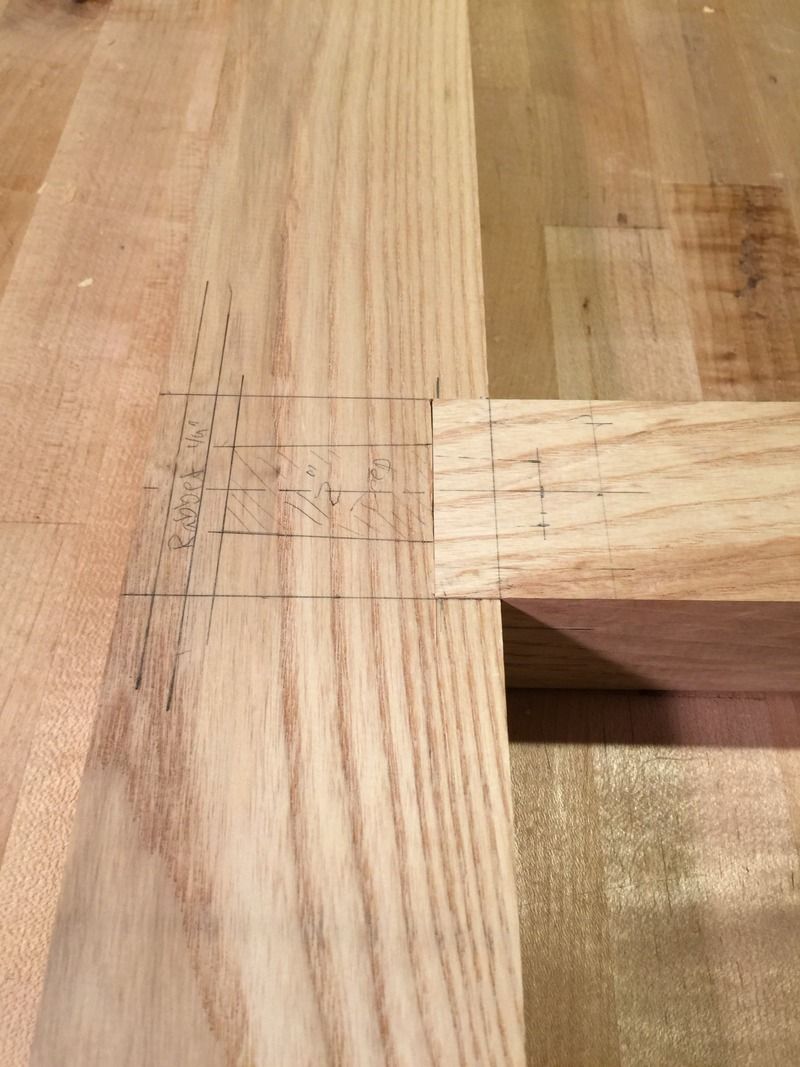
Mocking up to check square and mark out the tenons. I used the cut side as a template to mark out the opposing side, then double check that I'm going to hit my marks once the center crossmember is tightened up. All looks good and the frame is square.
I'm mindful of wind at this point, and checking my joints for squareness in all directions, but I wont have an absolute until I have this side on.
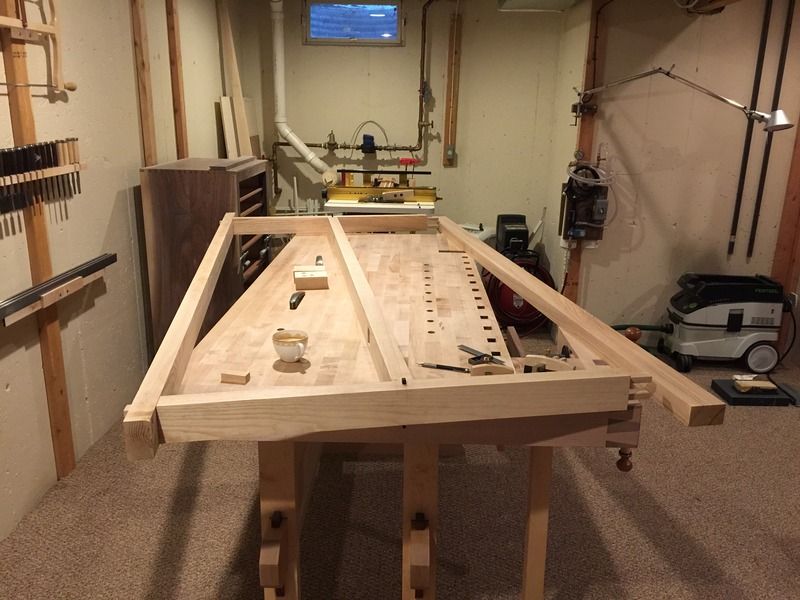
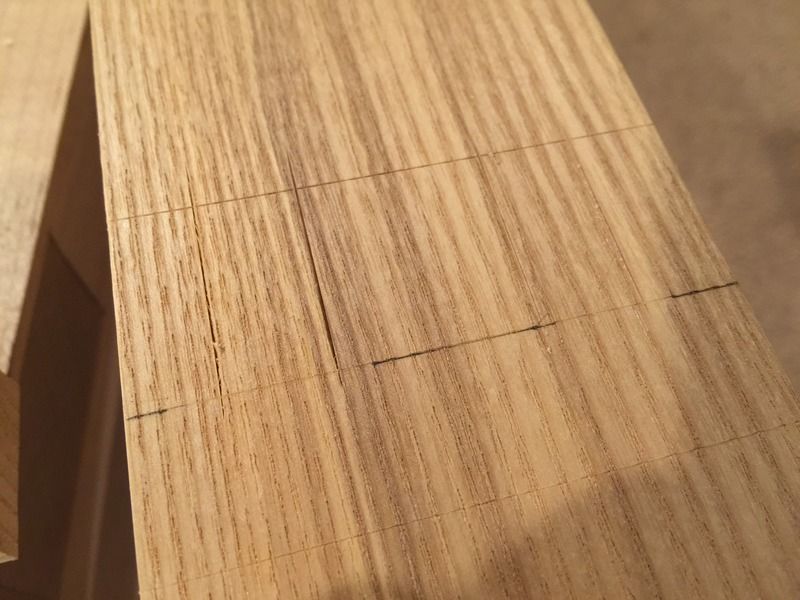

Starting square
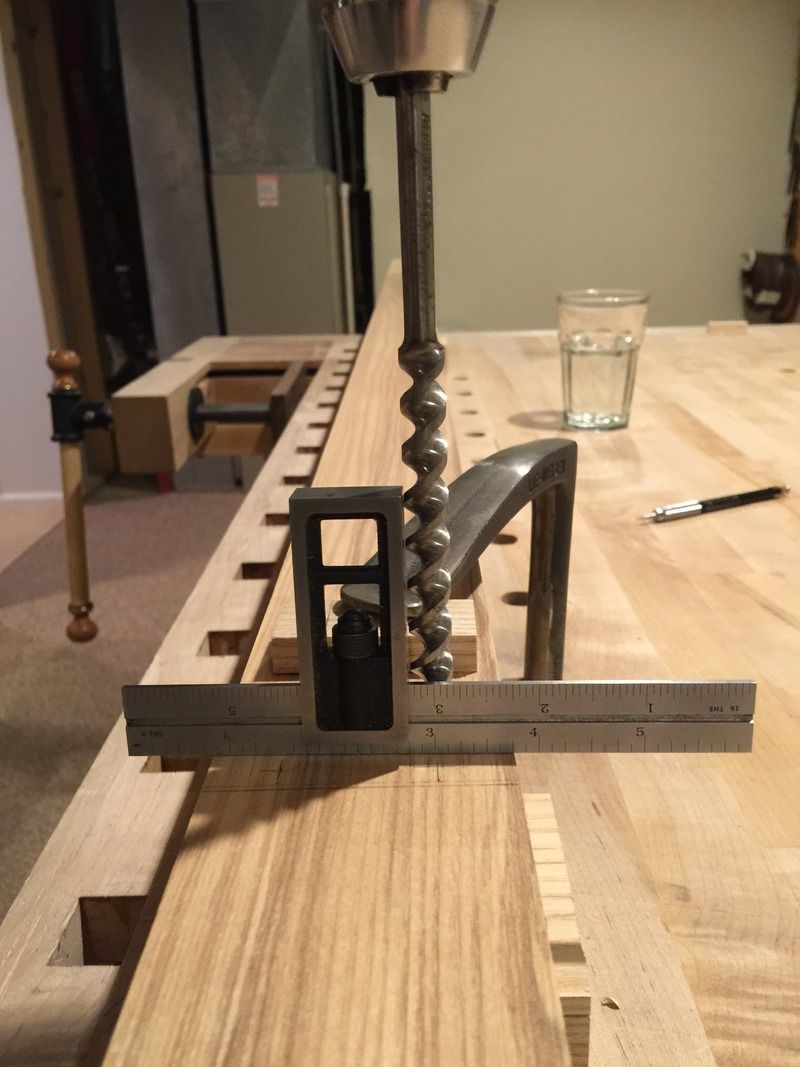
And on the exit (inside of the board) within the requisite boundaries.
Mocking up to check square and mark out the tenons. I used the cut side as a template to mark out the opposing side, then double check that I'm going to hit my marks once the center crossmember is tightened up. All looks good and the frame is square.
I'm mindful of wind at this point, and checking my joints for squareness in all directions, but I wont have an absolute until I have this side on.


Starting square


And on the exit (inside of the board) within the requisite boundaries.

-
Brian
- Deshi
Post
Re: Bed Build
Not as far along as I was hoping at this point. Ended up spending most of the day chasing a leak that presented itself in my workshop....and removing a good portion of my ceiling...which I will be replacing later this week...sigh.
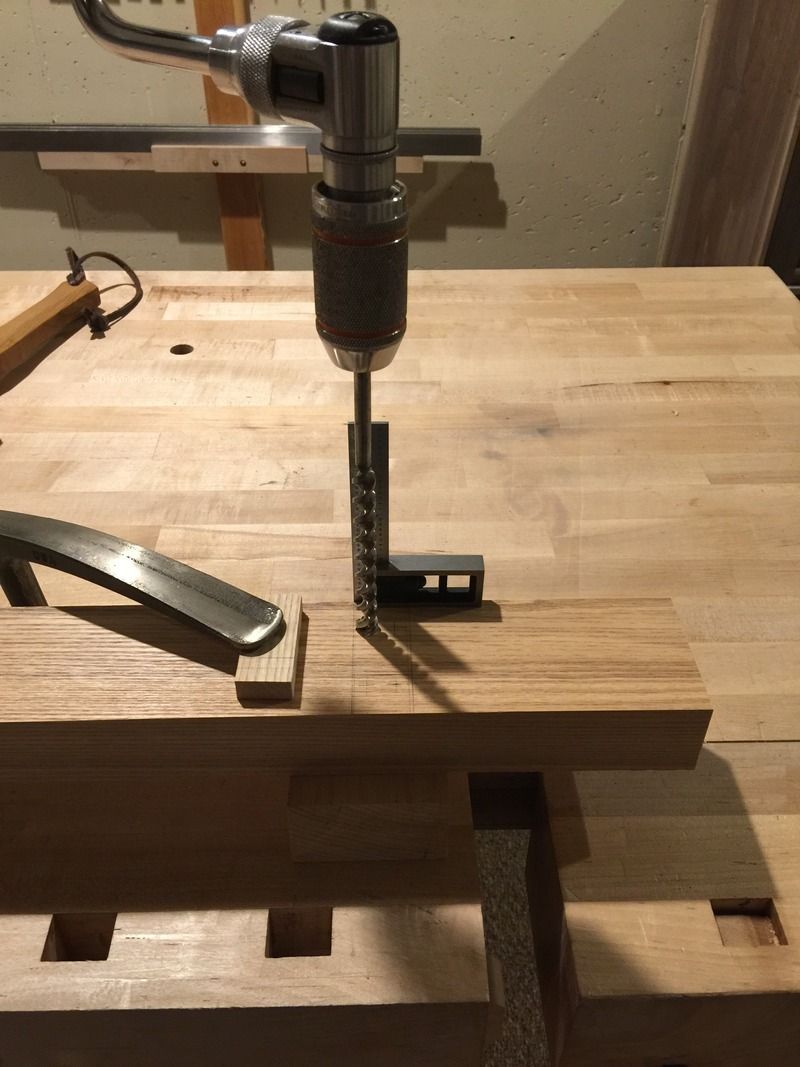
I did manage to get some mortising done I detailed my approach;
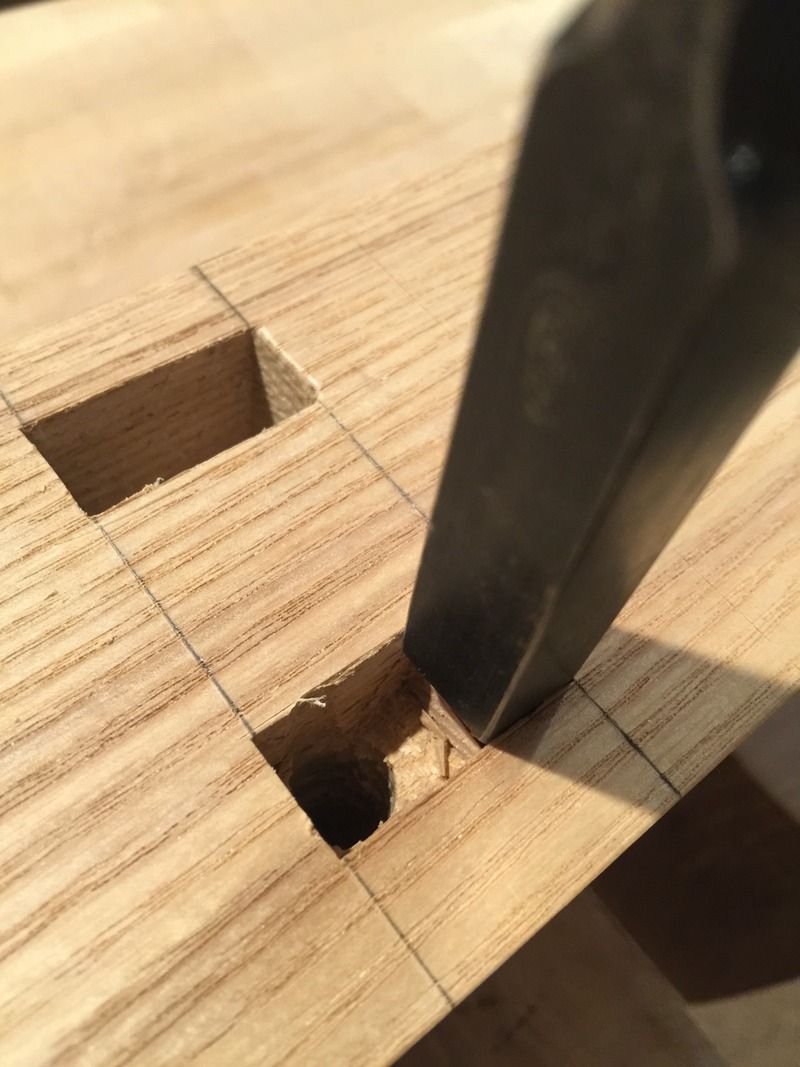
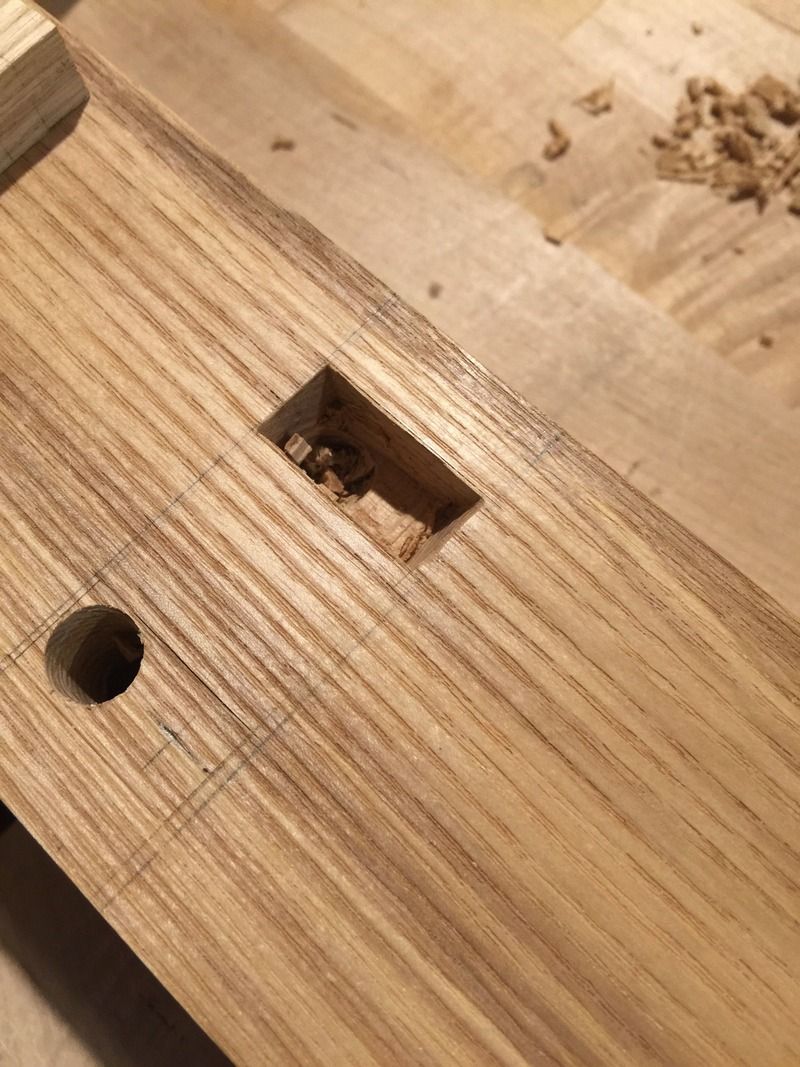
First round of chopping toward the hole, these steps get progressively smaller as I approach the opposing edge
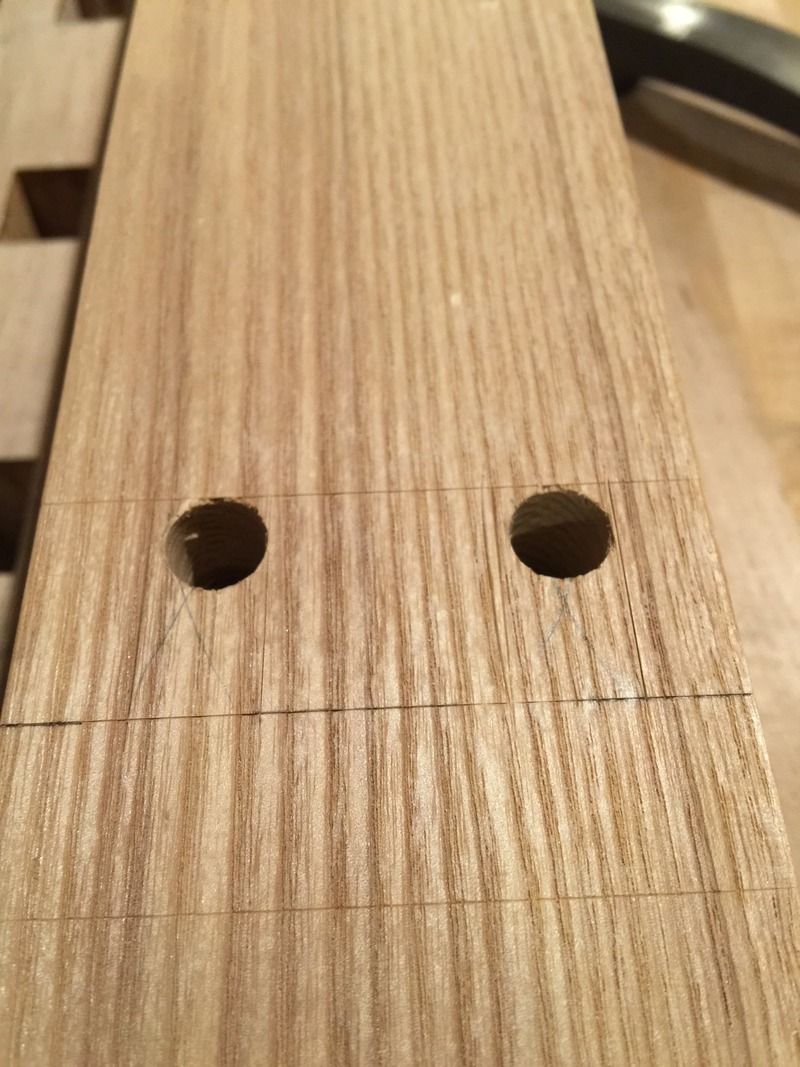
I then move to the opposing edge of the hole and chop, this is usually two chops and the bevel is facing the hole.
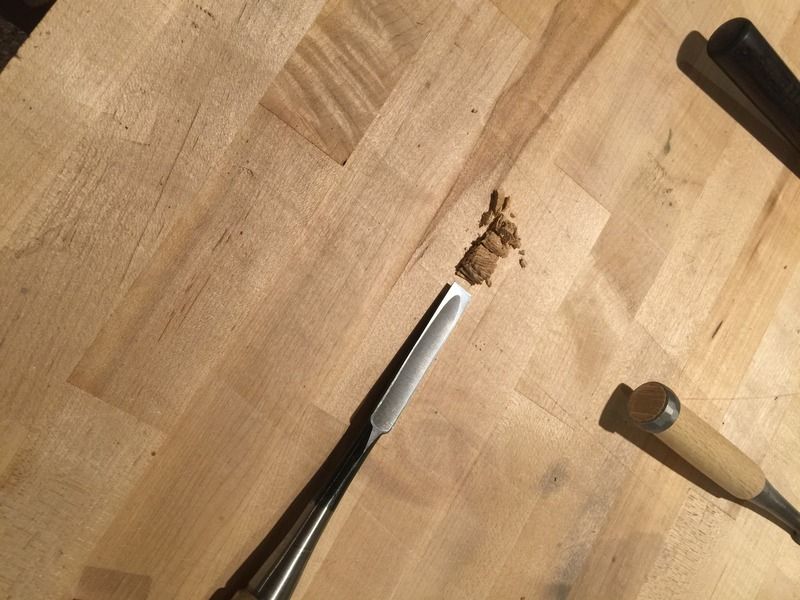
Scoop out the waste, I use a smaller chisel to do so, the entire bit of waste comes out in one scoop; I believe also that a bottom clearing chisel will work for this.
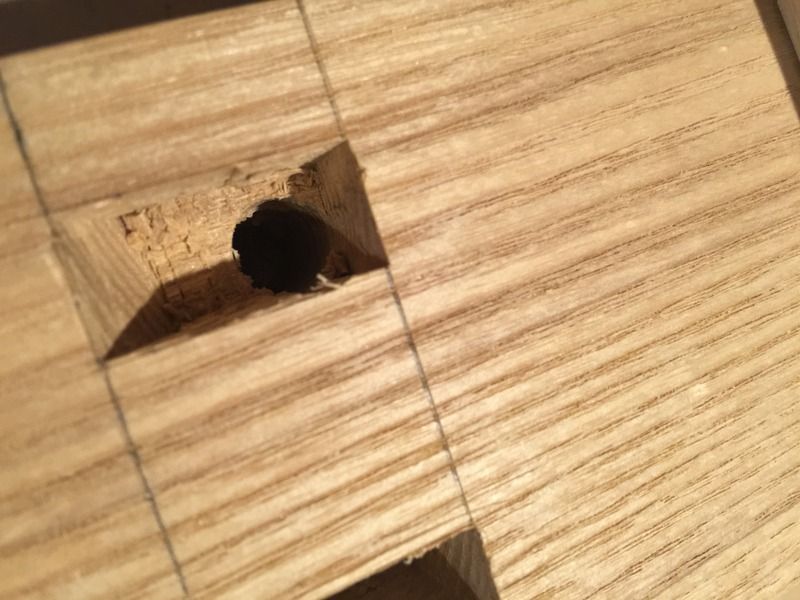
Here is the result at this point
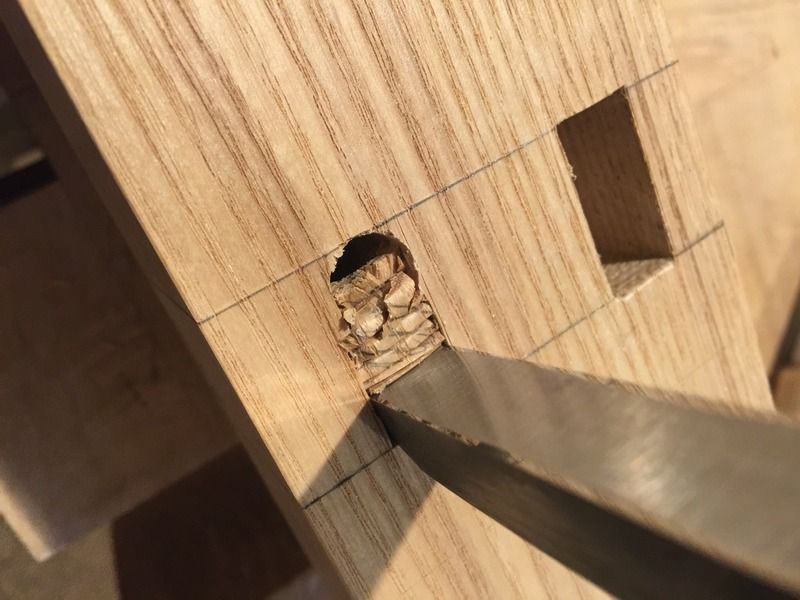
Next I cut the slope, bevel toward the hole, At this point I'm beginning to check my work for square and ensure that my eyeball is well tuned.
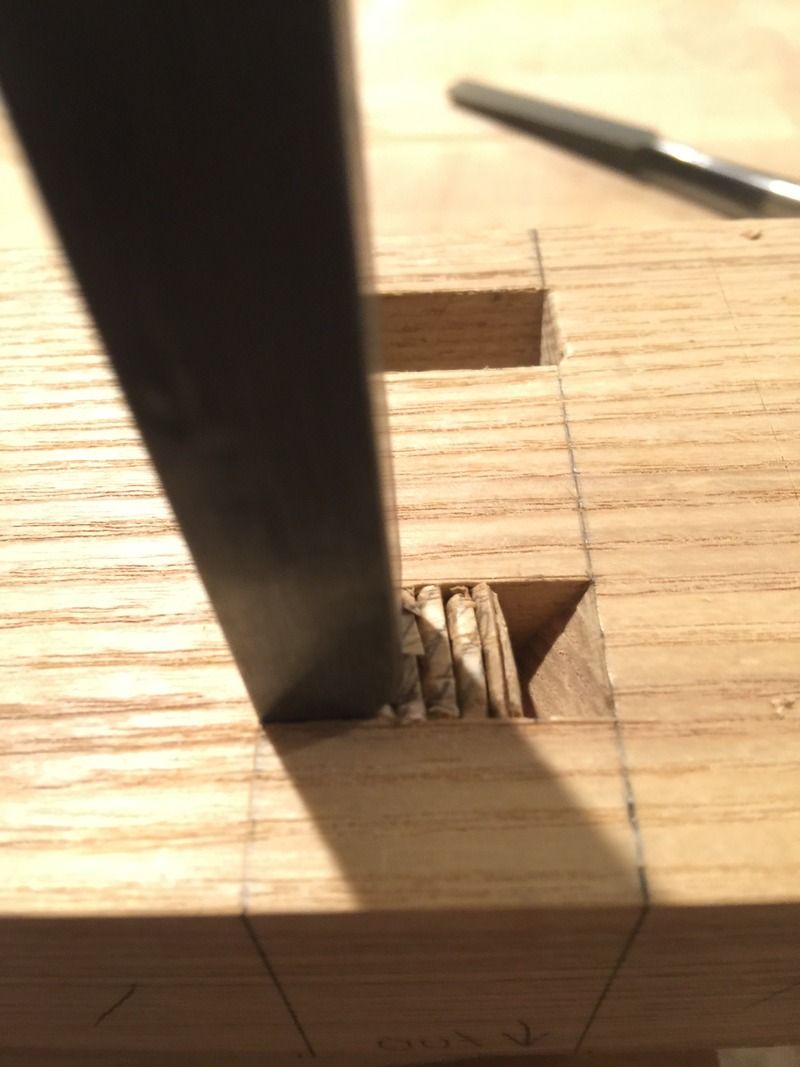
Rinse and repeat to lower the floor further and then I flip it around to cut the opposing side. This will leave a triangle of material jutting out from the wall....now I chop this out in larger cuts because I want the material to remain supported and do not want to break out a portion of the wall. The final cut might be 3/16"~ or so this cut is tough but it will shear the material clean from the wall if done correctly;
That is before and here is after;
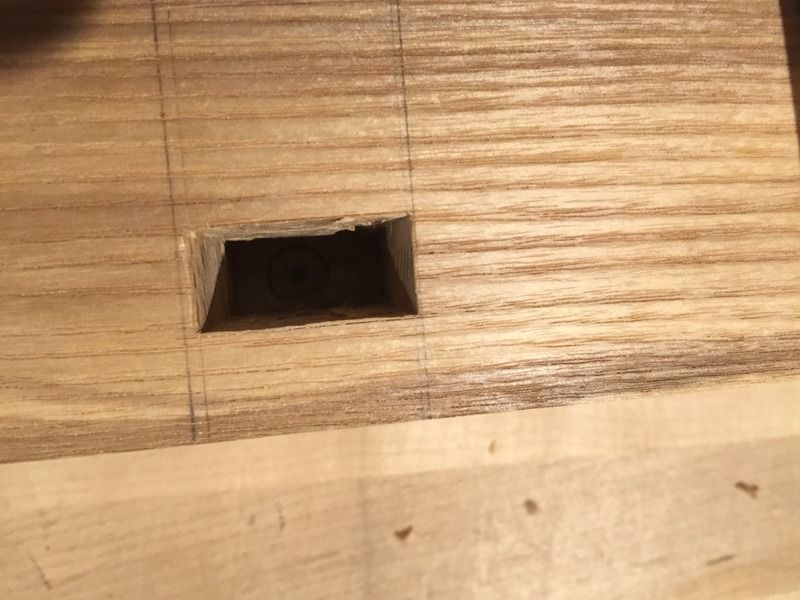
Notice how all of my lines are still intact. My next step is to cut the slope in the sides of the mortise which allow room for wedges. I do this with a Chu-tataki nomi because the handle is longer, giving me a better look at whats happening near the bottom exit. I do not chop clear through, but leave a small ledge and then follow up with a paring chisel. I pare the slops flat and then pare the sides flat and to my line.
If you chop clear through you run the risk of making the mortise wider than planned, the tenon will be loose in the hole and when the wedges are driven in you will run the risk of splitting the tenon.....so, dont do that.
Here is the leg joinery, this is a modified version of the dovetails Roubo details for his workbench. I've always disliked long plain sliding dovetails because I find them to either be too tight or too loose, and so I've decided to cut a slope on these for a wedging fit.
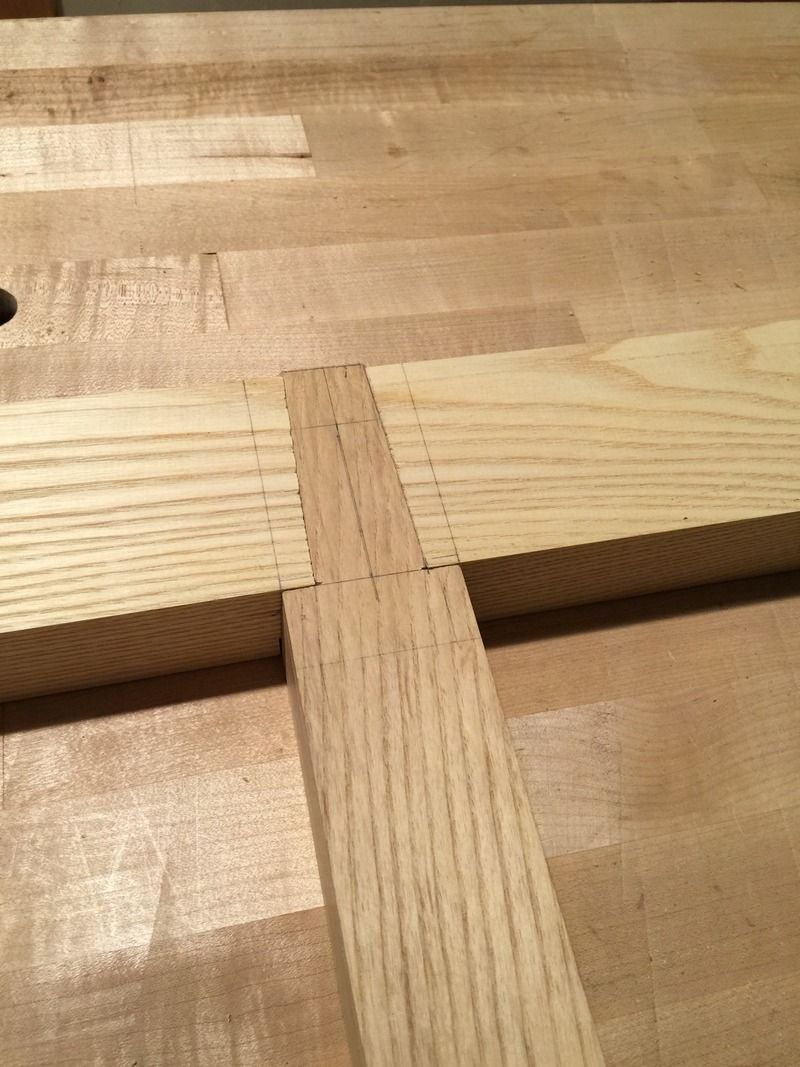
So far, without glue these are rock solid, I've clamped them into a vise and used them as a lever and they're strong, resisting my prying attempts very well.
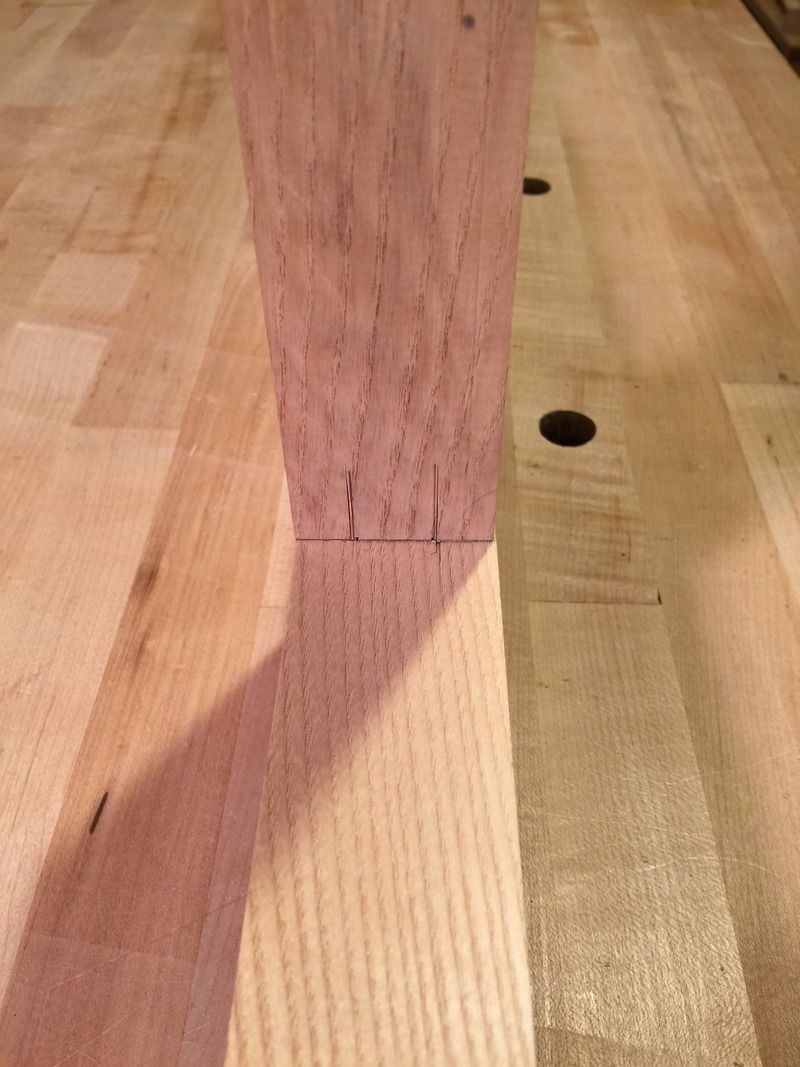
Here is the back side, please ignore the layout on the leg, but the layout on the beam will be cut soon. Those will be receiving the crossmembers with shachi pins. The legs will be so short that they do not require additional support to resist splaying, instead the long side beams are in need of support to resist twisting when a load is applied to the center of the bed, that is the goal of these crossmembers.
I did manage to get some mortising done
First round of chopping toward the hole, these steps get progressively smaller as I approach the opposing edge

I then move to the opposing edge of the hole and chop, this is usually two chops and the bevel is facing the hole.

Scoop out the waste, I use a smaller chisel to do so, the entire bit of waste comes out in one scoop; I believe also that a bottom clearing chisel will work for this.

Here is the result at this point

Next I cut the slope, bevel toward the hole, At this point I'm beginning to check my work for square and ensure that my eyeball is well tuned.

Rinse and repeat to lower the floor further and then I flip it around to cut the opposing side. This will leave a triangle of material jutting out from the wall....now I chop this out in larger cuts because I want the material to remain supported and do not want to break out a portion of the wall. The final cut might be 3/16"~ or so this cut is tough but it will shear the material clean from the wall if done correctly;

That is before and here is after;

Notice how all of my lines are still intact. My next step is to cut the slope in the sides of the mortise which allow room for wedges. I do this with a Chu-tataki nomi because the handle is longer, giving me a better look at whats happening near the bottom exit. I do not chop clear through, but leave a small ledge and then follow up with a paring chisel. I pare the slops flat and then pare the sides flat and to my line.
If you chop clear through you run the risk of making the mortise wider than planned, the tenon will be loose in the hole and when the wedges are driven in you will run the risk of splitting the tenon.....so, dont do that.
Here is the leg joinery, this is a modified version of the dovetails Roubo details for his workbench. I've always disliked long plain sliding dovetails because I find them to either be too tight or too loose, and so I've decided to cut a slope on these for a wedging fit.

So far, without glue these are rock solid, I've clamped them into a vise and used them as a lever and they're strong, resisting my prying attempts very well.

Here is the back side, please ignore the layout on the leg, but the layout on the beam will be cut soon. Those will be receiving the crossmembers with shachi pins. The legs will be so short that they do not require additional support to resist splaying, instead the long side beams are in need of support to resist twisting when a load is applied to the center of the bed, that is the goal of these crossmembers.

Who is online
Users browsing this forum: No registered users and 43 guests