Bed Build
- durbien
- Sweeper of Floors, Maker of Tea
- Location: Southern CA
Post
Re: Bed Build
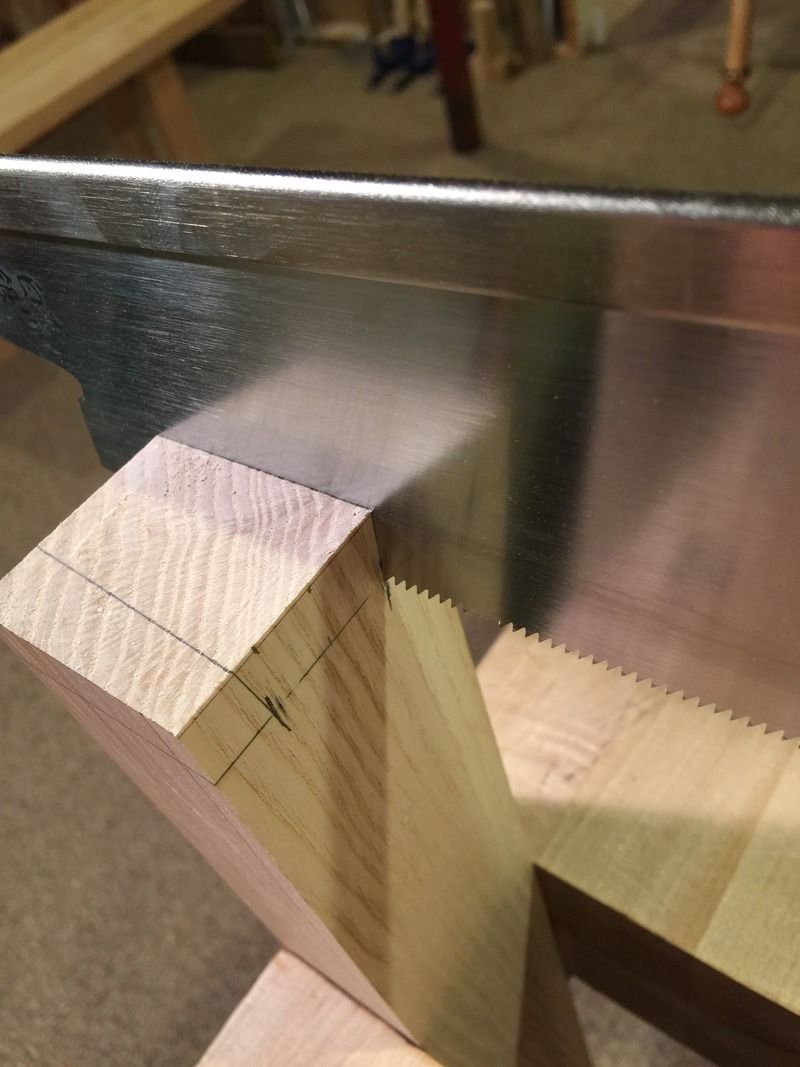
Your work speaks for itself, but I have to ask - if you're going to pare anyway, why not just drill the whole thing out? Unless you just enjoy chopping rather than drilling (fair enough).
-
Brian

- Deshi
Post
Re: Bed Build
depends on the mortise, sometimes I'll drill two holes then saw out the center with a bowsaw and pare the waste, but generally I prefer this approach.
 alt.jpg "5")
-
Brian
- Deshi
Post
Re: Bed Build
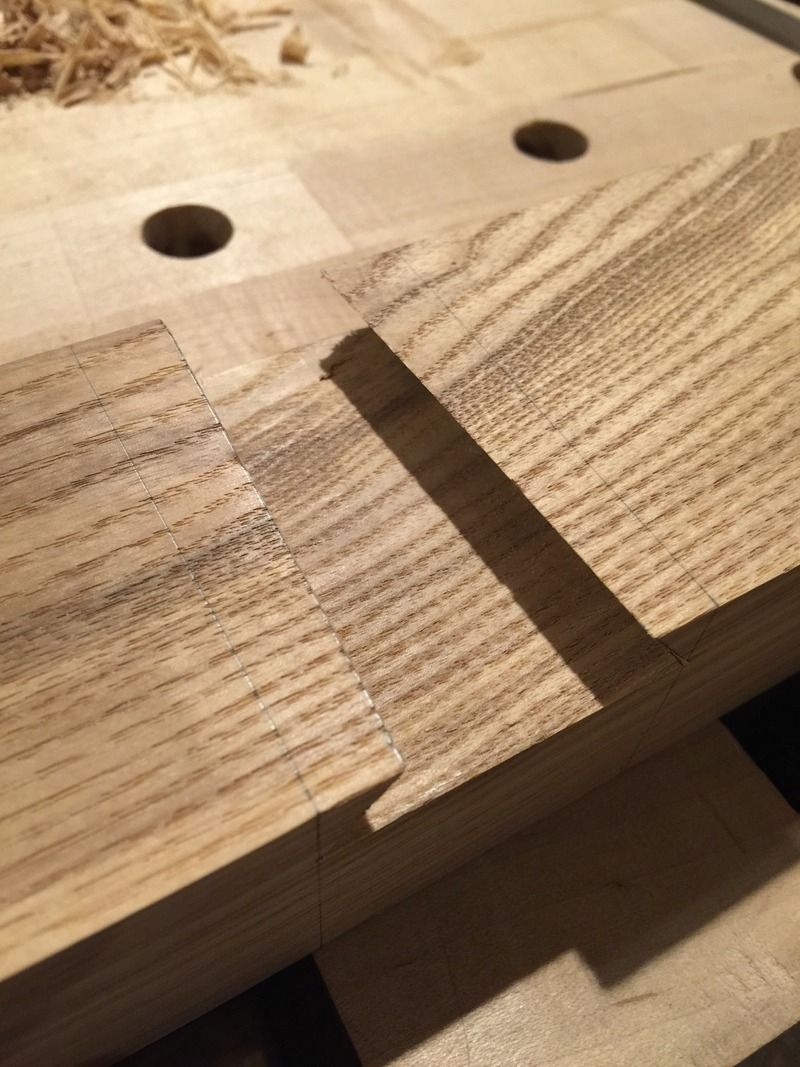
Here is the cutout on the front of the beam;
This is tapered along the sides, but not along the length.
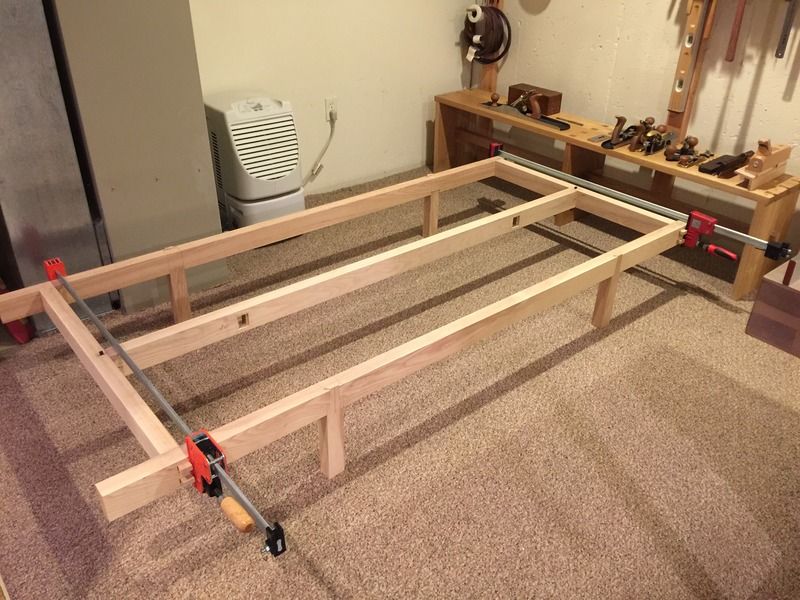
Now standing on it's own and allowing me to test the strength of various parts in real load. Once the crossmembers are in I should have a better picture of how strong the entire assembly is, but so far I'm happy. I am debating a center leg, I have been trying to avoid it, but if the crossmembers do not remove most of the flex in the center beam I will build a center leg. The beam can carry my weight dead center, which realistically is something that it would never have to do with a mattress on the bed, but I prefer to overbuild that risk a cracked beam down the line a bit.
Cutting the tapered sliding dovetails terminating the ends of the crossmembers.
This is tapered along the sides, but not along the length.

Now standing on it's own and allowing me to test the strength of various parts in real load. Once the crossmembers are in I should have a better picture of how strong the entire assembly is, but so far I'm happy. I am debating a center leg, I have been trying to avoid it, but if the crossmembers do not remove most of the flex in the center beam I will build a center leg. The beam can carry my weight dead center, which realistically is something that it would never have to do with a mattress on the bed, but I prefer to overbuild that risk a cracked beam down the line a bit.

Cutting the tapered sliding dovetails terminating the ends of the crossmembers.


-
Jon B

- Sweeper of Floors, Maker of Tea
- Location: Brooklyn, NY
- djwong
- Deshi
- Location: Cupertino, CA
Post
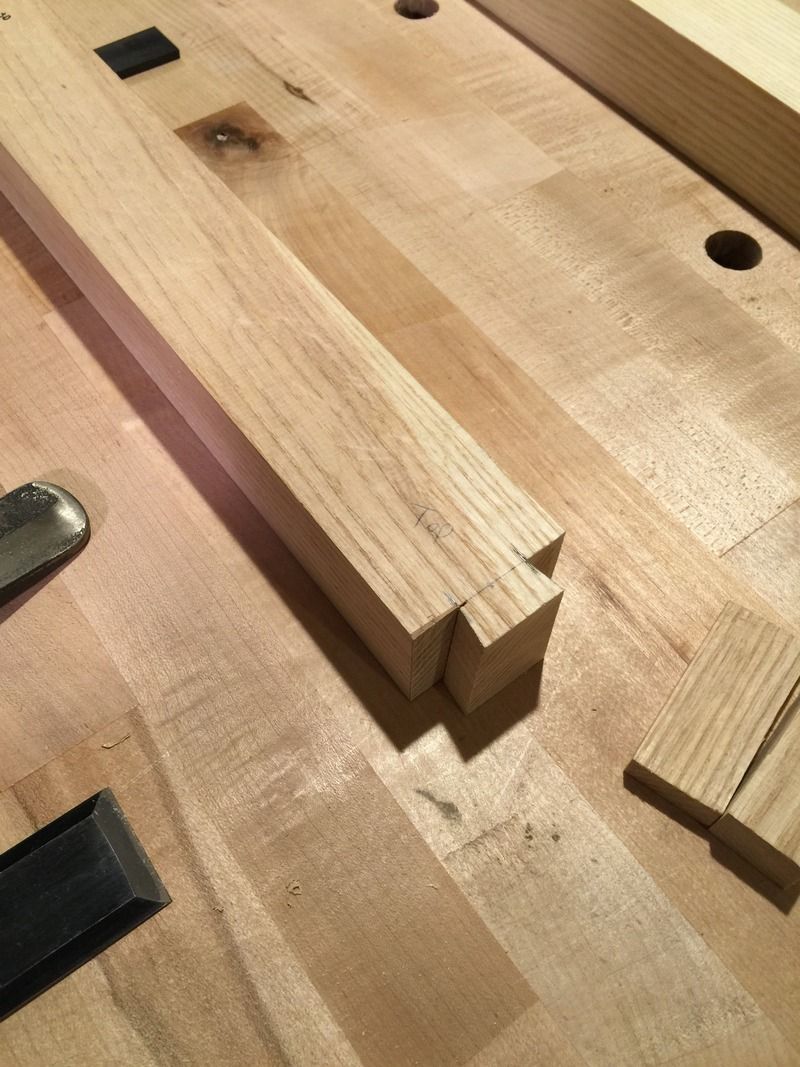
The cuts along the female dovetail sides is remarkably clean. Looks like you splits the pencil line. How did you clean out the acute angle portion? Did you saw the inside angles or somehow use the side rebate plane?
David
Re: Bed Build
Brian,Brian wrote:Here is the cutout on the front of the beam;
This is tapered along the sides, but not along the length.
The cuts along the female dovetail sides is remarkably clean. Looks like you splits the pencil line. How did you clean out the acute angle portion? Did you saw the inside angles or somehow use the side rebate plane?
David
-
Brian
- Deshi
Post
Re: Bed Build
Thank you both!
David, those are actually right off the saw. I had one that needed a little work and so I just went in with a paring chisel and knocked down the belly. For these joints I planned it so that all of the adjustment would be in the leg rather than the receiver since it's easier to work on the leg, then once the fit was close and I could get about 1/4" from seated I used a mallet to see if they would seat.
At that point I removed them and adjusted the shoulders and then returned to seat them again. One wonderful thing about a compression fit is that it will close minor inconsistencies without much issue.
Who is online
Users browsing this forum: No registered users and 42 guests