Page 7 of 9
Re: Bed Build
Posted: Mon Jul 06, 2015 2:48 pm
by Evans
Brian wrote: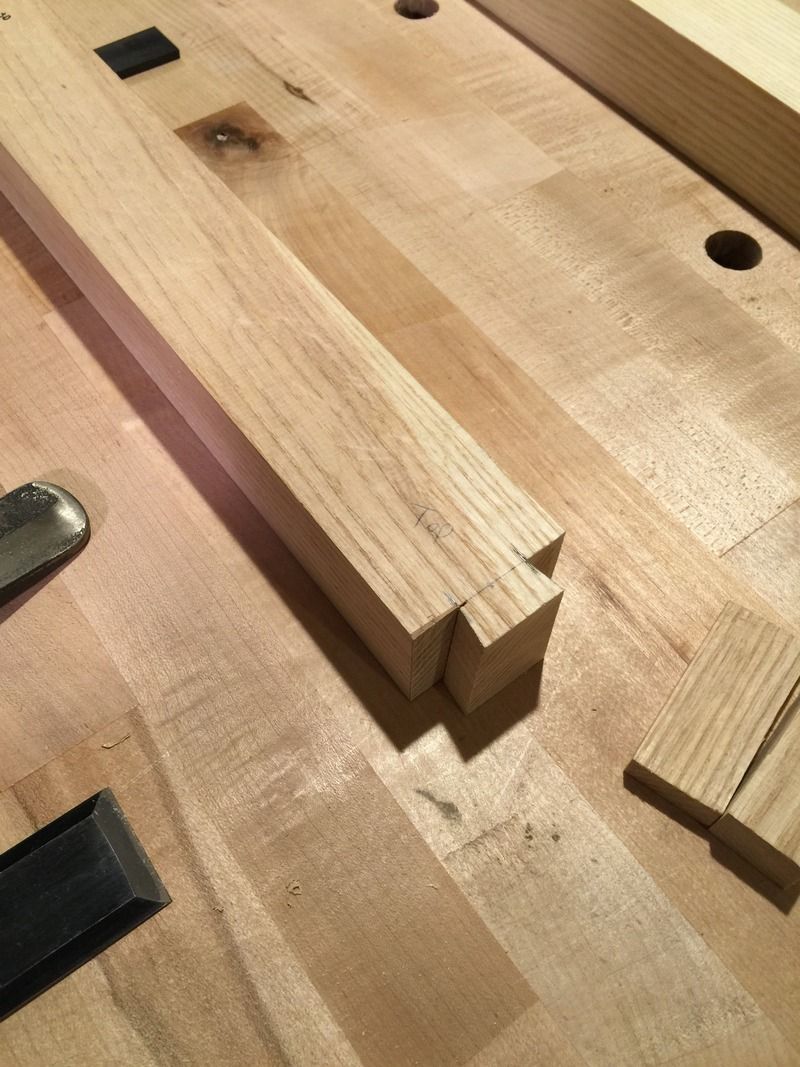
Dude, excellent work on the joinery, but you're making me uncomfortable with that bevel-up chisel resting on your workbench. Sorry if that comment is out of bounds for the forum, but seriously, I have to close this window now.

Re: Bed Build
Posted: Mon Jul 06, 2015 4:46 pm
by Brian
I dont mind, and thanks for the comments on the joinery. With regard to the chisel....I can hire a staff member to hold them while not in use....but those wages add up.
Re: Bed Build
Posted: Wed Jul 08, 2015 9:26 pm
by Brian
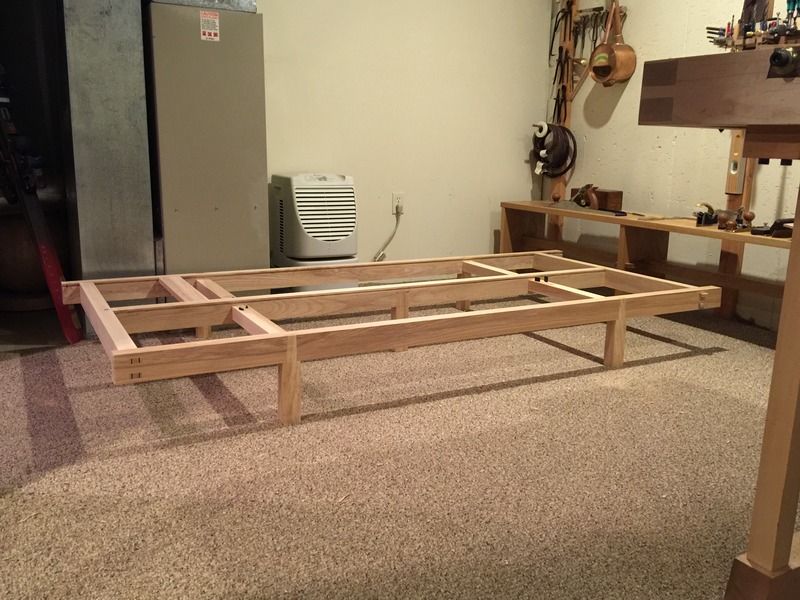
Moving along, not as many photos of the process this time around, I've been working like hell to get everything wrapped up....since very soon it needs to be put to use;
Cutting the bridle joint for the center support leg. I decided after some testing to add this leg. I could probably have done without but no need to risk a cracked joint after a few years of use to save a short period of effort.
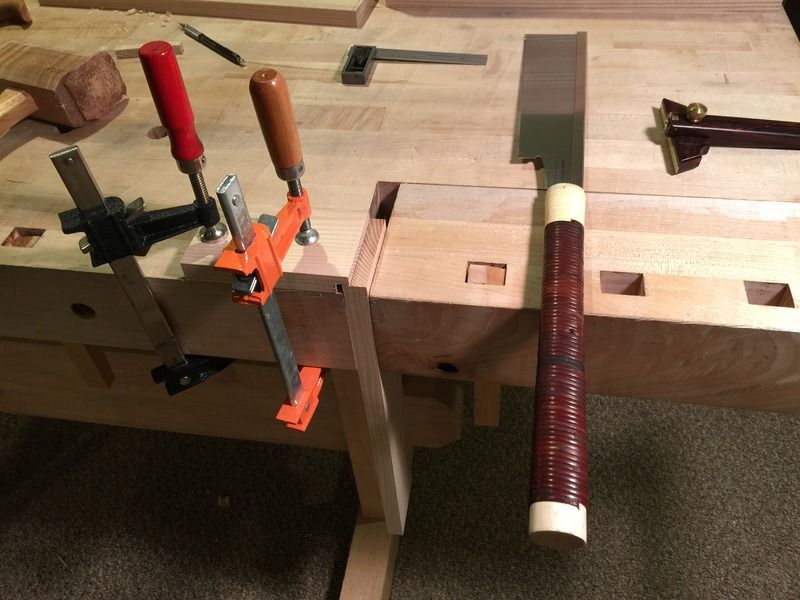
Then onto cutting the rabbets to house the slats. I'm amazed at how sturdy these are in use at only 3/16 depth. I can stand on one slat right in the center and they do not flex significantly.
I'm able to seat and finish two corner joints, leaving the opposing two able to be opened to allow the slats to fall in. But that left side is what the finished corner joints will look like;
In order to leave this so that is can be broken down in the future I decide to glue the wedges only. Removing them would likely be a real PITA but still considerably easier than fully glued joints
A very minor gap which will be filled before I apply finish.
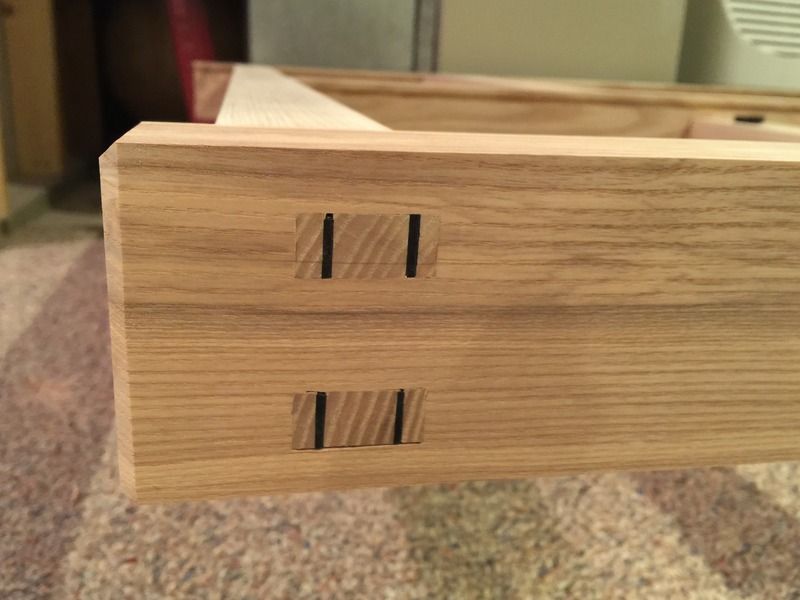
Finished leg joinery. I'm very happy at how strong these joints are and how securely they seat due to the taper.
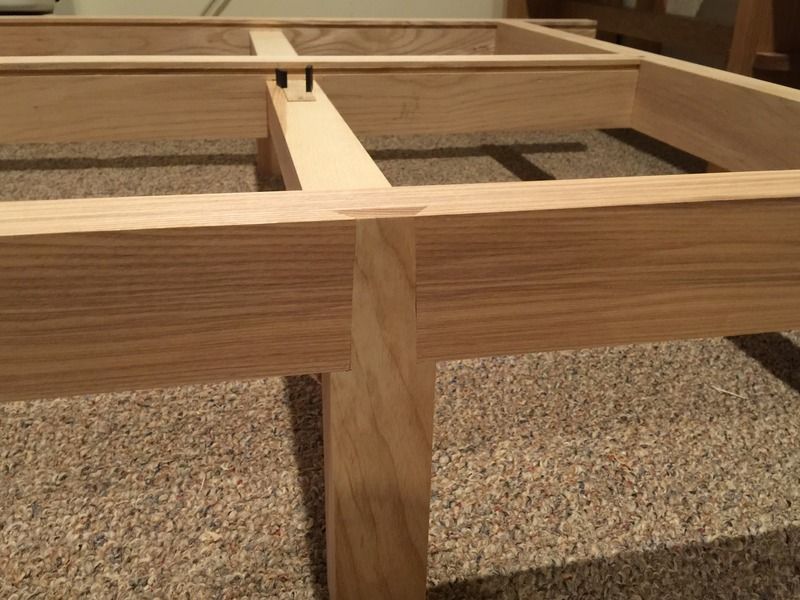
Close up of the inside of the leg, the crossmembers are terminated into side beams with tapered dovetails and also seen are the rabbets of the legs. These help to maintain the secure feeing of the legs by resisting prying and also help to seat the crossmembers.
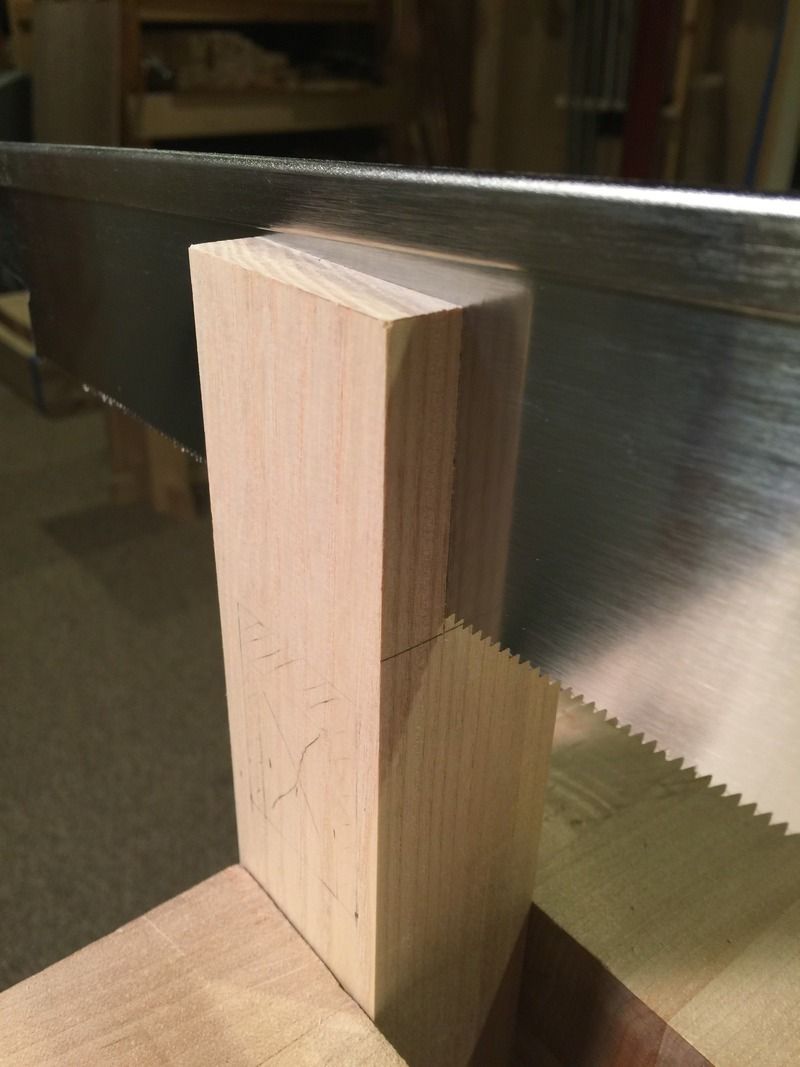
Tusk tenons;

Next I'll be cutting/fitting the slats and it should finally begin to look like a bed.
Re: Bed Build
Posted: Wed Jul 08, 2015 9:43 pm
by Chris Hall
Coming along nicely
Re: Bed Build
Posted: Wed Jul 08, 2015 9:46 pm
by Brian
Thanks Chris!
Re: Bed Build
Posted: Wed Jul 08, 2015 10:30 pm
by Paul Atzenweiler
I am loving the process! It is too bad that you have to cover up all that cool joinery with bedding!
Re: Bed Build
Posted: Wed Jul 08, 2015 10:34 pm
by Chris Pyle
Loving this build along, can't wait to see it completed. Great job.
Re: Bed Build
Posted: Thu Jul 09, 2015 8:05 am
by Brian
Thanks gents! I wish I could see the rod tenons especially with all of the work that went into them, but now that I've built them they should crop up in more of my work.
I've got a dining table I've been wanting to build for quite some time (using the newb as an excuse to get it approved with my wife) which will use a rod tenon....however unsuccessful I have been.
Re: Bed Build
Posted: Thu Jul 09, 2015 8:58 am
by Chris Hall
Paul Atzenweiler wrote:I am loving the process! It is too bad that you have to cover up all that cool joinery with bedding!
ah, but the best joinery is covered up my friend!
Re: Bed Build
Posted: Thu Jul 16, 2015 2:31 pm
by Brian
Here's what my past few days have looked like, and also a setup for crosscutting. I would normally use my router table for this quantity of work, but the option was unavailable due to a sleeping baby upstairs
Oddly enough the sounds of hammering do not wake him up, but I'm hesitant to see if a 3hp Hitachi motor will.
A total of 38 slats, so 152 rip cuts and 152 cross cuts.

Photos to follow of the install. I'm down to pegging the slats into their respective places with bamboo pins.


