Page 1 of 2
Drilling, Sawing, Filing
Posted: Sat Feb 06, 2016 5:22 pm
by SteveM
Hello All,
I'm new here, and thought I'd better post something soon before Chris revokes my membership for not doing so

.
I've been a woodworker using Japanese tools for a long time, a member of other Japanese woodwork forums (I use the name Sheets) and used to leave comments on The Carpentry Way blog, until its seemed that to do so required selling my soul to Google (lately it seems that Anonymous means don't bother - my comments never got submitted. That isn't Chris' fault, the software just seemed to eat my comments and never pass them on for approval). No problem, I still read the blog regularly.
I've moved away somewhat from woodworking, though not totally, my focus the last little while has been on metalwork -ala Japanese sword arts (Chris knows having also studied with Ford Hallam).
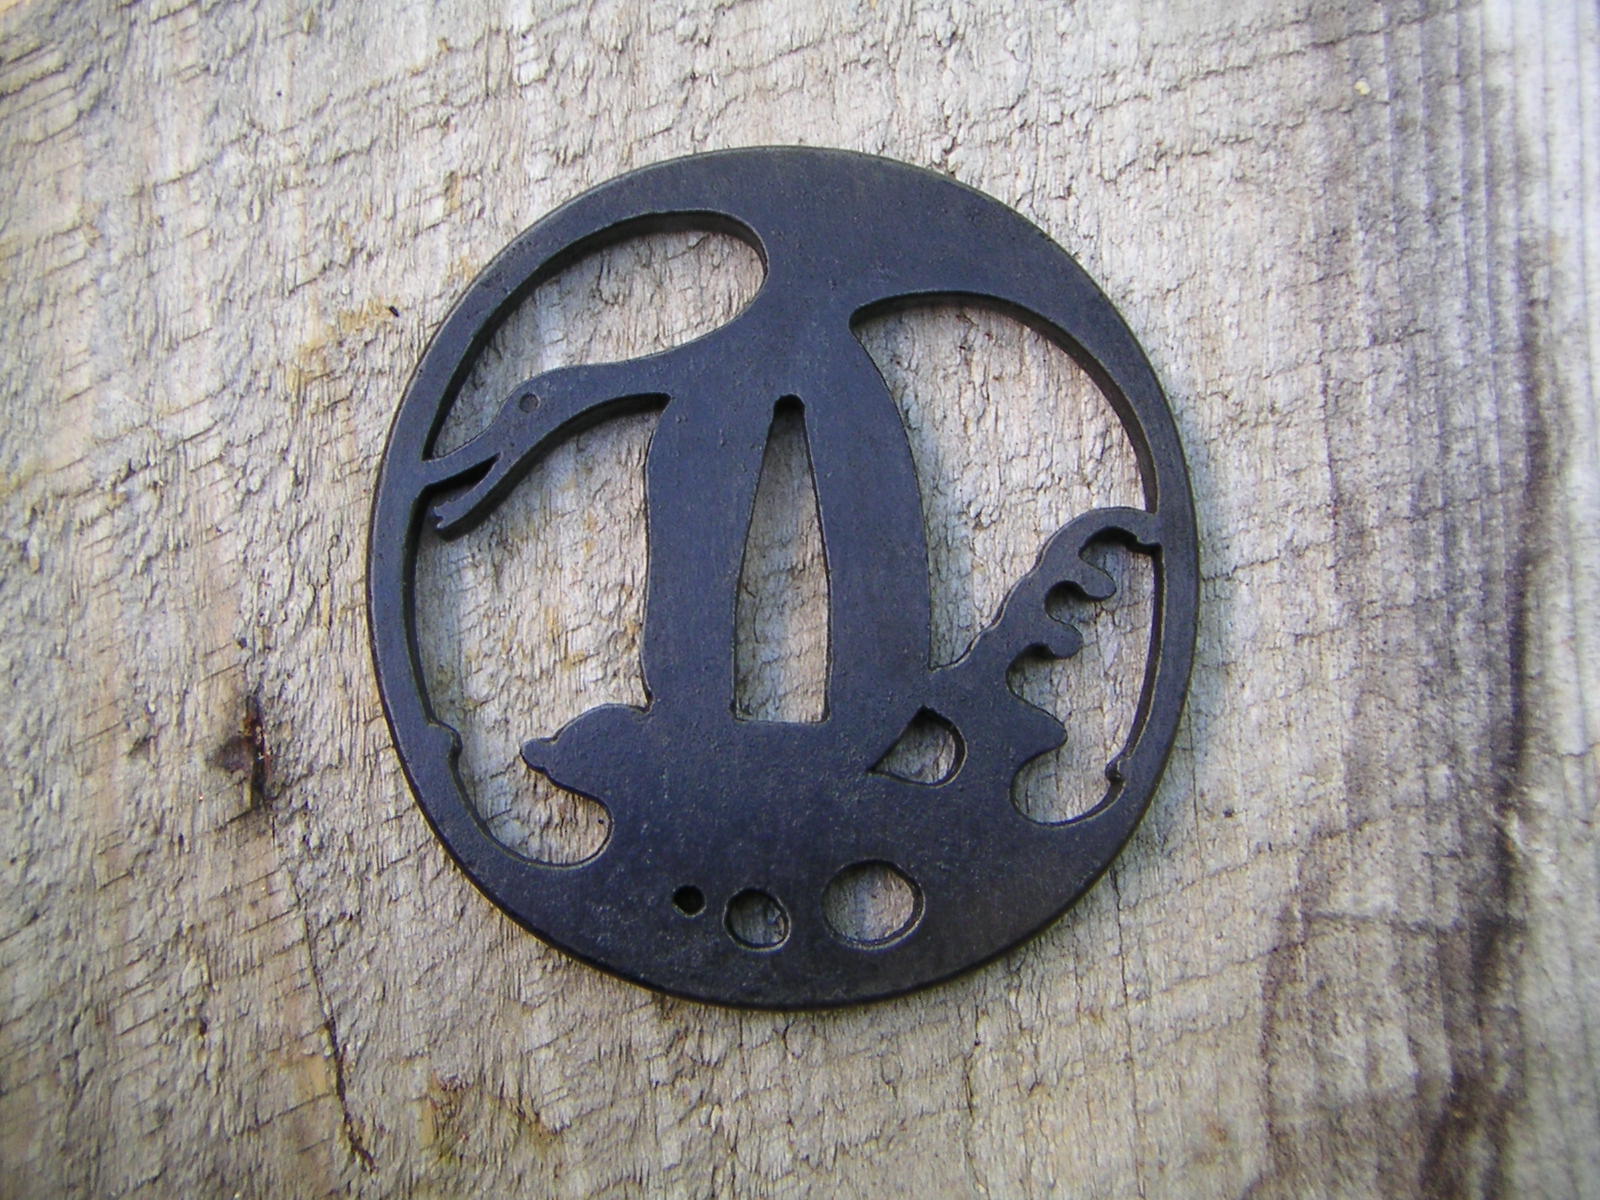
Latest effort (a tsuba):
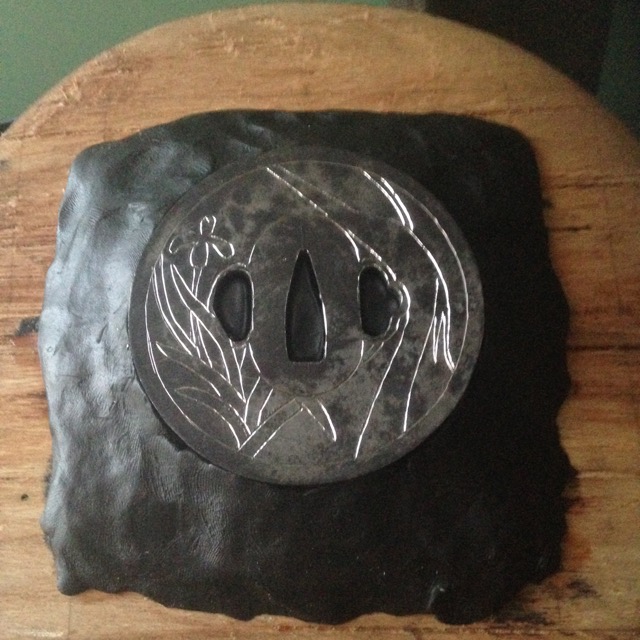
- IMG_0583.jpg (121.04 KiB) Viewed 7136 times
The scribed lines defined by chisel (kebori tagane - new terms for the glossary, Chris?) before cutting out the negative parts to leave a positive silhouette (the drill, saw, file part).
Most of my late woodworking relates to the Japanese sword rebuilding the hilt (tsuka), as here:
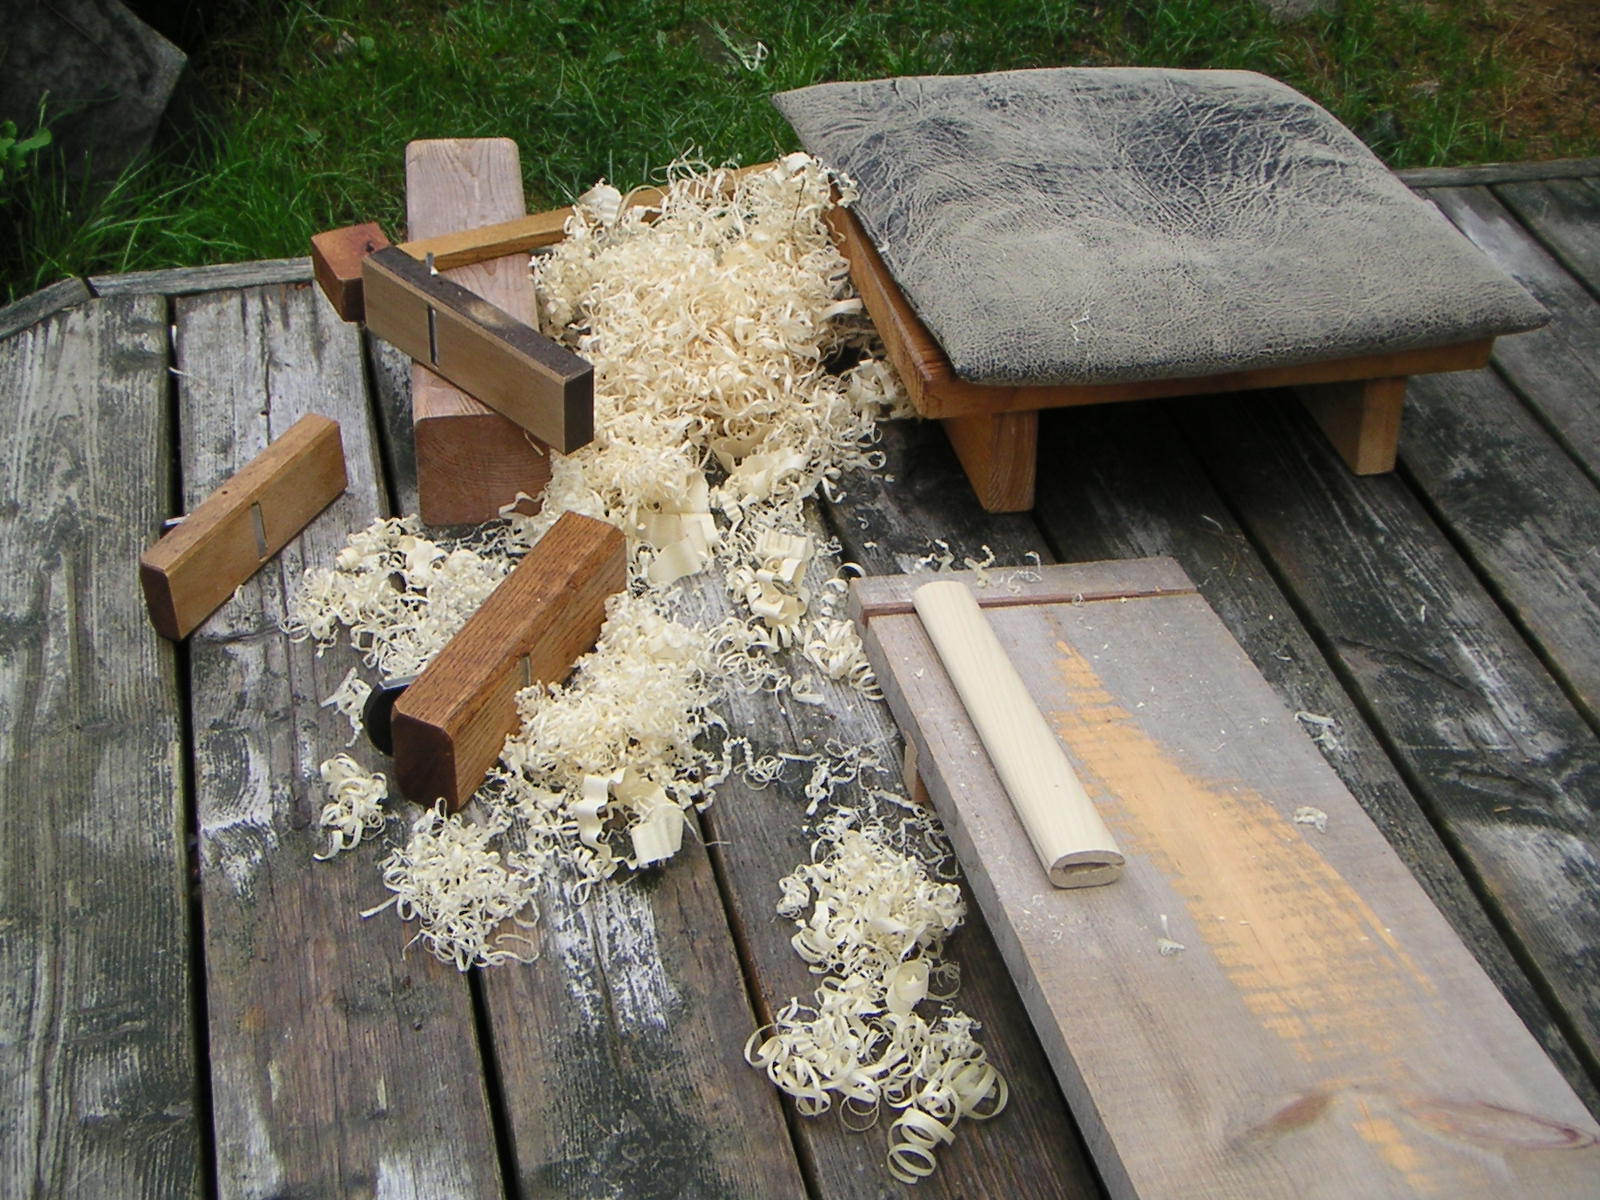
- 06.JPG (356.89 KiB) Viewed 7136 times
Glad to be here,
Steve
Ps., may I just say a collective, "nice work" to all the members who have shown their projects.
Re: Drilling, Sawing, Filing
Posted: Sat Feb 06, 2016 6:33 pm
by Brian
Awesome! Thanks for posting up your work, I am enjoying!
Re: Drilling, Sawing, Filing
Posted: Sun Feb 07, 2016 12:02 am
by dmccurtis
Lovely work. Interesting kanna – the mouths look quite close to the middle of the dai.
Re: Drilling, Sawing, Filing
Posted: Sun Feb 07, 2016 1:31 pm
by SteveM
dmccurtis wrote:Lovely work. Interesting kanna – the mouths look quite close to the middle of the dai.
That's one of these (pic from Japan Woodworker)
- SmallKakuri.jpg (5.92 KiB) Viewed 7111 times
42mm Kakuri which Lee Valley used to carry. Quite the workhorse for me, it works very well. But I see the price is $50 USD now. For that much money, I would opt for something more traditional on eBay.
Re: Drilling, Sawing, Filing
Posted: Sun Feb 07, 2016 4:45 pm
by dmccurtis
Oh I've looked at those. Fifty dollars is a bit much for it, I agree. Is the ura hollow? I've never noticed.
Re: Drilling, Sawing, Filing
Posted: Sun Feb 07, 2016 5:24 pm
by SteveM
dmccurtis wrote:Oh I've looked at those. Fifty dollars is a bit much for it, I agree. Is the ura hollow? I've never noticed.
No, the blade/chip-breaker are not traditional. The blade is not laminated and is of uniform thickness, rather than wedge shaped. The blade is held firm by the screw thumb-wheel of the chip-breaker under the pin. Not sure what type of steel, but doesn't hold an edge as well as white or blue, but being small, takes little time to sharpen. When I bought mine, they were something like $35 Cdn? (maybe even less), so not a bad deal, as even small laminated kanna were quite a bit more expensive new and somewhat harder to come by used (eBay didn't have the selection/quantity they do now). But its a nice size.
Re: Drilling, Sawing, Filing
Posted: Sun Feb 07, 2016 9:31 pm
by Chris Hall
Welcome to the forum Steve.
I remember your handle 'Sheets' from the old Japanese woodworking forum.
Are you making the tsuba for decorative/artistic purposes, or plan to fit it to a blade, or??
Re: Drilling, Sawing, Filing
Posted: Sun Feb 07, 2016 10:40 pm
by SteveM
Chris Hall wrote:Welcome to the forum Steve.
I remember your handle 'Sheets' from the old Japanese woodworking forum.
Are you making the tsuba for decorative/artistic purposes, or plan to fit it to a blade, or??
Yes, that's going back a while - too bad that forum seemed to wither up. There hasn't been much activity on the Australian forum (Japanese hand tools) either. Nice to see some regular activity here (I was lurking a long time before joining).
Some tsuba I've made for mounting; I study Iaido - Japanese swordsmanship, so I've put one on my own sword
this one:
* edit. I should point out that this tsuba is "Basic Tsuba Project #1" over on the Following the Iron Brush forum. Its a good learning project for those new to the craft.
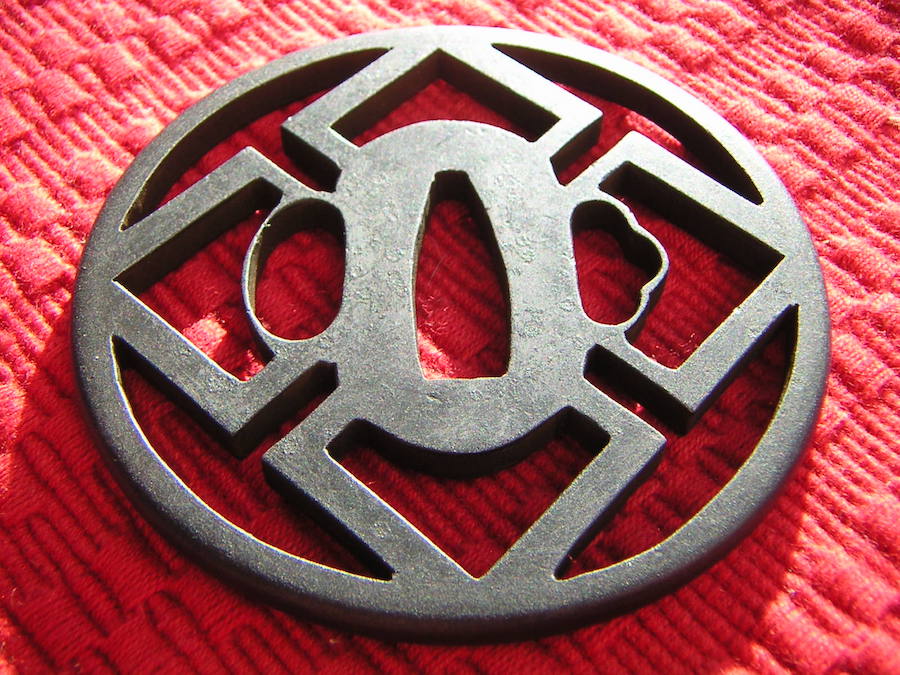
- Repat1.jpg (148.75 KiB) Viewed 7083 times
and also given one to my sensei
this one, which I've since done a better job on the patina:
- PICT0002.JPG (351.54 KiB) Viewed 7083 times
.
I'll probably make more for dojo mates in time. The current one I don't have a plan for yet - might just become another I've made for fun and to gain experience - I'm pretty new at it, which shows. Both woodworking and metalworking are hobbies for me, so I can dedicate as much time to either as I feel like. Plus, I'm retired, so have lots of time for hobbies these days

.There's talk of another tsuba course this year in Hamilton, ON (in May following Ford's courses in New Hampshire) which I hope to attend (nothing beats having a Master's tutelage to speed up the learning process).
Thanks for the welcome,
Steve
Re: Drilling, Sawing, Filing
Posted: Wed Mar 02, 2016 10:01 pm
by SteveM
Progress on the tsuba. Most of the shaping is complete, now I need to clean some lines and get ready for texture/patina.
Re: Drilling, Sawing, Filing
Posted: Thu Oct 27, 2016 7:04 pm
by SteveM
It's been a while since I posted anything here - I've been working on this and a couple of other tsuba as well - I'm just pretty slow. Anyway, I decided to try and add some colour contrast to this tsuba by inlaying some brass wire. I'm not good at this sort of thing (yet), so needed to make some practice pieces first. At this stage, the wire is just inlayed and brought almost level with the surface using chisel and scraper, and then roughly ground with stones. I'll polish it smoother later. The tsuba had been tumbled in a can of wet rocks to impart a texture to the surface, so there remains remnants of rust and staining which eventually will need to be cleaned off before I try the patination process (something I'm also not good at yet

) Once completed, it should be easy to see the colour of the brass against the (hopefully) dark brown/black steel.