Page 1 of 3
Views
Posted: Sat Jan 28, 2012 4:05 pm
by Chris Hall
Here are some pictures of the first project:
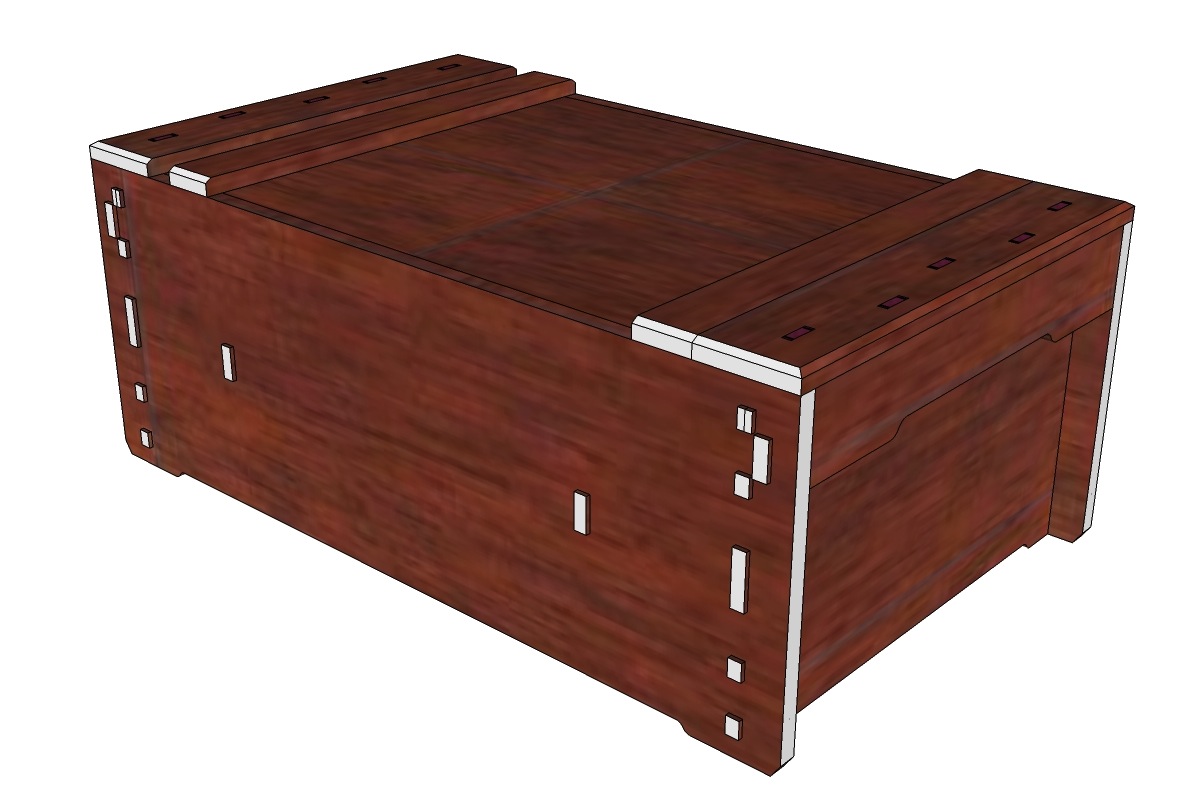
- 道具箱 assembled view 3.jpg (124.98 KiB) Viewed 7248 times
Underside:
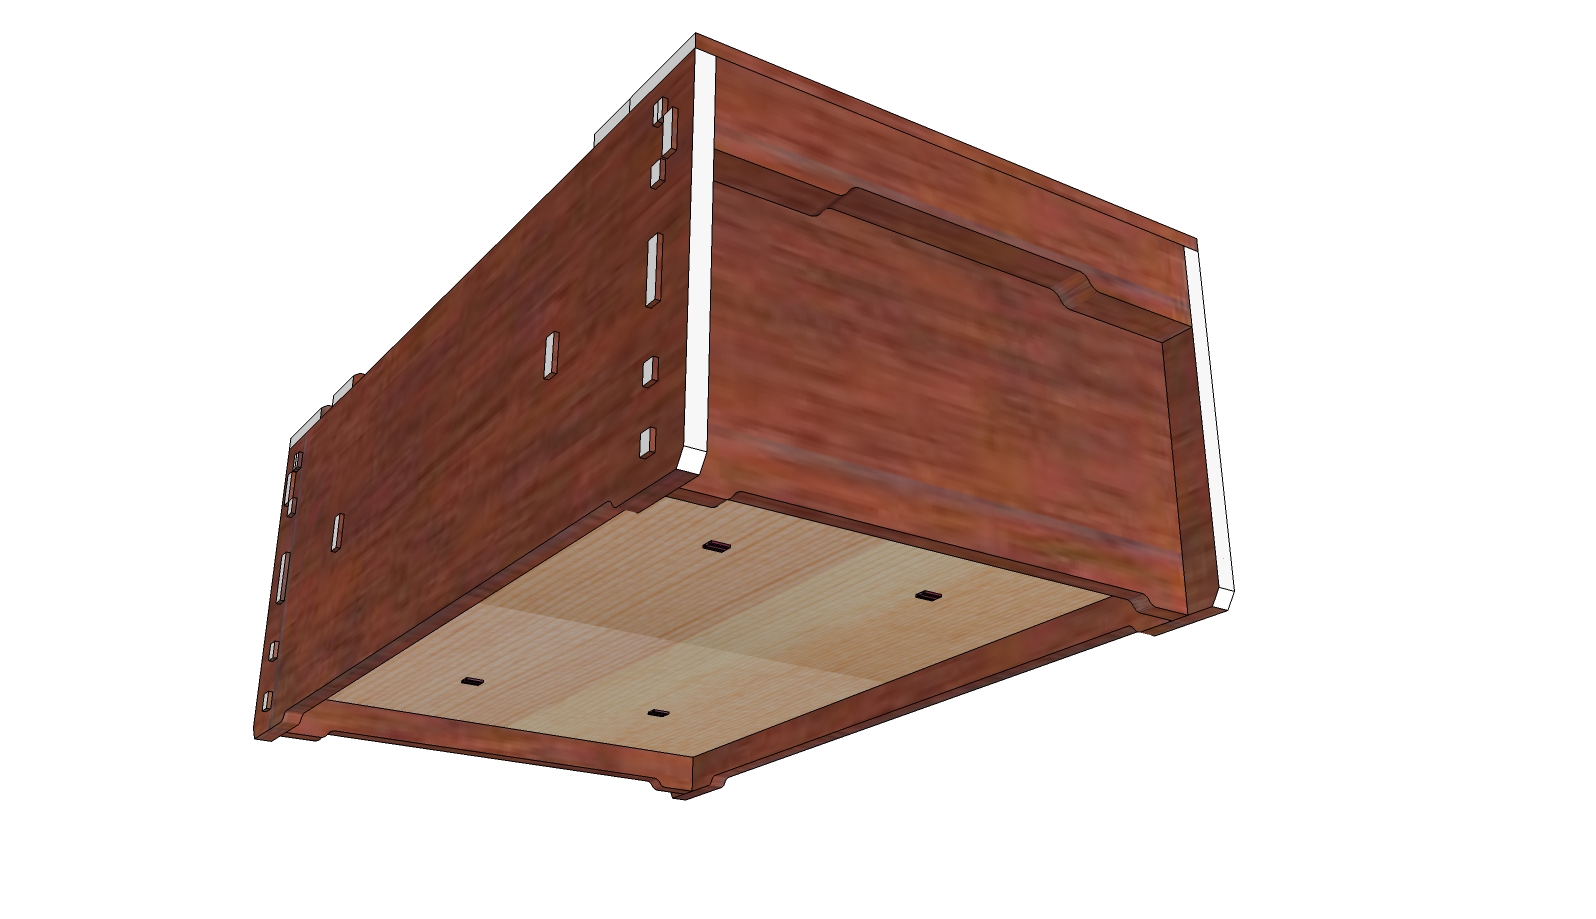
- 道具箱 assembled view 4.jpg (325.49 KiB) Viewed 7248 times
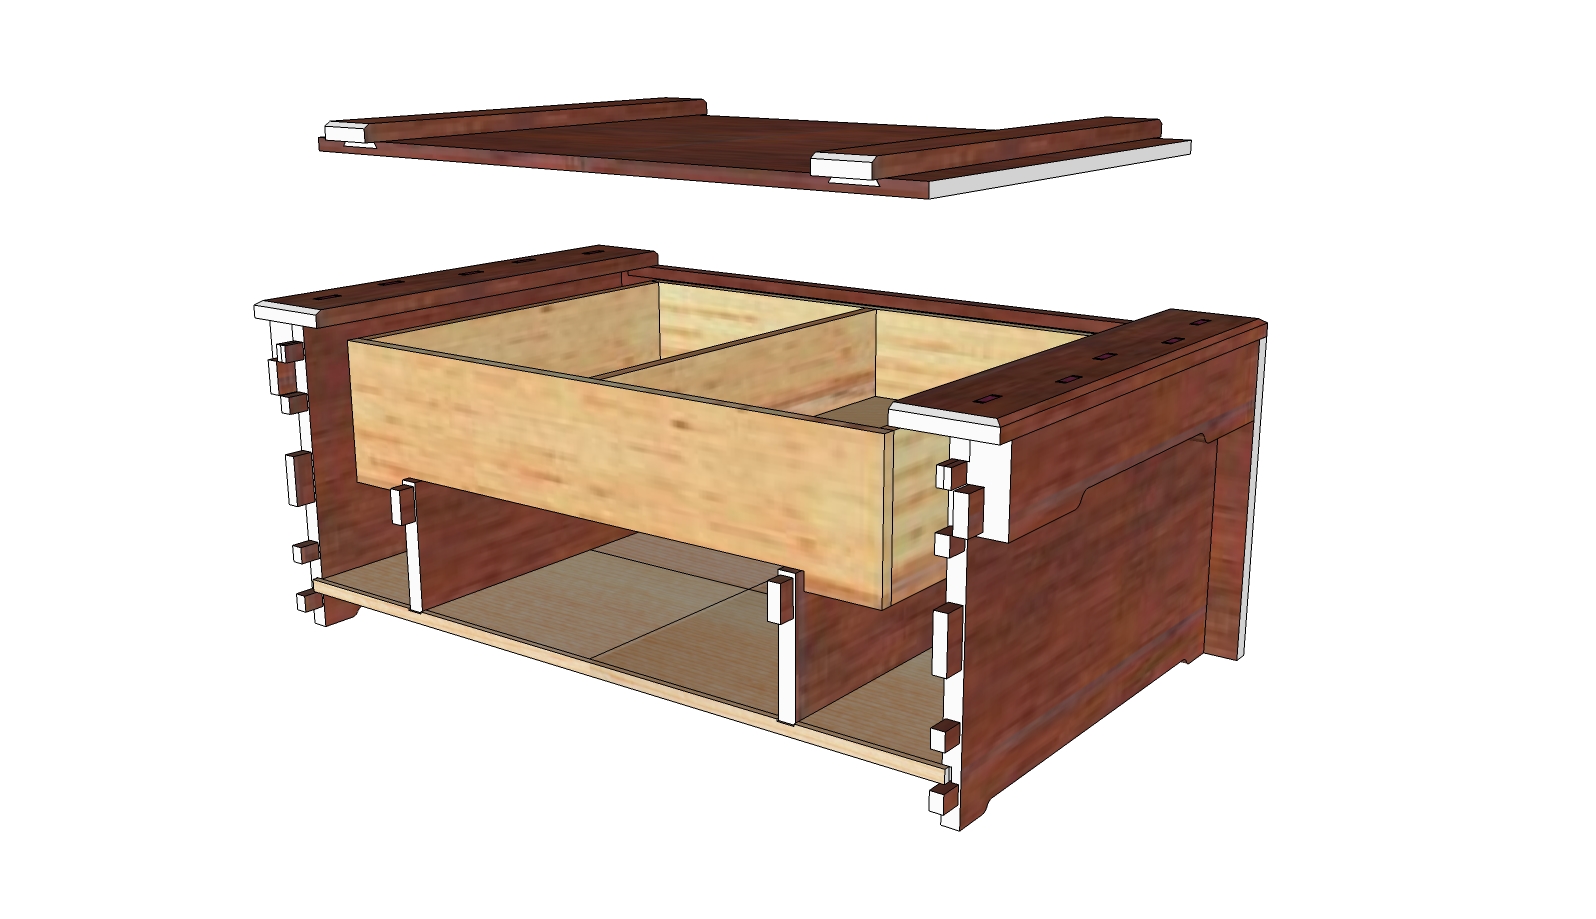
Lid off and interior drawer out:
- 道具箱 assembled view 5.jpg (427.22 KiB) Viewed 7248 times
Cutaway view - the configuration of the internals, along with overall dimensions, will be up the individual maker:
- 道具箱 cut away view.jpg (346.53 KiB) Viewed 7251 times
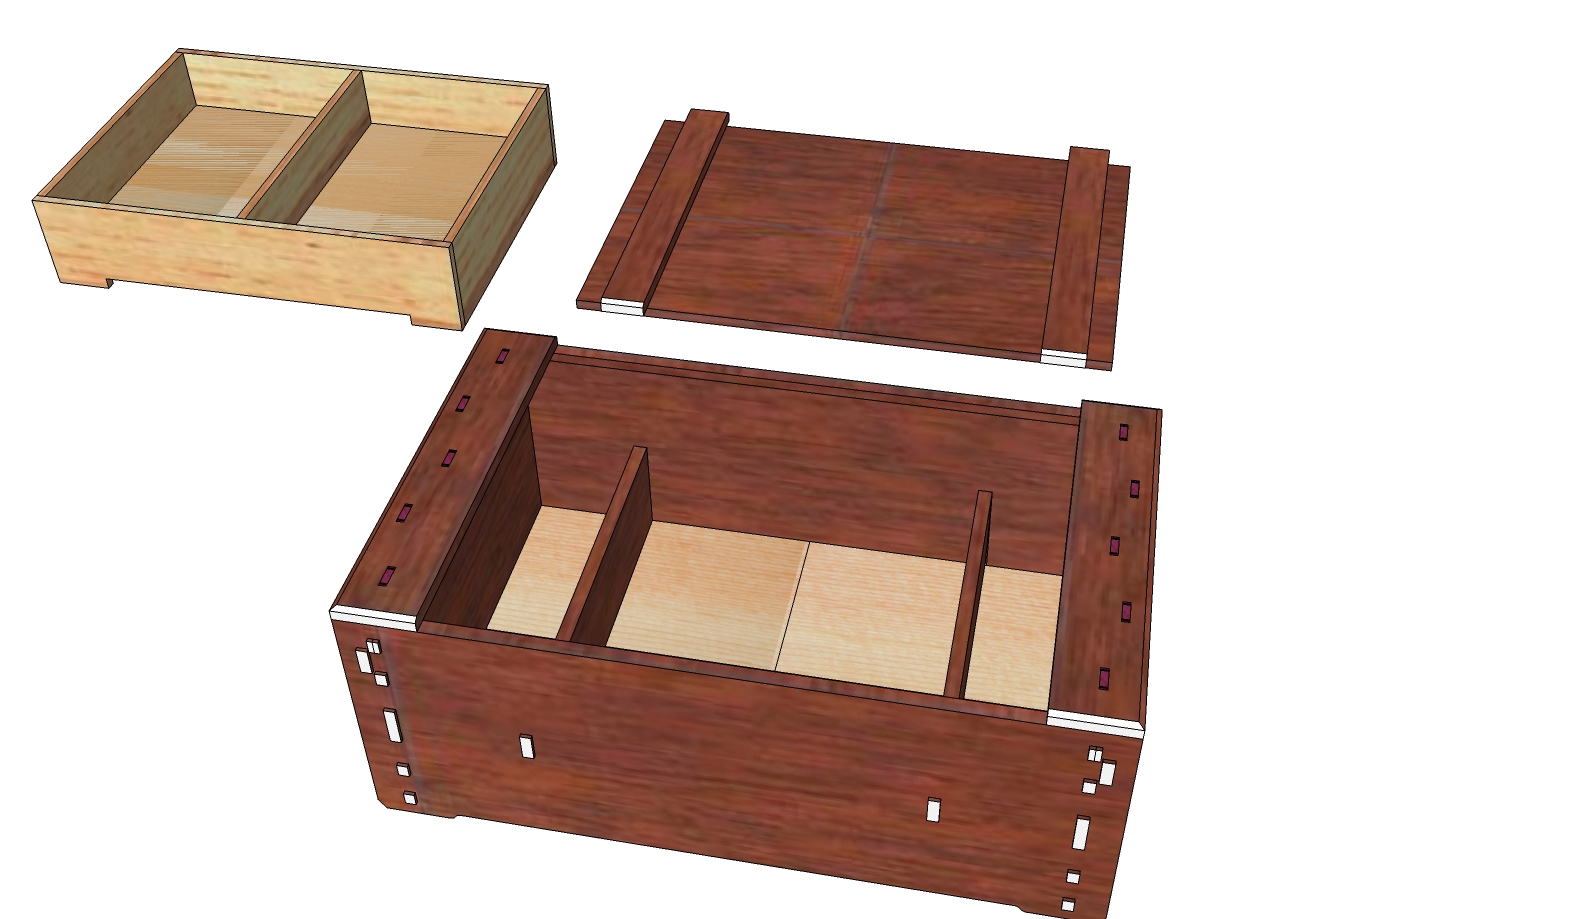
And a couple of exploded views, one from above:
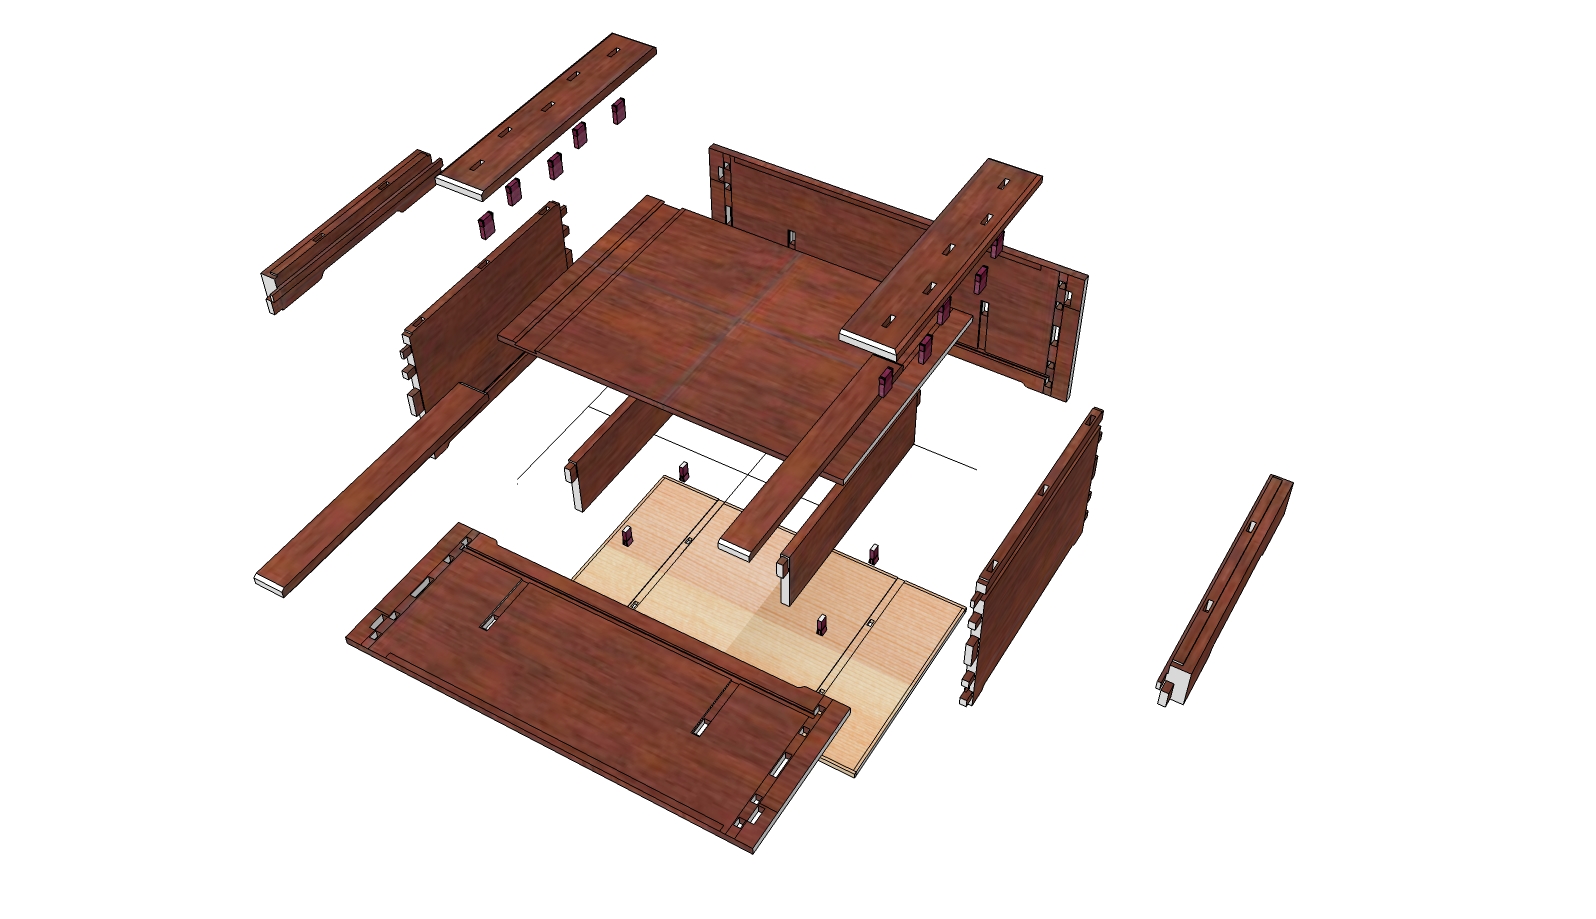
- 道具箱 exploded view.jpg (380.13 KiB) Viewed 7251 times
And one from below:
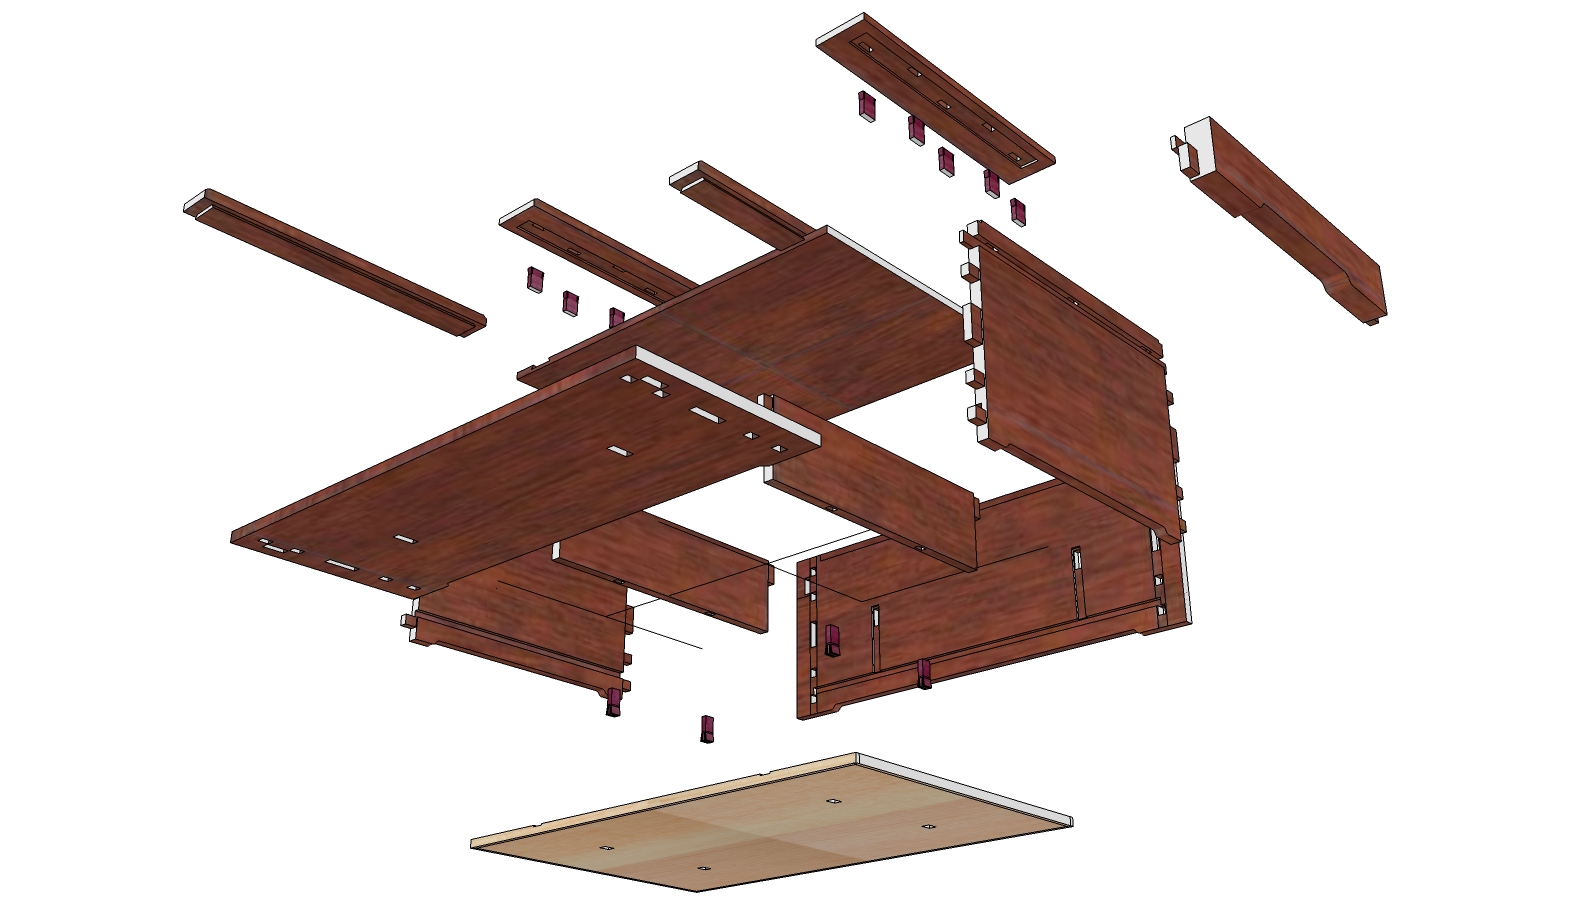
- 道具箱 exploded view 2.jpg (370.96 KiB) Viewed 7251 times
I guess it isn't the most 'basic' starter project, but it is the solution I came up with which allows for exploration of some interesting joinery and a finished box which relies upon that joinery to hold together, rather than glue or metal fasteners.
Re: Views
Posted: Sun Jan 29, 2012 7:37 am
by yanai
Hey Chris,
Looks like a fun build.
Mike
Re: Views
Posted: Sun Jan 29, 2012 12:58 pm
by Chris Hall
Yes, I'm looking forward to it!
Re: Views
Posted: Wed Feb 01, 2012 1:42 pm
by parole.sprekate
Hi Chris,
will a sketchup file be made available? It would be interesting to explore in depth the model and its measures.
Thanks
Re: Views
Posted: Wed Feb 01, 2012 4:31 pm
by Rogu
What does everyone put in their tool box?
Mine will hold the essentials or what I think are essentials:
Planes: nagadai, shiage, dai noshi, kiwa-kanna, mentori kanna, ari-sakura kanna, hibakura, waki-dori
Chisels: 5 sizes of oiire nomi, 3 sizes of tsuki-nomi
Saws: 210mm ryoba, osae-hiki, azebiki
Striking: tapping out hammer, genno, mallet
Layout: shirabiki, marking gauge, morticing gauge, 3 sliding bevels, combination square, double square, 18" ruler, 24" straightedge, winding sticks, feeler gauges, micrometer
Sharpening supplies will be put in a separate box as will specialty planes, chisels, etc..
My planes will be kept in a belly of the box as will the hammers, and the straightedges. The chisels will be in the tray and so will the marking tools. The saws will lay on top of the tray in a canvas holder.
To now let the tool box get too big, I think I will cut some openings in the lower spacers to allow for the straightedges and the nagadai.
I would welcome the thoughts of others for anything I've missed or for alternative storage considerations.
Re: Views
Posted: Wed Feb 01, 2012 8:16 pm
by Chris Hall
parole.sprekate wrote:Hi Chris,
will a sketchup file be made available? It would be interesting to explore in depth the model and its measures.
Thanks
for this project, the sizes of many of the parts will be up to the maker, however for various joinery details I will be providing detailed drawings.
Re: Views
Posted: Wed Feb 01, 2012 8:27 pm
by Chris Hall
Robert, you are precocious. The topic of what goes in the box is going to be the first matter up for consideration, and each maker will have different things they want to store, and thus the internal configurations will vary. This doesn't have to be a tool box either - you could make a box in this pattern to store many things, like a statue, musical instrument, power tool, precious stone collection, etc.
As Robert noted, in designing the box for your needs I would caution against a design built around the idea of having everything but the kitchen sink in the box. You aren't going to enjoy a lugging around a box that, when loaded, weighs 50kg (110 pounds). If you have a lot of stuff, make more boxes. A box for saws would have very different dimensions than one for chisels.
This is the first task in this project - decide what you will put in the box and what the spatial requirements are for those things and how they might be best arranged in the box. The exploded view drawing shows an interior removable tray. My box is going to hold chisels and planes for the job site. Probably I will fit in a few marking gauges, bevel gauges, and so forth to that tray. Your box might be quite different in what it contains, so the removable tray might not be the right choice for you.
The aim of this project, at least as I see it, is not to recreate a mini H.O. Studley tool chest, but to explore Japanese joinery by using this box as a vehicle. If you are daunted by the prospect of the joinery, there is always recourse to the traditional Japanese approach to these boxes: nails. Each maker must decide for themselves what a suitably ambitious chunk of work might be, and if you bite off more than you can chew you may run out of steam, so maker, know thyself!
We'll go step by step and I'll show some alternative ways of putting things together, along with alternative cutting approaches, here and there as seems warranted.
Re: Views
Posted: Thu Feb 02, 2012 9:33 am
by Rogu
Robert, you are precocious
Sorry, jumped the gun again. I just got a little over-enthusiastic.
Re: Views
Posted: Thu Feb 02, 2012 10:07 am
by Chris Hall
Enthusiasm is all good Robert - don't slow down on my account!
Re: Views
Posted: Fri Feb 03, 2012 10:20 pm
by yanai
Chris Hall wrote:parole.sprekate wrote:
for this project, the sizes of many of the parts will be up to the maker, however for various joinery details I will be providing detailed drawings.
Hi Chris,
I got busy again, clearing wood from the old furniture shop before they demo the building. I should be done by the end of this week, so I can start milling some wood for this project. Did you make the detailed drawings available already (and I just missed it), or are they still coming?
Busy is good. Drives me nuts, but good. One good outcome of all this is that I'll be getting some decent wood for free.
Mike