charlie wrote:Can you say something about the slot on the upper outside of the end panel and the corresponding part of the handle that meet and form the "double" tenon on the outside? Aside from creating some interesting woodwork, are these meant to tie these two parts together?
The Japanese tool box is a simple affair with an attractive connection of parts at the end, with the carcase sides overlapping and the handles tucked in under the cap. Trouble is, the portion of the box with the handle and cap coming together is most tricky to resolve without metal connectors. Throw some screws or nails in there and it is quite straightforward - probably why you always see these boxes nailed or screwed together. Knowing that this box was potentially going to carry a fair amount of weight, and that it might even get stepped on or roughly handled at times (hopefully not by me!) led me to consider quite a few different joinery arrangements along the way.
As it turns out, connecting the cap is the crux of the puzzle, and I explored several arrangements before settling upon a solution, including sliding dovetails of various forms and hidden dovetail keys in various arrangements. The way in which the handle is configured is something of a product of a long evolution and is intimately related to the cap and how the cap is attached to the box.
First off, the handles are the means by which the box is likely to be lifted, and are subject to loading in two directions - vertically, and possibly outwards at times. to deal with the vertical lifting load, the strongest joinery solution is to attach the handle to the box's end board with a long rebate of some sort. However, since the handle is shaped with a U-shaped cutout on its lower edge, the rebate can only begin above the height of that cutout. So, the rebate fairly quickly became a tongue. The end board of the box is only 0.5" thick, so the position of the groove on the outside face of the board to accommodate the handle's tongue had to be carefully considered. Ideally the tongue would be somewhere in the range of 1/3~1/2 f the thickness of the end wall of the box, or in the range of 0.1875"~0.25".
While thinking about the placement of the tongue and groove, one also needs to think of a way of strengthening the handle against any potential outward or torsional load when the box is lifted. To counteract such a load, the solution is to place some sort of tenon on the ends of the handle, tenons which engage the long walls of the box. At first I only considered stub tenons, however I knew that the longer the tenon, the stronger it is going to be. I also knew that the handle's tenon had to fit, whether it was through or stub, in and around the existing configuration of tenons on the end boards (and corresponding mortises on the long side boards), and there happen to be two such tenons on the upper end of that board right where the handle was located.
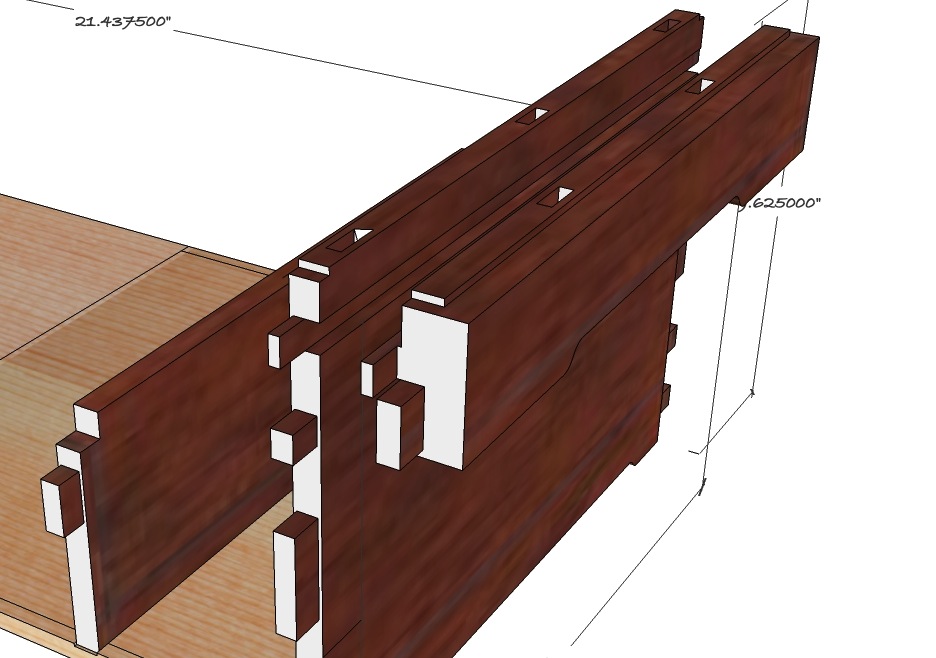
- 道具箱 handle detail.jpg (105.71 KiB) Viewed 6623 times
I hit upon the arrangement of fitting the handle tenons in behind and kitty-corner to the two end board tenons. By having the handle's groove extended, they could add strength as well, and by making the location of the tongue and groove coincide with the existing upper tenon I could somewhat disguise its location. I also thought the arrangement looked aesthetically pleasing. The tongue and groove is the primary component in giving strength to the join of handle to the box, and the location of the handle's tongue can't help but be close in position to the end board's tenons. The tongue needs to be as wide, long, and tall as possible. The solution I came up with was to nestle that handle tongue in alongside the upper tenon on the end board.
HOWEVER, that was then and this is now, and having received this question from Charlie, it got me to walk through the mental thought processes which got me to the solution seen in the above picture. That was great, since walking back through also led me to see things in a slightly new light, and I realized that there is an even better option for this tongue and groove connection. I have now reconfigured the tongue to be
stopped in its groove, rather than carried through, and lowered the tongue at the same time, all of which allows for a full size upper tenon on the end board:
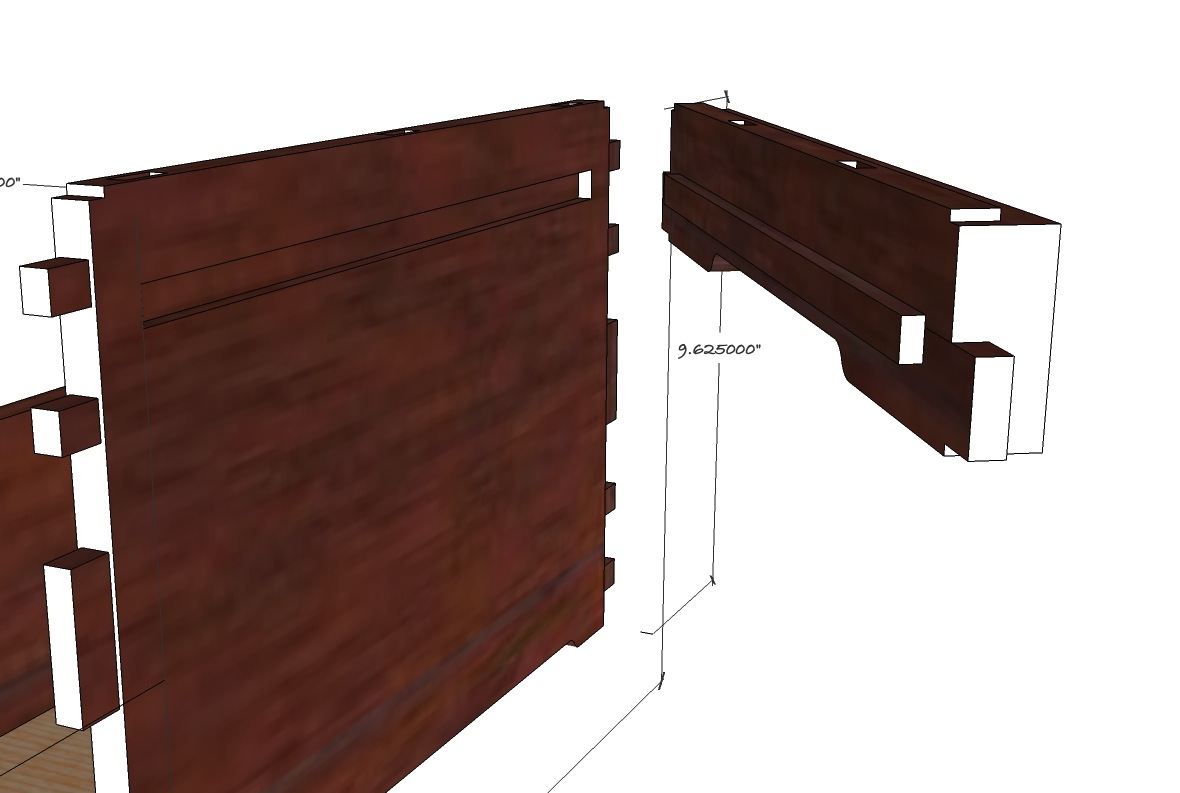
- 道具箱 handle connection improved.jpg (93.3 KiB) Viewed 6623 times
This simplified the cut out at the end of the handle, as there now only needs to be a single tenon. The stopped groove is more difficult to cut out than the through version, however this is a minor issue to solve with a router, which is how I will cut that groove.
One point of note that should be borne in mind:
the end boards of the box carcase are 1/8" (3mm) taller than the long side boards of the carcase.
Another point: the tenons can be glued, or wedged. I plan to wedge mine, and trim them flush.
Here's a close up of the reconfigured handle end, which I have colored in a lighter wood to make the dimensions easier to see:
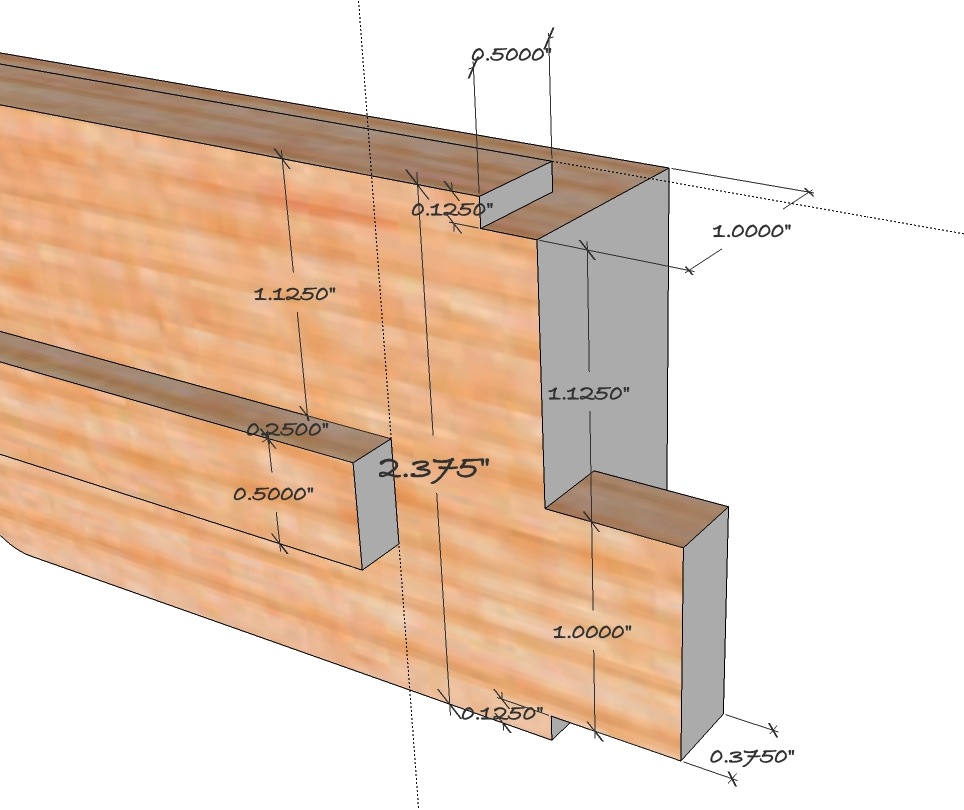
- 道具箱 handle details.jpg (111.97 KiB) Viewed 6623 times
Basically, the stick is 2.375" tall by 1.25" thick, and as long as you need it to be for your box.
With the handle back in place, here is how the end tenon cluster looks:
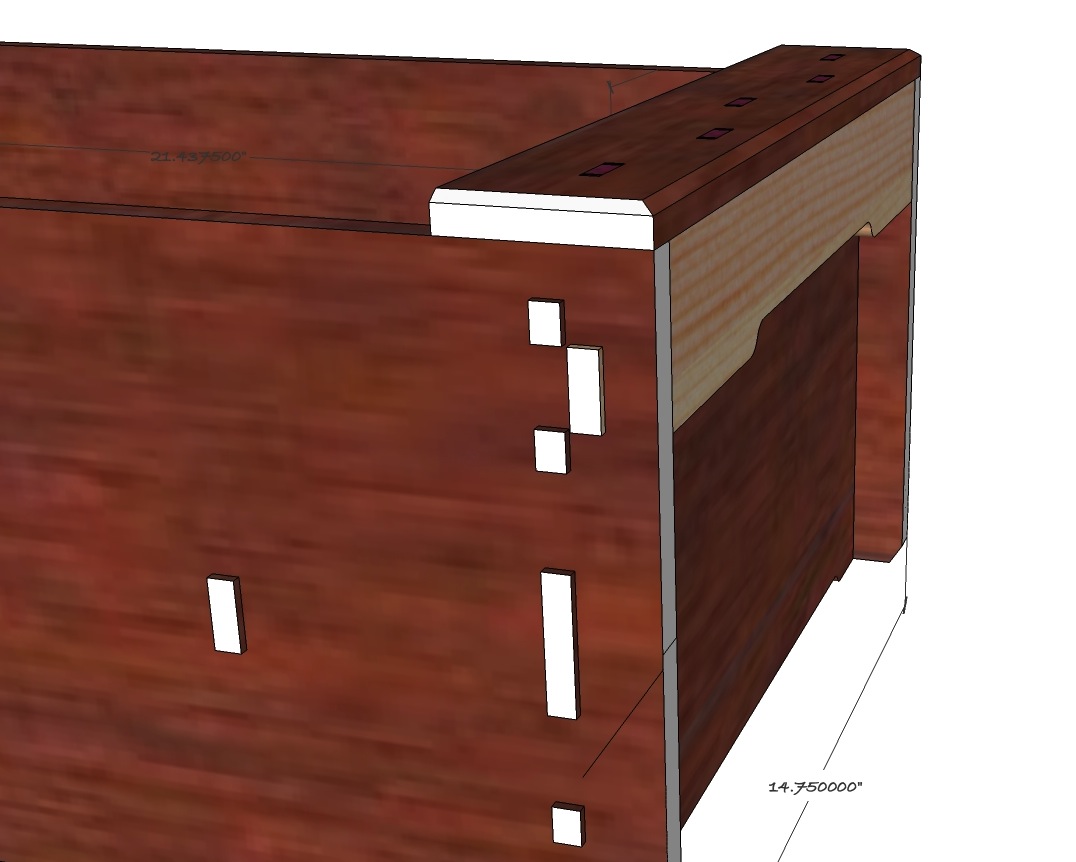
- 道具箱 box corner detail.jpg (106.83 KiB) Viewed 6623 times
Design is an interesting process and I appreciate the questions about 'why' it is the way it is since it gives me the opportunity to revisit the issue. In the case of the handle, I spent most of my attention trying to solve the attachment of the cap to the handle and end board, and other aspects of the design in that area did not receive as much consideration as they could have. I feel that with today's slight change, the connection looks tidier and the stopped tongue and groove retains greater strength in the end board.