Page 6 of 9
Re: Preliminaries - Milling
Posted: Sat Feb 18, 2012 2:37 pm
by Chris Hall
I imagine those woods will work fine Marv. One note of caution: it's not good practice to place boards end up in the dirt. You'd be amazed at how readily little bits of grit will find their way to your cutting blades. Make sure to slice off the last inch or so of those board ends before you get into much milling.
With soft woods your chisels need to be nice and sharp...
Re: Preliminaries - Milling
Posted: Sat Feb 18, 2012 4:58 pm
by Koot
Chris Hall wrote: Make sure to slice off the last inch or so of those board ends before you get into much milling.
Oh, for sure Chris. The board ends will be cut off first, using a hand saw. That way I can make sure I'm clear of any end checking before I measure and hand saw to rough working lengths. From then on it will be hand and power tools.
Marv
Re: Preliminaries - Milling
Posted: Sat Feb 18, 2012 5:17 pm
by Chris Hall
I'm interested to see what develops...
Re: Preliminaries - Milling
Posted: Mon Feb 20, 2012 1:20 am
by Dan McC
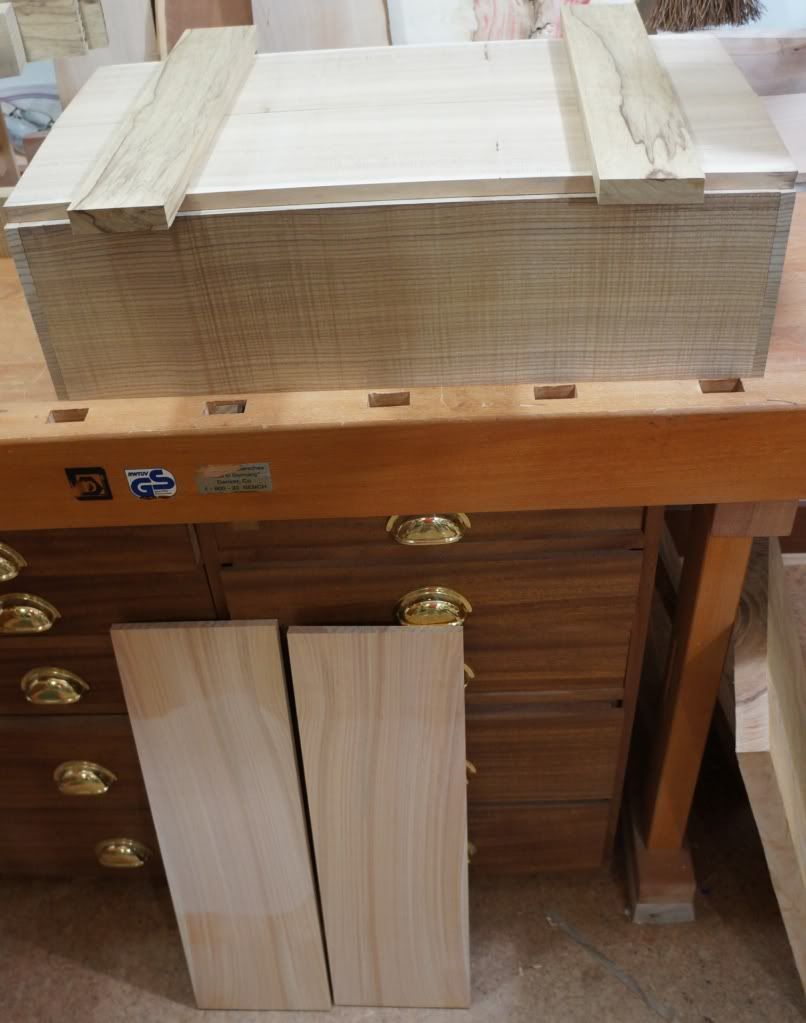
Dan McC wrote:OK, got everything milled up oversize. Will give it a few days to settle then take it down closer to final dimensions. Did notice a bit more warping off the saw than I would have liked, so I still have a bit of work ahead of me to take everything back to flat. Had enough material to make a few spare pieces "just in case".
Body is catalpa, top elm, bottom Monterey cypress, battens black limba.
Made some modest progress on the milling over the weekend. Unfortunately there was a bit more post-resawing cupping, internal checking, and hidden knots in my stock from the initial milling than I had planned for. So I wound up having to trim the size of my box down a bit, it's going to be more like 24 3/4" long x 13 1/2" wide by 7" tall.
Also ended up with the sides and ends being .475" thick rather than a full .500".
Still need to finishing final milling of the bottom and battens/caps. You can see the cupping on the left piece of Montery cypress that I will be using for the bottom, I partially jointed it before snapping this photo.
The elm top is washed out in the following photo. I am happy with the colour match between the elm top, catalpa sides and black limba battens, I was afraid it would be an ugly hodge-podge, kind of like a polka dot shirt with striped pants, but I think it is going to work fine.
With any luck I will be able to get the top and bottom glued up this week.
Re: Preliminaries - Milling
Posted: Mon Feb 20, 2012 6:33 am
by dom
I've been trying to work out the scale of my box, I more familiar with the metric system, so didn't realize your tool box is quite big.
I've already got one that's long and narrow, so I want to make a shorter deeper one. I'm planning to store planes on the bottom, and leave enough room for internal tray which I may or may not build. the dimensions are about 11 inches wide (2 planes are that length, maybe a standard?) 18 long and about 7.5 high. looks like this next to the sketchup guy, and holds planes like inside the cardboard box:
Re: Preliminaries - Milling
Posted: Mon Feb 20, 2012 10:03 am
by Chris Hall
Good work - coming along nicely.
Re: Preliminaries - Milling
Posted: Tue Feb 21, 2012 5:42 pm
by Chris Hall
Another small step along with the floor panel today. I mark out the width of the panel using the end boards as a checking gauge. The width of the floor boar is equal to the inside narrow dimension of the toolbox plus the amount of tongue on each side of the floor panel. in this case, since my floor panel is vertical grain, i don't expect a whole lot of movement, so with a 1/4" (6.35mm) dado on the long sides of the box, I allow for a tongue which is 3/16" long (about 5mm). The inside of my box measures 13.75"; add 0.1875" to each side makes for a floor board which is 14.125" wide. Not only do I establish this mathematically, but I check the result against the end board's floor panel dado to make sure everything makes sense:

- DSC04885-small.JPG (130.62 KiB) Viewed 9787 times
A closer look:
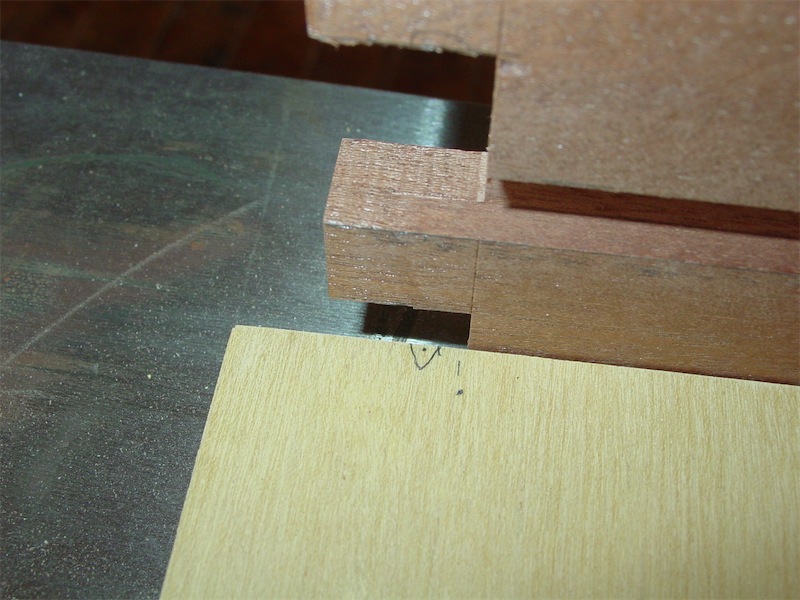
- DSC04886-small.JPG (138.6 KiB) Viewed 9787 times
The little triangle on the floorboard marks the place to cut.
You can see I have about 7/8" of wood to remove off the edge of the board. This I did on the table saw (not shown). With a hand saw, you would mark the entire cut line and then rip the board just fat of the line and dress it to the line with a plane.
Re: Preliminaries - Milling
Posted: Fri Feb 24, 2012 3:28 am
by timoore
We've cut most of our boards roughly to length and will finish that up tonight. We'll let them sit for a week while we do some vacation travel.
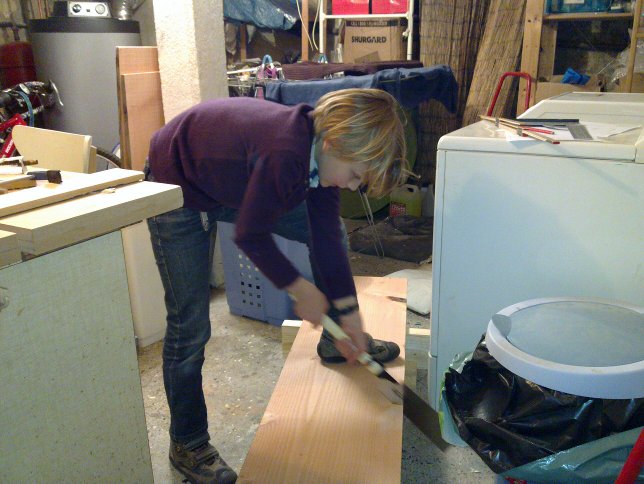
- isaac-saw.jpg (71.59 KiB) Viewed 9775 times
Everyone wants to help:
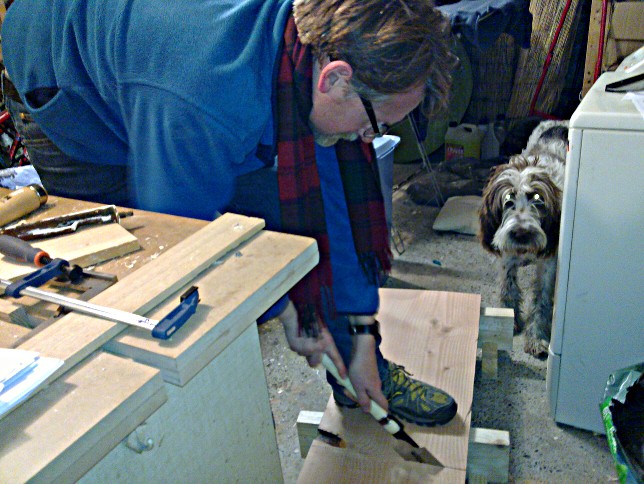
- help.jpg (109.82 KiB) Viewed 9775 times
Re: Preliminaries - Milling
Posted: Fri Feb 24, 2012 3:48 am
by Chris Hall
Looks like 'the supervisor' is keeping a close eye on you both. Good work!
Re: Approaching the finish
Posted: Sat Mar 31, 2012 7:06 pm
by Paul Atzenweiler
While you are approaching the "finish", I am finally able to approach the beginning. I am using oak salvaged from a horse stable that was being demolished. Normally I don't care to use oak as during milling it tends to smell like sour cow manure, but it can look very nice and is durable. I am going for a "sophisticated rustic" look but will not be surprised if that turns into a dismall failure.