Looks good Jack,
Would you mind expanding a bit on your method for hand cutting the stopped dadoes?
Regards
Derek
Getting rolling - dadoes, mortises and tenons
Post
Here are photos and a brief overview. You will have to excuse some of the images as they are blurred since this was hand held and I didn't go in and get my bench top tripod. I will next time but I think you will get the idea. The layout is for a 1/2" dado that I knifed around quiet deep and just undersized so that the initial mortising cuts will not break out on top but will form a perimeter for the hand router to follow. You will see in the continued post how I establish size on this sample dado. I used a 12mm chisel to make one run across. I am using a 9mm chisel just to show by alternating side to side how a smaller chisel can be used. I started and stopped approx. 1/8" from the end.
The spacing is approximately 1/8" by eye.
Using a smaller chisel bevel down the first row of waste can be popped out.
Then using a small router plane, I loosened the clamp knob and let the cutter dig in then tightening the the clamp I made the first pass.
I set the cutter for a very aggressive cut and by making several offsetting passes at that level I roughed past the chisel marks.
Five attachments are all that is allowed here so this will be continued in next post ...............
Re: Getting rolling - dadoes, mortises and tenons
Derek,Yxoc wrote:Looks good Jack,
Would you mind expanding a bit on your method for hand cutting the stopped dadoes?
Regards
Derek
Here are photos and a brief overview. You will have to excuse some of the images as they are blurred since this was hand held and I didn't go in and get my bench top tripod. I will next time but I think you will get the idea. The layout is for a 1/2" dado that I knifed around quiet deep and just undersized so that the initial mortising cuts will not break out on top but will form a perimeter for the hand router to follow. You will see in the continued post how I establish size on this sample dado. I used a 12mm chisel to make one run across. I am using a 9mm chisel just to show by alternating side to side how a smaller chisel can be used. I started and stopped approx. 1/8" from the end.
- DSC01759.JPG (325.76 KiB) Viewed 13790 times
- DSC01760.JPG (369.57 KiB) Viewed 13790 times
- DSC01762.JPG (305.85 KiB) Viewed 13790 times
- DSC01763.JPG (346.7 KiB) Viewed 13790 times
- DSC01768.JPG (331.33 KiB) Viewed 13790 times
Post
Continuing on from previous post. Cutting dadoes using hand tools.
The nest cuts are quiet aggressive, taking cuts of about 1/32".
Down to within about 1/32" or .030".
The I pared the ends to approx. 1/32" to 1/64".
I did this so the floor would be clean.
Then took the dado to final depth taking finer cuts ( .002" to .005" approx.).
Continued an next post................
Re: Getting rolling - dadoes, mortises and tenons
Derek,Yxoc wrote:Looks good Jack,
Would you mind expanding a bit on your method for hand cutting the stopped dadoes?
Regards
Derek
Continuing on from previous post. Cutting dadoes using hand tools.
The nest cuts are quiet aggressive, taking cuts of about 1/32".
- DSC01771.JPG (280.95 KiB) Viewed 13787 times
- DSC01773.JPG (306.6 KiB) Viewed 13787 times
- DSC01774.JPG (247.32 KiB) Viewed 13787 times
- DSC01777.JPG (290.42 KiB) Viewed 13787 times
- DSC01780.JPG (358.4 KiB) Viewed 13787 times
Post
This should finish up this series of one of my methods to cut dadoes using hand tools which I just devised out of necessity for this project and using tools that I have. Using a 1x2x12 parallel set flush with the front edge establishes the dado 1" from edge.
End is final trimmed.
Other end is final trimmed.
Back parallel is set off front parallel using 1/4x1/2x6 parallel, establishing 1/2" width dado.
And the 1/4x1/2x6 parallel a tight fit in the dado. The finish depth is 3/16". Length is whatever is needed.
Regards,
Jack
Re: Getting rolling - dadoes, mortises and tenons
Derek,Yxoc wrote:Looks good Jack,
Would you mind expanding a bit on your method for hand cutting the stopped dadoes?
Regards
Derek
This should finish up this series of one of my methods to cut dadoes using hand tools which I just devised out of necessity for this project and using tools that I have. Using a 1x2x12 parallel set flush with the front edge establishes the dado 1" from edge.
- DSC01782.JPG (251.86 KiB) Viewed 13786 times
- DSC01781.JPG (253.08 KiB) Viewed 13786 times
- DSC01785.JPG (282.4 KiB) Viewed 13786 times
- DSC01786.JPG (267.77 KiB) Viewed 13786 times
- DSC01790.JPG (275.84 KiB) Viewed 13786 times
Jack
-
Chris Hall

- Site Admin
- Contact:
- Location: Greenfield, Massachusetts
- djwong
- Deshi
- Location: Cupertino, CA
Post
Re: Getting rolling - dadoes, mortises and tenons
Really informative sequence of photos Jack. Thanks for taking the time to post them. Here's a counterpoint of what not to do...
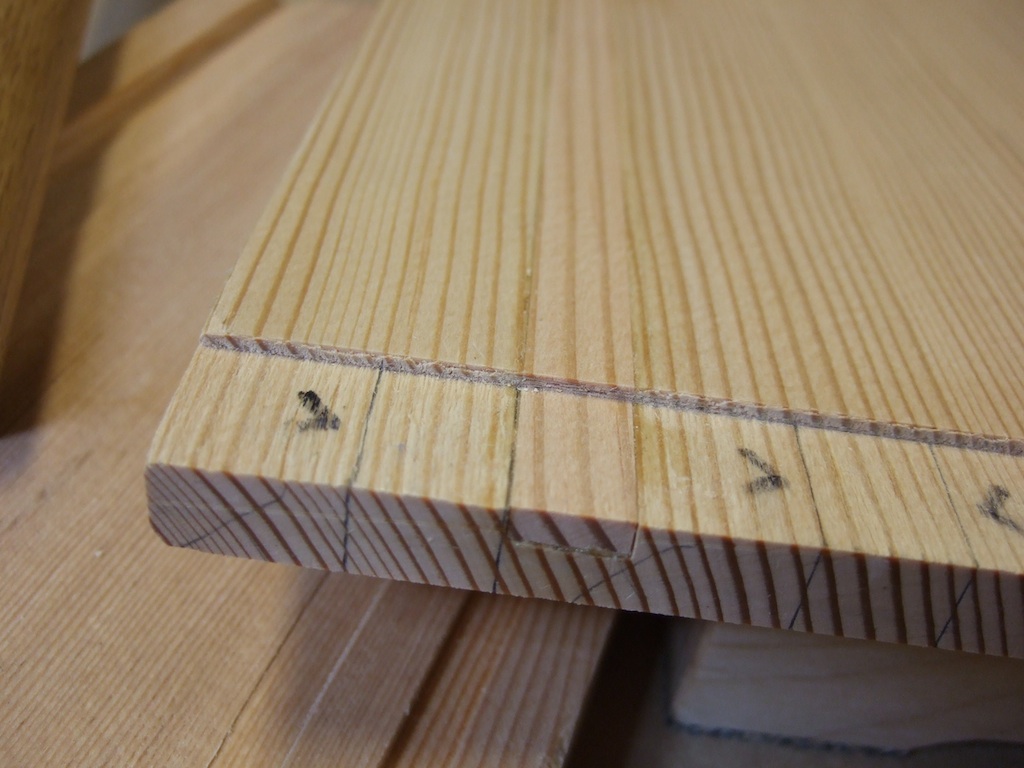
I finished my layout yesterday, and started by cutting the tenon shoulders in the end walls. I experimented on some scrap with cutting the shoulder withe a rabbit plane after sawing the tenons, but I was getting too much blowout on the ends of the tenons in the douglas fir.
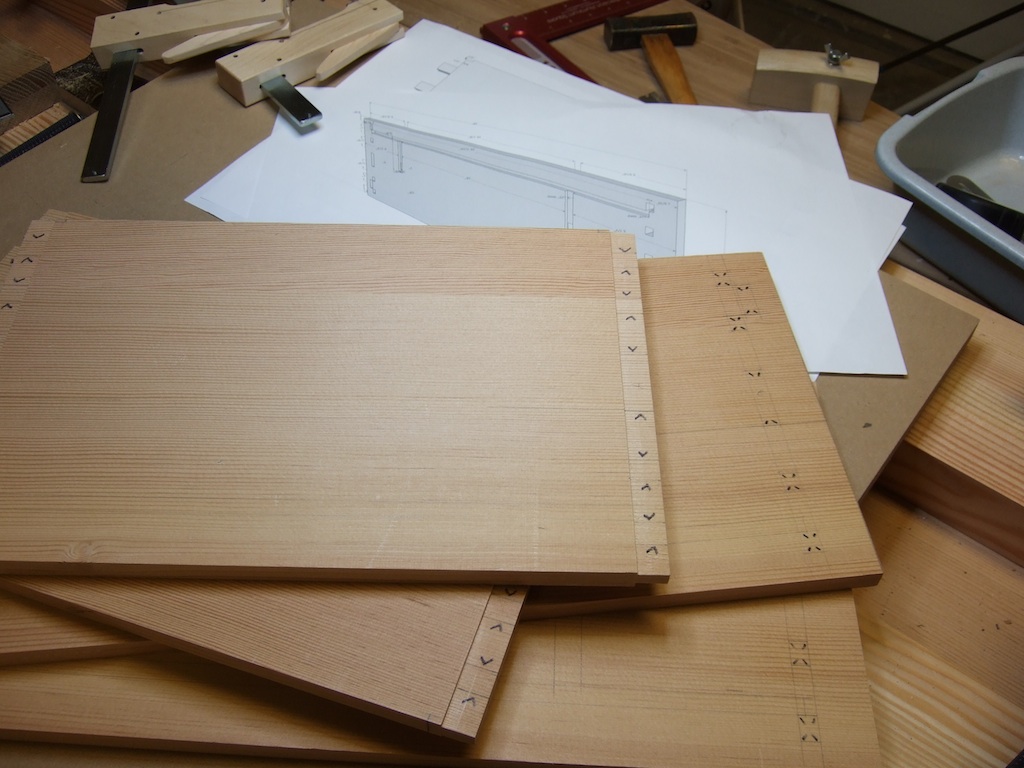
Next I cut the though dados for the floor board with my 1/4" plow plane. My plan was to cut the 1/4" dado to depth, and widen the sides with a chisel. I set a guide fence, knifed a line, and started paring. The side walls sort of turned into a splintery mess.

Frustrated, I let the fence slip and cut the dado too wide. Instead of tossing the piece, I decided to patch it, since it was not structural and would not show in the finished piece. I cleaned up the dado mess with a router and glued a patch. I did not use the router to cut the original dado because I frankly lack confidence in handling the router.
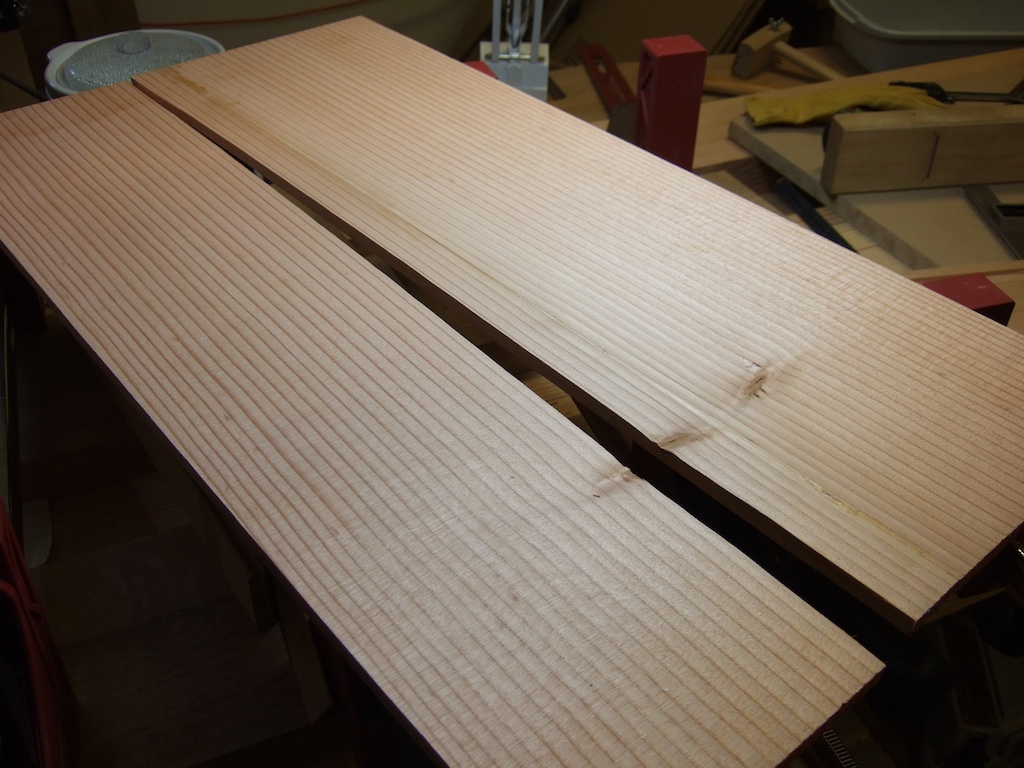
As long as I had the glue out, I finished gluing up the floor board. There must have been a hidden fracture, because it broke apart in the clamps sometime later - not along the glue line.
So I am back to cutting dados and preparing new floor board stock.
I finished my layout yesterday, and started by cutting the tenon shoulders in the end walls. I experimented on some scrap with cutting the shoulder withe a rabbit plane after sawing the tenons, but I was getting too much blowout on the ends of the tenons in the douglas fir.
Next I cut the though dados for the floor board with my 1/4" plow plane. My plan was to cut the 1/4" dado to depth, and widen the sides with a chisel. I set a guide fence, knifed a line, and started paring. The side walls sort of turned into a splintery mess.
Frustrated, I let the fence slip and cut the dado too wide. Instead of tossing the piece, I decided to patch it, since it was not structural and would not show in the finished piece. I cleaned up the dado mess with a router and glued a patch. I did not use the router to cut the original dado because I frankly lack confidence in handling the router.
As long as I had the glue out, I finished gluing up the floor board. There must have been a hidden fracture, because it broke apart in the clamps sometime later - not along the glue line.
So I am back to cutting dados and preparing new floor board stock.
-
Chris Hall
- Site Admin
- Contact:
- Location: Greenfield, Massachusetts
Post
Re: Getting rolling - dadoes, mortises and tenons
Djwong,
looks like you're having some adventures in cut out land. Doug Fir can be tricky due to the pronounced differences in density between the early wood and the late wood. You fitted a cleanly matched patch into place - well done!
Could you re-glue that board along its split? That would save making up new boards.
Are you planning to tackle the dado cut out a little differently for round 2?
For dealing with blowout on the end of a stick, you can try clamping a sacrificial block on the end that you cut through with the plane.
- djwong
- Deshi
- Location: Cupertino, CA
Post
-David
Re: Getting rolling - dadoes, mortises and tenons
I actually have a second set of partially milled components set aside for almost every piece in the toolbox. I figured somewhere along the way, I would screw something up. I did not think it would be the floor board, so I will have to resaw new boards from a slab I have. I use a bandsaw and a jointer/planer, so it should not cost much time. The one thing I will do differently is to leave it a little thicker when I glue it up.Chris Hall wrote:Could you re-glue that board along its split? That would save making up new boards.
Yes. I think I will use a powered router for all the dado's. I am not opposed to going out and getting a new plow or router plane, but one of the lessons I wanted out of these projects, was to learn to use my existing tools better. The router is one of those tools that can really do some damage to your workpiece in a blink of the eye. That's why I have always been reluctant to use it.Are you planning to tackle the dado cut out a little differently for round 2?
-David
-
timooreti
Post 
Re the "splintery mess," in my own limited experience I've found that a super-sharp chisel helps that problem a lot.
Progress: I've started milling the boards to size. The first one -- a long side of the big box -- is taking a long time due to somewhat limited late-night sessions and a steep learning curve, but I'm getting there. The next ones should take less time. It's very satisfying to use a big old wood jointer plane!
Re: Getting rolling - dadoes, mortises and tenons
I'm glad to see that someone else is using "douglas," though your stock looks nicer than mine. I was starting to get serious wood envy, what with all the exotic species people are usingdjwong wrote: I finished my layout yesterday, and started by cutting the tenon shoulders in the end walls. I experimented on some scrap with cutting the shoulder withe a rabbit plane after sawing the tenons, but I was getting too much blowout on the ends of the tenons in the douglas fir.
...
Next I cut the though dados for the floor board with my 1/4" plow plane. My plan was to cut the 1/4" dado to depth, and widen the sides with a chisel. I set a guide fence, knifed a line, and started paring. The side walls sort of turned into a splintery mess.
...
As long as I had the glue out, I finished gluing up the floor board. There must have been a hidden fracture, because it broke apart in the clamps sometime later - not along the glue line.
So I am back to cutting dados and preparing new floor board stock.
Re the "splintery mess," in my own limited experience I've found that a super-sharp chisel helps that problem a lot.
Progress: I've started milling the boards to size. The first one -- a long side of the big box -- is taking a long time due to somewhat limited late-night sessions and a steep learning curve, but I'm getting there. The next ones should take less time. It's very satisfying to use a big old wood jointer plane!
-
Yxoc

- 5
 alt.jpg "5")
Post
Re: Getting rolling - dadoes, mortises and tenons
Jack - Thankyou, that was a comprehensive explanation and well illustrated. I had imagined them being done by knifing the lines and then working to depth with the router plane but wasting out with the chisel first is much more efficient.
regards
Derek
regards
Derek
Return to “Project 1: The Tool Box”
Who is online
Users browsing this forum: No registered users and 1 guest