Page 1 of 1

Re: Input please

Posted: Wed Apr 11, 2012 11:35 pm
by charlie
Chris,
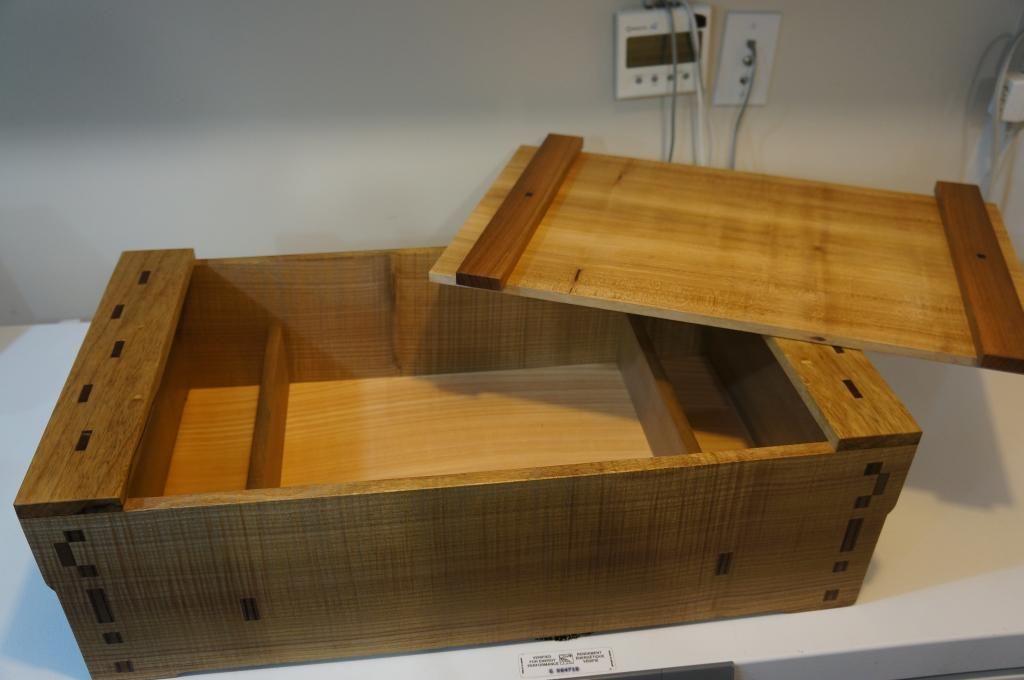
Here's my walnut toolbox:
IMG_2.JPG
IMG_2.JPG (859.27 KiB) Viewed 9995 times
I eliminated the interior partitions to allow room for long saws I want to put in the bottom. (Yes, the top of the sides are slightly curving inward already.)
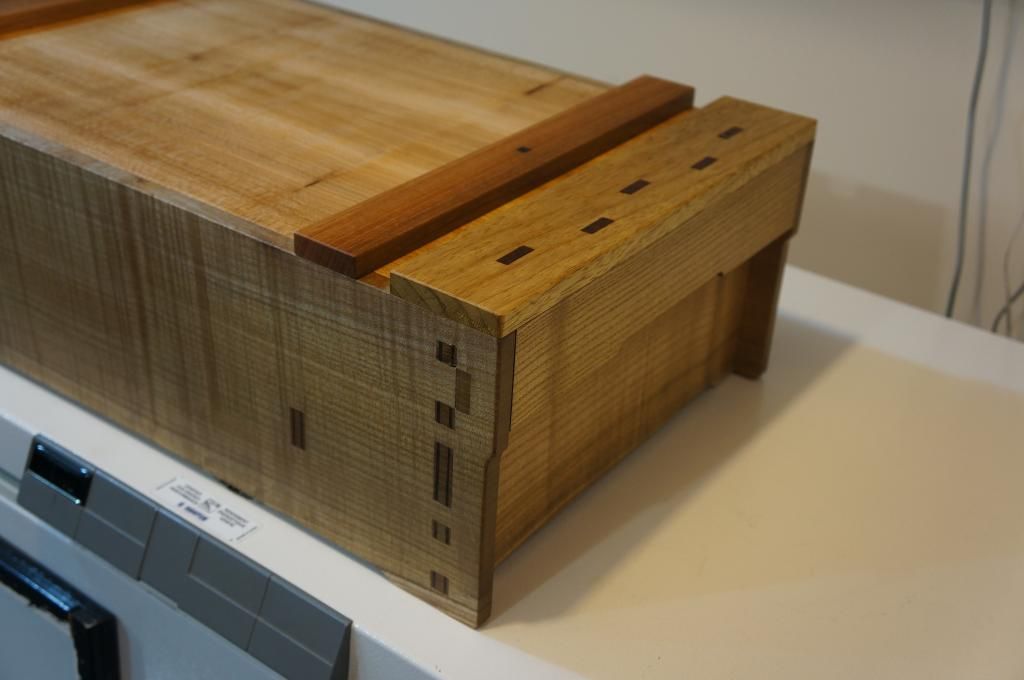
For fear of wedges I glued the through tenons to the sides.
For fear of hell tenons I glued 8/10ths of the cherry keys on the bottom, but wedged the tops. I did do the two center tenons in the hellacious manner, and it worked well. I signified these by using ebony wedges, instead of walnut, which I used on the others.
I put an application of walnut oil on it and probably will leave it at that.

I didn't have stock wide enough to do the handle the way you did it, so I laminated some thinner pieces.
Here's a sketch:
IMG_3.JPG
IMG_3.JPG (401.54 KiB) Viewed 9995 times
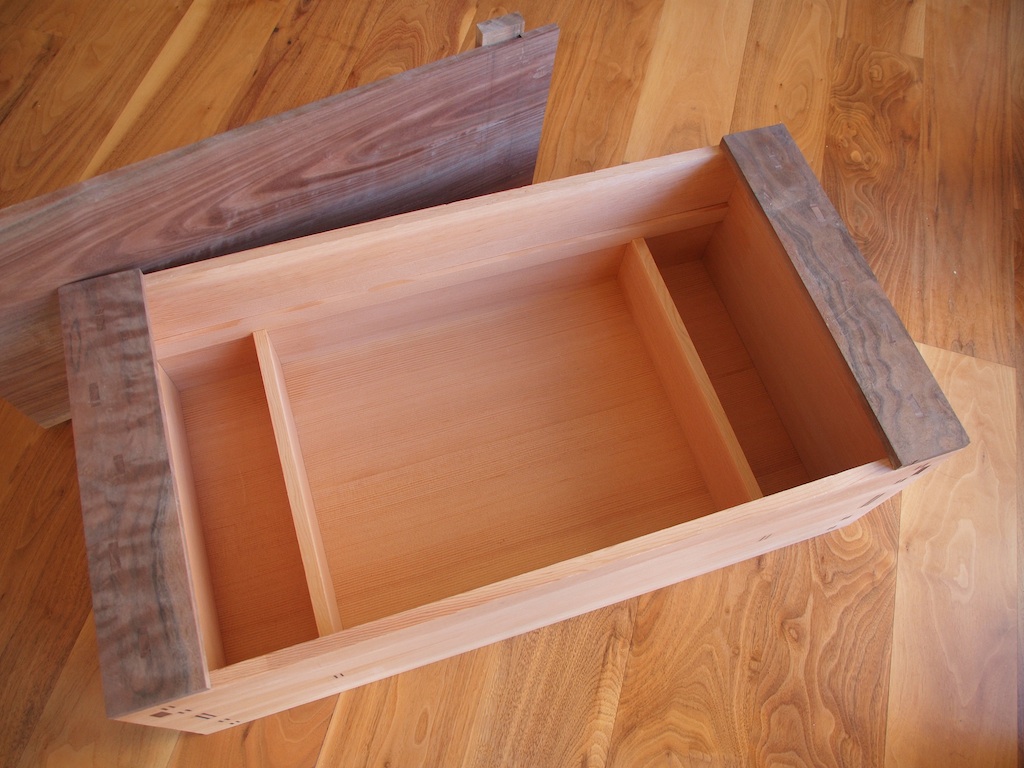
And here are the parts:
IMG_4.JPG
IMG_4.JPG (689.06 KiB) Viewed 9995 times
A little bit of carving on the top:
IMG_5.JPG
IMG_5.JPG (488.16 KiB) Viewed 9995 times
I screwed rails to the side and dropped the ends of the tray 1/4" below it's sides to hold it in place and used what I have been told is a katagi sakuri kanna for the sliding dovetail:
IMG_6.JPG
IMG_6.JPG (396.31 KiB) Viewed 9995 times
After initial planing to rough thickness, no machines were used in the making of this toolbox.

With apologies for the photo quality.

Re: Input please

Posted: Thu Apr 12, 2012 4:26 am
by djwong
That's a nice looking toolbox. Congratulations!

Re: Input please

Posted: Thu Apr 12, 2012 8:00 am
by Chris Hall
Charlie - outstanding work!! I was really pleased to see your finished piece and think it came out really well. Clean execution and I'm sure your work will inspire other members here.

At some point i would like to post pictures on the Carpentry Way blog of study group members with their finished pieces, so if you would consider having a friend or family member snap a pic of you with your toolbox, I would appreciate it. And if you would prefer to remain anonymous, that's fine - if there is a picture of the toolbox you would be okay with me using, please let me know.

~C

Gallery of Finished Work

Posted: Thu Apr 12, 2012 8:02 am
by Chris Hall
Here's the place to post up pics of your completed toolbox.

Re: Gallery of Finished Work

Posted: Sun Nov 11, 2012 6:24 pm
by Dan McC
OK, here is my finally completed toolbox. The body is catalpa, the bottom is Monterey cypress, and the lid is elm. The outside has a couple coats of Tried and True on it, the inside is shellac. The pins that hold the battens to the lid are ebony. I have not done any trays, I will leave that to 'the future'.

Image

Image

Image

Some of you may recall that during the build I had an oops on one bottom corner. I patched it up, and with the passing of a bit of time to darken the patch and the oil finish, it is not bad.

Image

I learned a tremendous amount from the project, thank you Chris!! Looking forward to the next one!

Dan

Re: Gallery of Finished Work

Posted: Sun Nov 11, 2012 6:41 pm
by Chris Hall
Dan,

excellent work - really turned out well!! I'm glad you're getting a lot out of this and can't wait to see what comes next!

~C

Re: Gallery of Finished Work

Posted: Mon Jan 07, 2013 4:51 pm
by djwong
On the 1 year anniversary month of my joining the study group, I am finally prodded to posting some photos of my toolbox. I do not consider the toolbox finished, as it is still missing tool trays, final surface preparation (lots of tear out), and an oil finish on the walnut.

My toolbox measures 28" x 14-1/2" x 10". The body is douglas fir and the top and handles are claro walnut. The toolbox turned out so much better than I could have hoped in the beginning. After being in its current state for the past 6 months, I am happy to report that everything is still straight, true, and tight. The top attaches securely with any binding.

Image
Image
Image
Image

Re: Gallery of Finished Work

Posted: Mon Jan 07, 2013 6:46 pm
by Chris Hall
That's beautiful! Very nice work David.